Amazon Elastic Container Service (Amazon ECS) is a fully managed orchestration platform designed to simplify the deployment, management, and scaling of containerized applications. Seamlessly integrated with the AWS ecosystem, it offers a user-friendly solution for running container workloads both in the cloud and on-premises, with robust security features enabled through Amazon ECS Anywhere.
ECS allows developers and administrators to easily deploy, scale, and monitor applications while automating resource optimization and task management.
In this guide, I walk you through the step-by-step process of deploying containers using ECS and highlights its key features that make it an excellent choice for container orchestration.
Before jumping on this lab, we need some requirements.
Prerequisites
An AWS account
Knowledge of Docker.
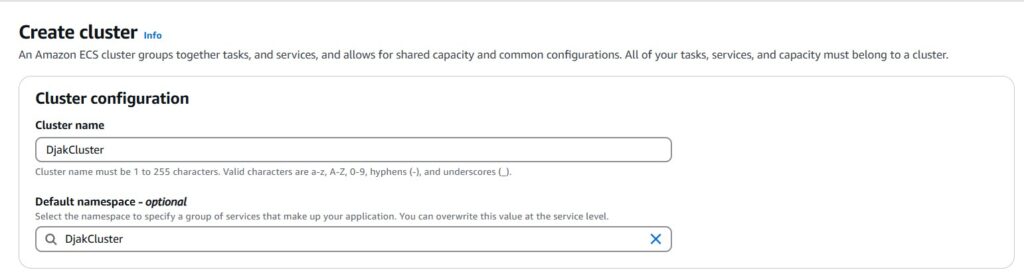
Step 1: Create an ECS Cluster
Navigate to the ECS dashboard and click Create Cluster.
Enter a Cluster Name under Cluster Configuration.
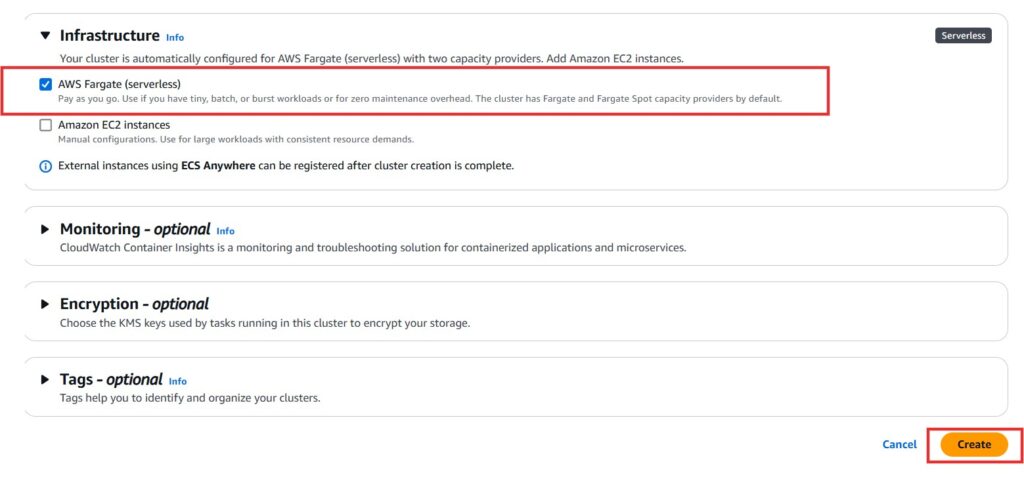
Select your infrastructure:
Choose AWS Fargate (serverless) for a managed experience.
Select Amazon EC2 if you prefer to manage your own instances.
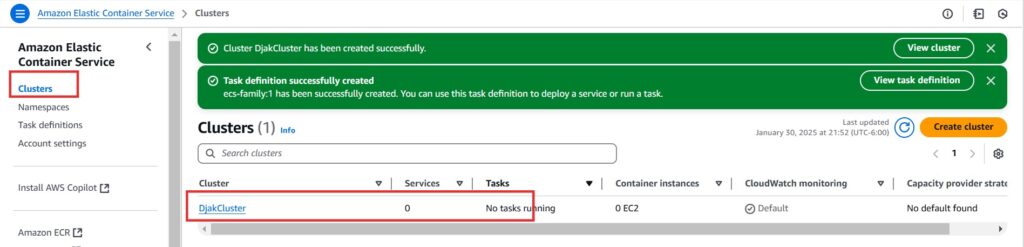
Scroll down and click Create.
Wait a few seconds for the cluster to be created.
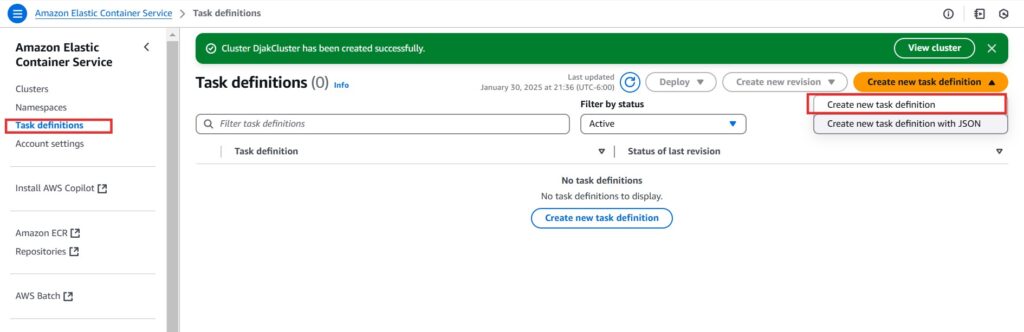
Step 2: Create a Task Definition
On the left navigation panel, select Task Definitions and click Create New Task Definition.
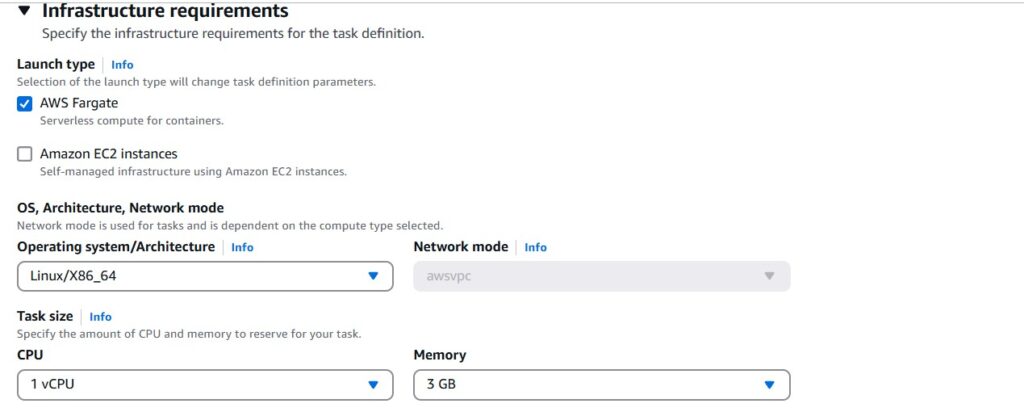
Provide a Family Name and choose the Launch Type as AWS Fargate.
Under Container Details:
Provide a container name.
Add the Repository URL (e.g., a DockerHub public image).
Set the Container Port to 5000 if your app uses this port.
Leave other settings as default and click Create.
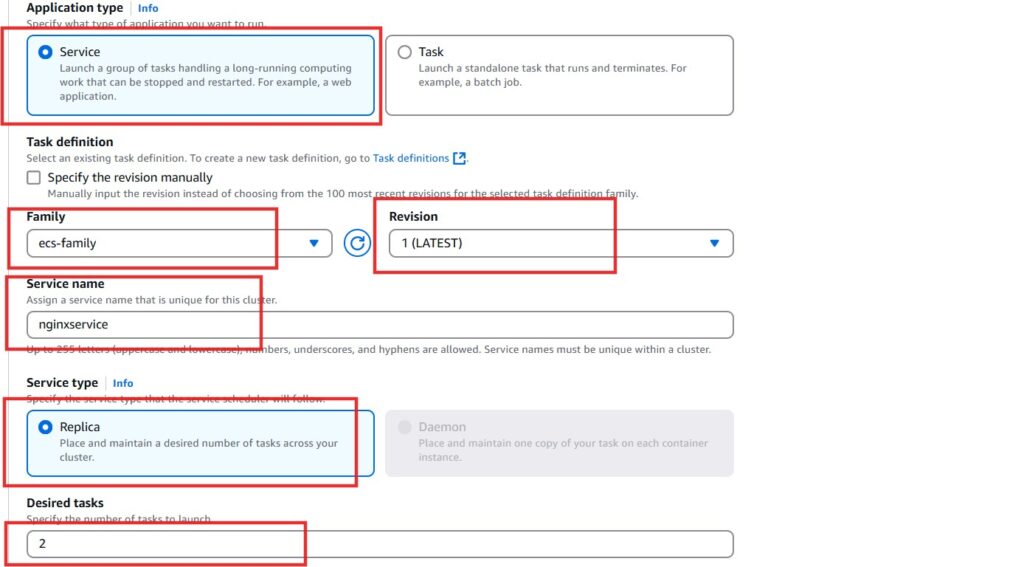
Step 3: Create a Service
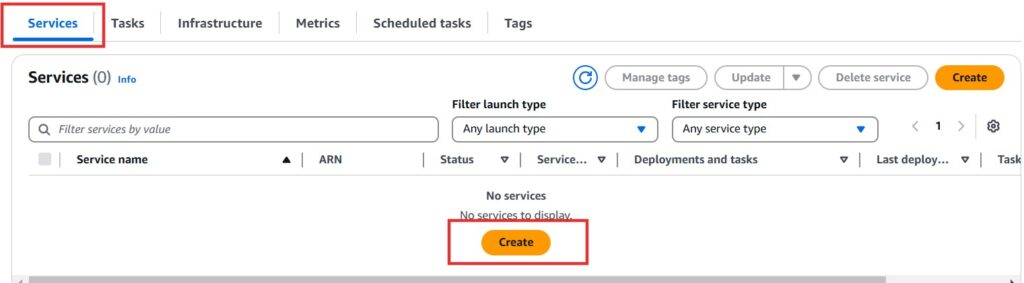
On the ECS console, click Clusters and select your created cluster.
Go to the Services tab and click Create.
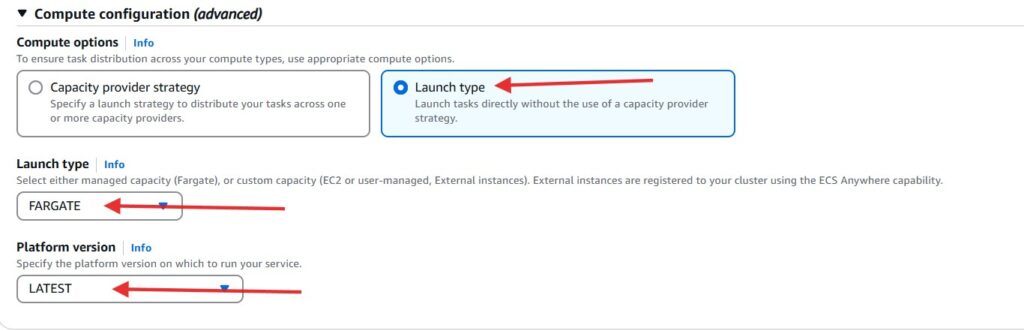
Use the following configurations:
Launch Type: Fargate
Platform Version: Latest
Application Type: Service
Task Definition: Select the task family created earlier
Provide a Service Name
Service Type: Replica
Desired Tasks: 2
Under Networking:
Create a new Security Group and allow TCP traffic on Port 5000.
Scroll down and click Create.
Wait for the service to deploy successfully.
Select the created service and go to the Tasks tab.
Click on a running task, copy its IP address, and access it in a browser by appending the port number.
Scroll down and click on Create
Give it some time for the service to deploy successfully
Select the service you created
Move to the Tasks tab and click on one of the running tasks
Copy the ip address and paste it on a browser. Add the port number to the ip address. The app loads on the browser
Congrats! You have successfully deploy a container in AWS ECS.
DO NOT FORGET TO CLEAN UP.
To delete the servive, select the service in the cluster console, then click on Delete service


Leave a Reply