If you have shopped online or bought something from an ecommerce website, you have used MySQL.
Background
MySQL is the world’s most popular open source relational database and Amazon RDS makes it easier to set up, operate, and scale MySQL deployments in the cloud.
Amazon RDS is a cloud-based managed database service that simplifies the setup, administration, and scaling of relational databases, including MySQL, without requiring you to manage the underlying infrastructure. RDS takes care of tasks like database installation, patching, backups, and automatic software updates. It offers high availability, scalability, and security features.
MySQL is a relational database management system (RDBMS) that is widely used for managing and storing structured data. It is a popular choice for web applications and other software systems that require a reliable and scalable database solution. MySQL can be installed on a server or a local machine, and you have full control over its configuration, maintenance, and backups.
Prerequisite
For this project, you need an AWS account. If you don’t have one already, set up a Free-Tier account.
Project Outline
In today’s tutorial, we’ll create a MySQL RDS single AZ database instance and connect it using MySQL WorkBench
Let’s Have Fun!
- Sign in to the AWS Management Console
Step 1: Create a VPC and DB subnet group
- Before creating our database we need a VPC and a DB subnet group.
- Go to VPC console and create a VPC that has at least two subnets in the AWS Region where you want to deploy your DB instance.
Cheat Sheet: If a VPC doesn’t have at least two subnets, you receive the following error message: “VPC must have a minimum of 2 subnets in order to create a DB Subnet Group. Go to the VPC Management Console to add subnets.”
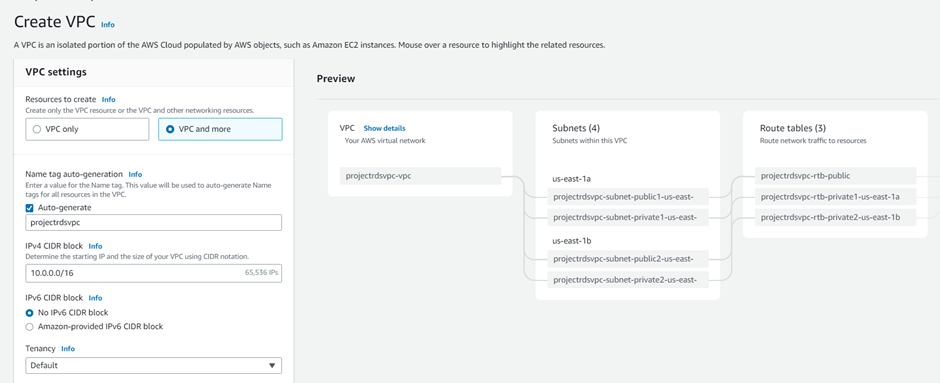
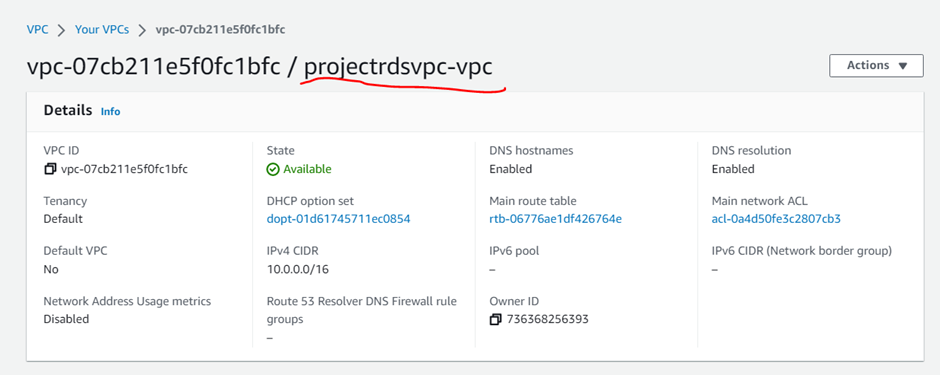
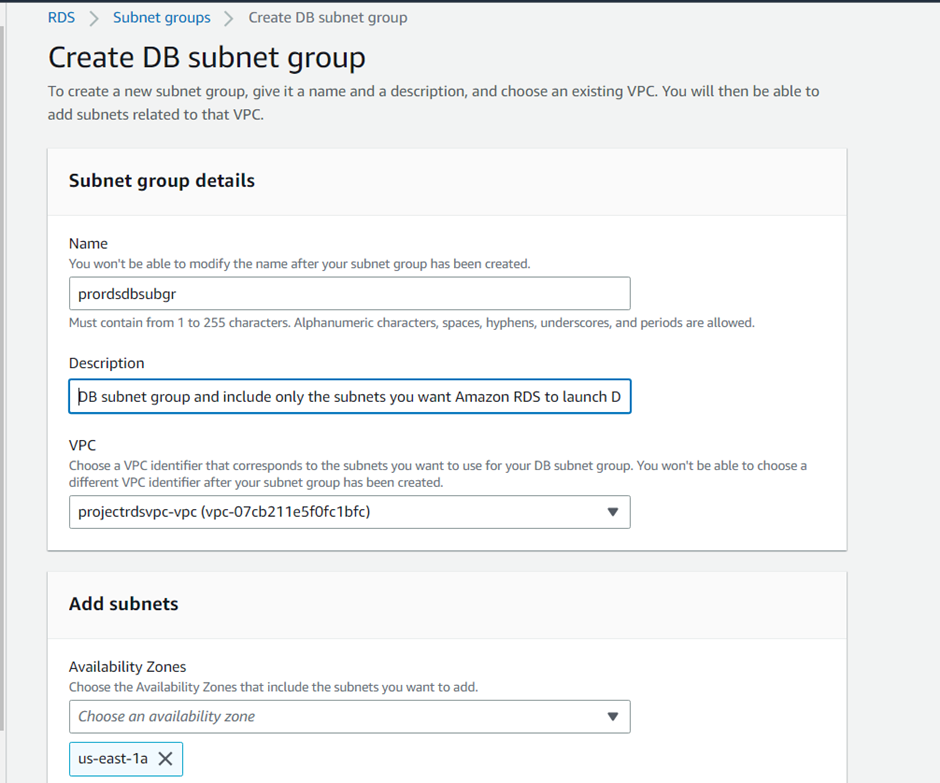
- Create a DB subnet group and include only the subnets you want RDS to launch DB instances into. If a DB subnet group isn’t created, then RDS creates a DB subnet group including all subnets for the VPC.
Cheat Sheet: Each DB subnet group must have subnets in at least two Availability Zones in an AWS Region. If your subnet group doesn’t include subnets from at least two Availability Zones, you receive following error message: “DB Subnet Group doesn’t meet availability zone coverage requirement. Please add subnets to cover at least 2 availability zones.”
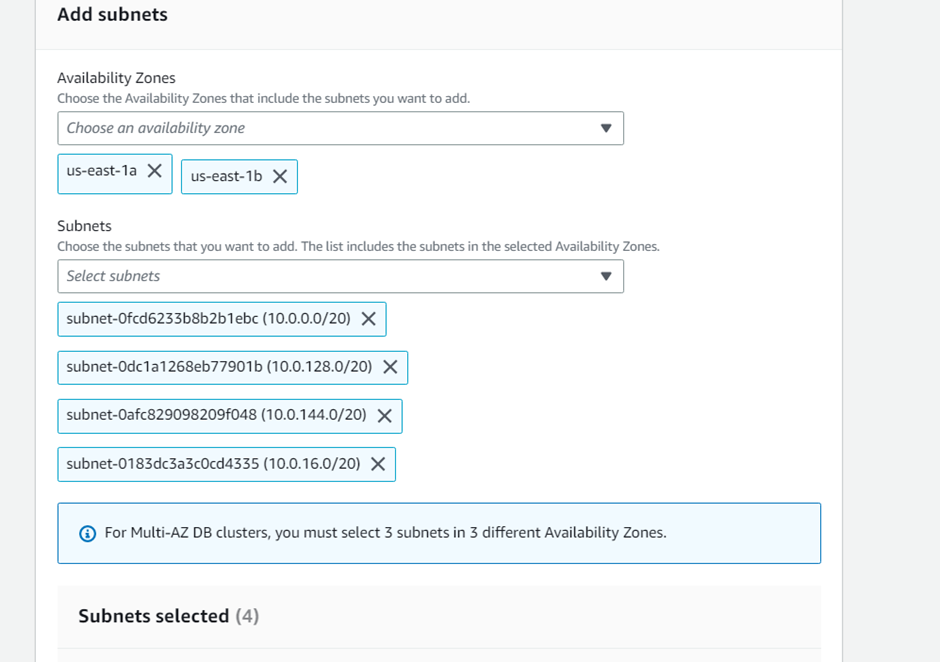

- Amazon VPC and the DB instance are set. It’s time to launch a RDS DB instance in a specific Amazon VPC.
Step 2: Create MySQL DB instance
- Now Open the Amazon RDS console.
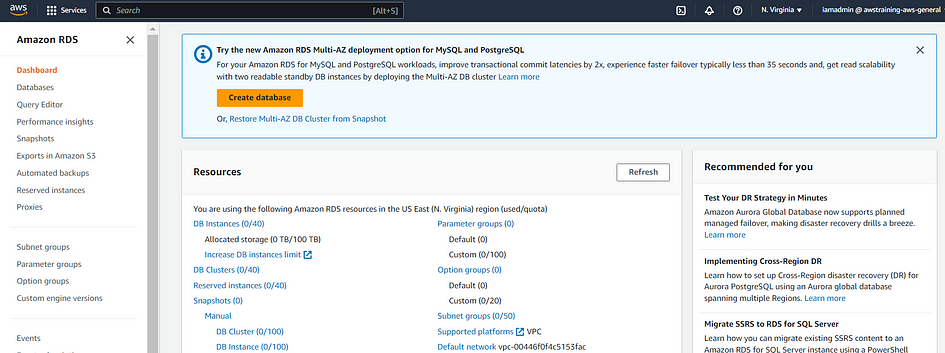
- Choose “Create database” to start creating a new RDS instance.
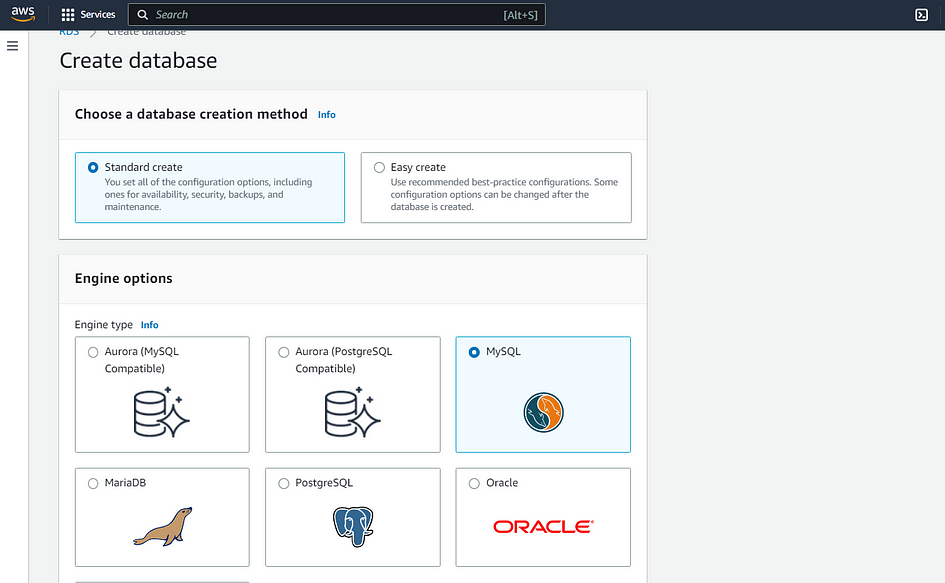
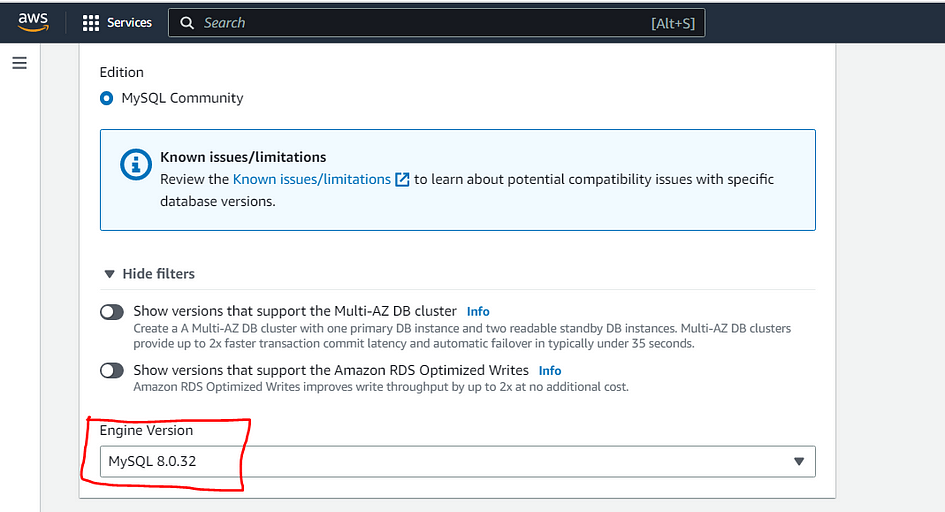
- In the “Engine options” section, select “MySQL” as the database engine.

- Leave the default value of version and edition for your requirements.
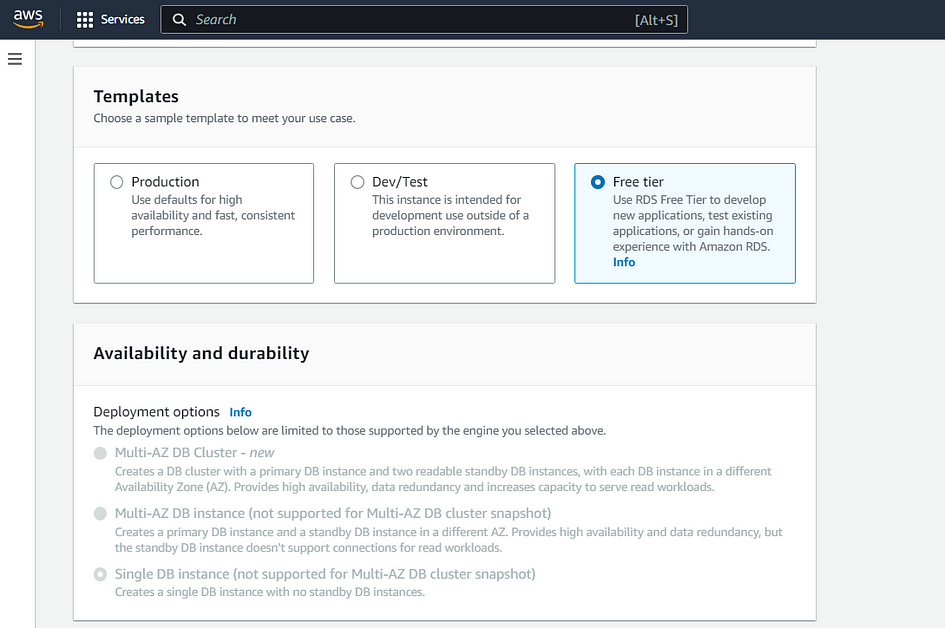
- Under the “Templates” section, select the Free Tier template configuration options.
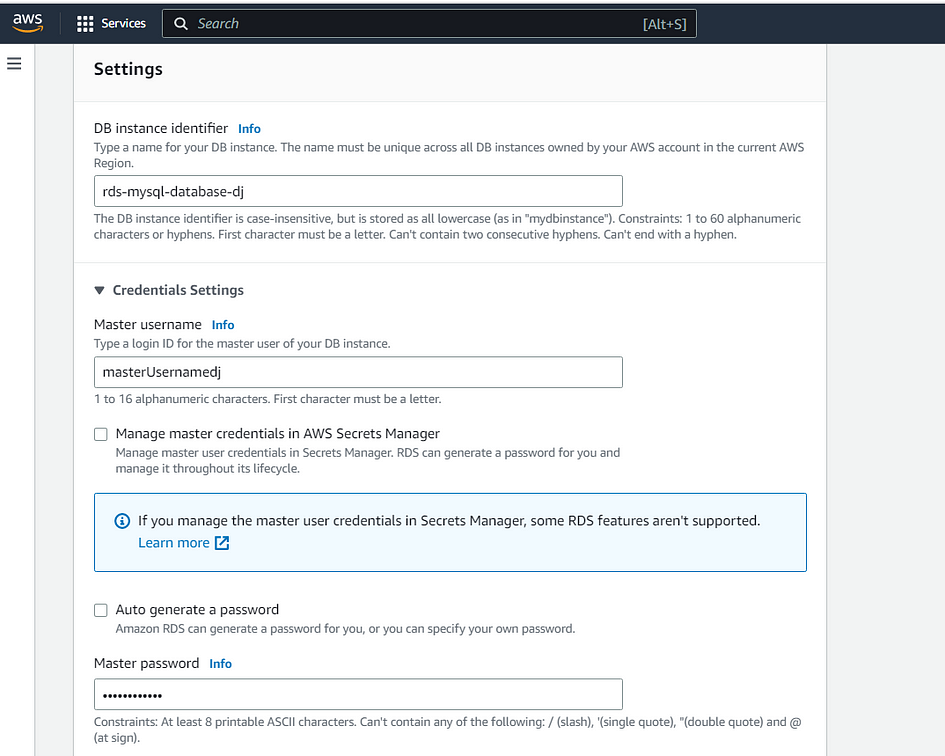
- In the “Settings” section, provide the following information for your DB instance:
=> DB instance identifier: Give a unique name to your database instance. I used “rds-mysql-database-dj”
=> Master username: Specify a username for the master user of the database. I chose “masterUsernamedj”
=> Master password: Set a secure password for the master user.
=> Confirm password: Re-enter the master password for confirmation.
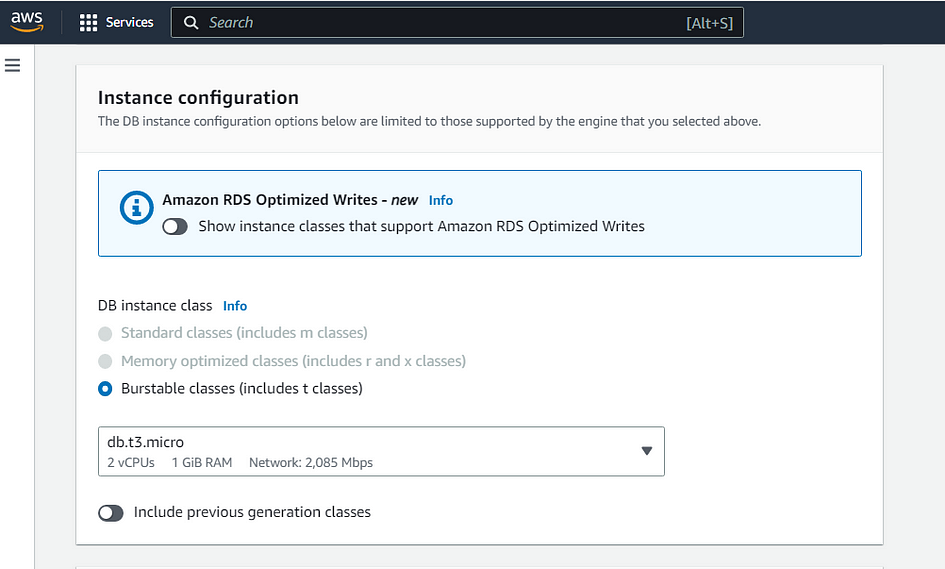
- Choose the appropriate instance type based on your workload needs. In my tutorial, I left all instance configuration by default.
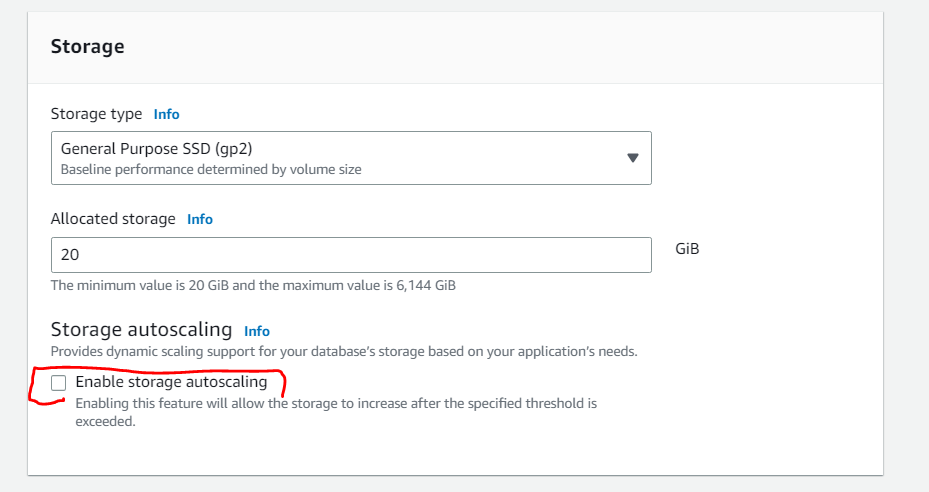
- Move to Storage configuration now. Leave all configuration by default, but uncheck “Enable storage autoscaling”.
Cheat Sheet: Enabling storage autoscaling is the right thing to do if your workload is cyclical or unpredictable, to automatically scale up your storage when needed. This option does not apply to this tutorial.
Multi-AZ deployment: Note that you will have to pay for Multi-AZ deployment. Using a Multi-AZ deployment will automatically provision and maintain a synchronous standby replica in a different Availability Zone. For more information, see High Availability Deployment.
- Scroll down and find the “Connectivity” section:
=> Check “don’t connect to an EC2 compute resource”.
=> Select The VPC and DB subnet group you created at the beginning of this lab.
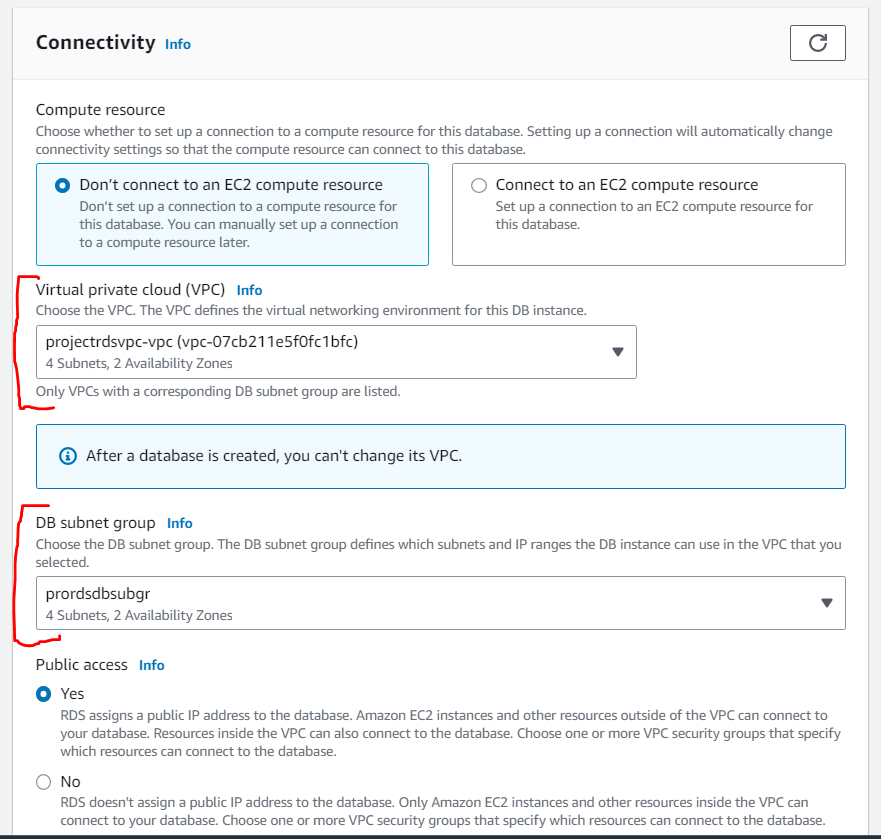
=> Choose “Yes” and it will allocate an IP address for your database instance so that you can directly connect to the database from your own device. Choose “No” for the “Publicly accessible” option if you want to restrict access to the database instance.
=> Set the VPC, subnet group, and availability zone.
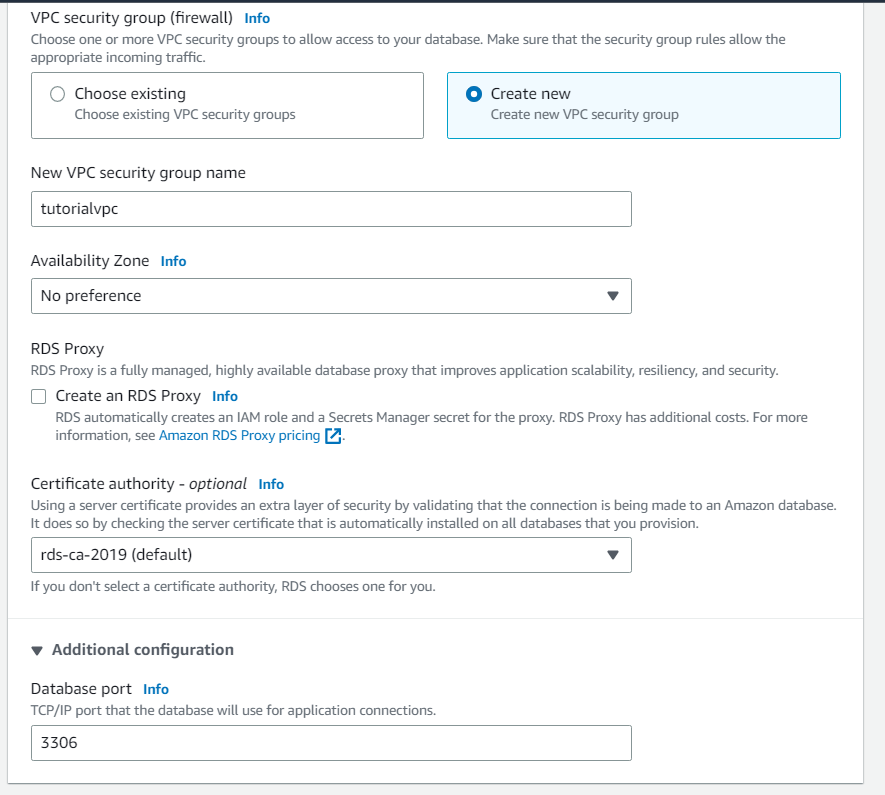
- VPC security groups: Select Create new VPC security group. This will create a security group that will allow connection from the IP address of the device that you are currently using to the database created.
- Availability Zone: Choose No preference.
- RDS Proxy: By using Amazon RDS Proxy, you can allow your applications to pool and share database connections to improve their ability to scale. Leave the RDS Proxy unchecked.
- Additional configuration — Port: Leave the default value of 3306.
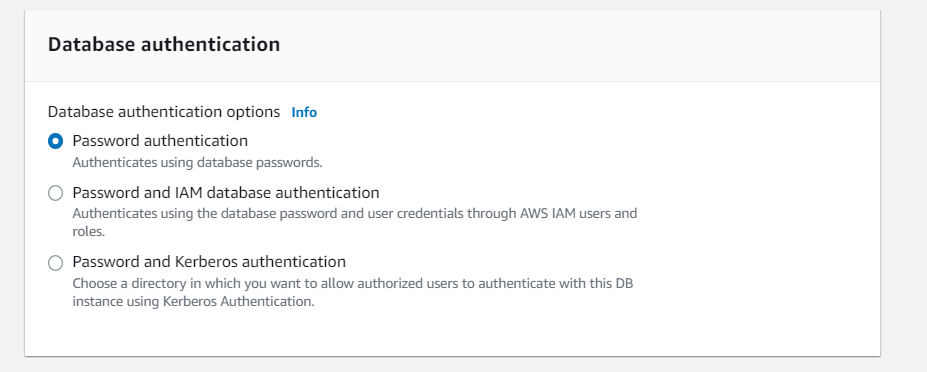
- Expand the “Database authentication” section:
=> Choose “Password authentication”.
Cheat Sheet: Amazon RDS supports several ways to authenticate database users. You can also choose to enable IAM database authentication for enhanced security.
- Move to “Monitoring” section. Leave Enable enhanced monitoring unchecked to stay within the Free Tier. Enabling enhanced monitoring will give you metrics in real time for the operating system (OS) that your DB instance runs on.

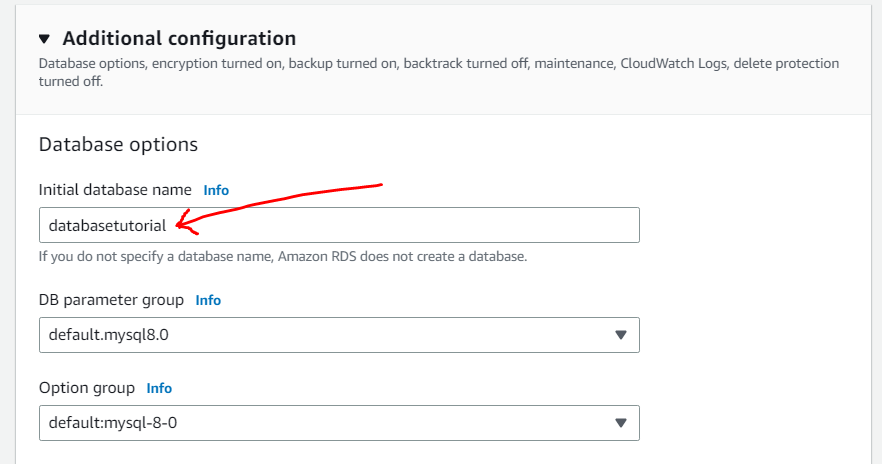
- Scroll down and locate the “Additional configuration” section:
=> Provide a name for the database in the “Database name” field. In my tutorial, I chose databasetutorial.
=> Leave the default selection for other configurations.
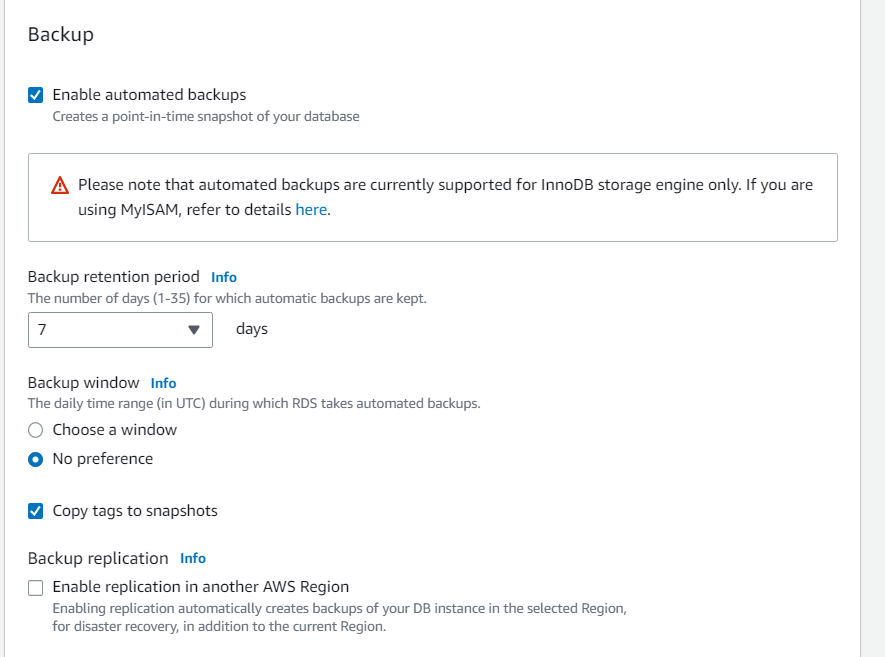
- Scroll down to Backup. Check “enable automate backup”.
=> For Backup retention period: You can choose the number of days to retain the backup you take. For this tutorial, set this value to 7 days.
=> For Backup window: Use the default of No preference.
=> Check “Copy tags to snapshot”, and uncheck “enable replication in Another AWS region”
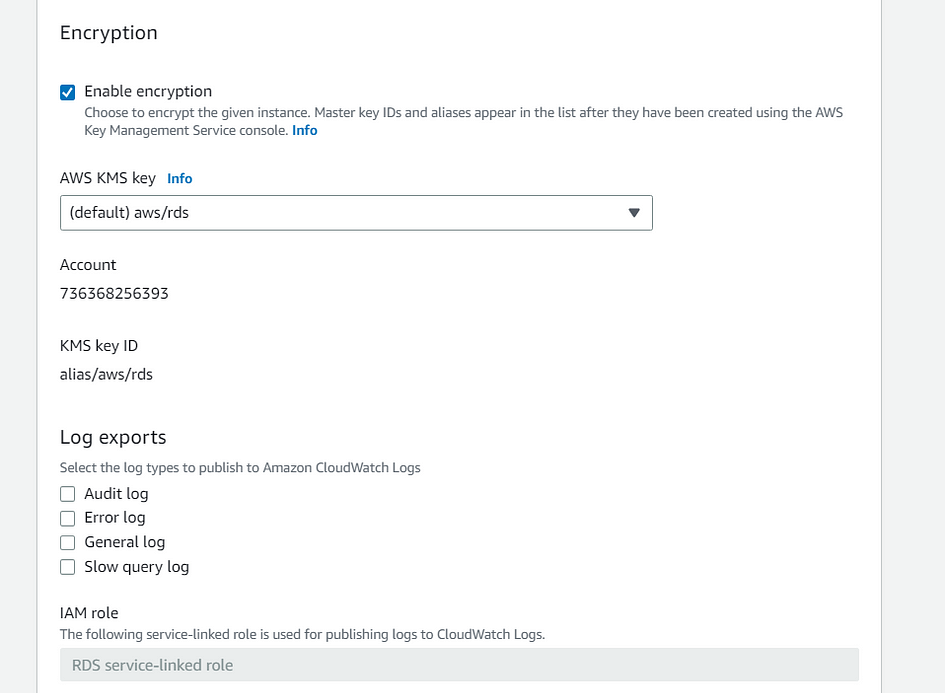
- In Encryption section, leave by default all configuration.
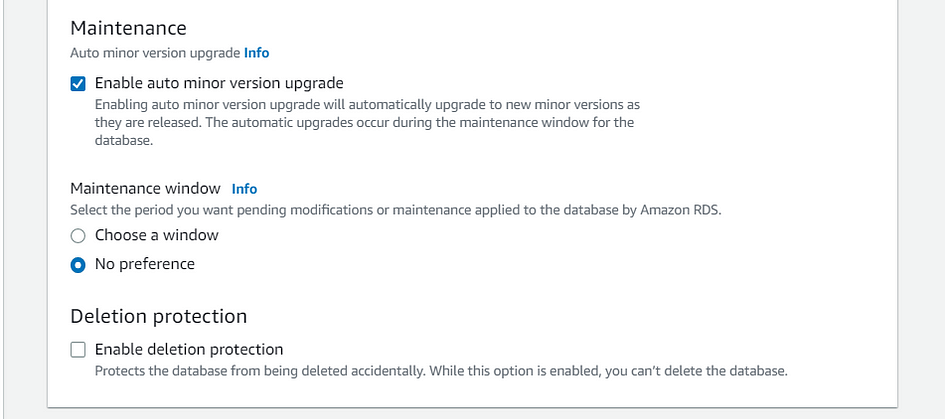
- Scroll down to Maintenance
=> For Auto minor version upgrade: Select Enable auto minor version upgrade to receive automatic updates when they become available.
=> For Maintenance Window: Select No preference.
=> For Deletion protection: Uncheck Enable deletion protection for this tutorial. When this option is enabled, you’re prevented from accidentally deleting the database.
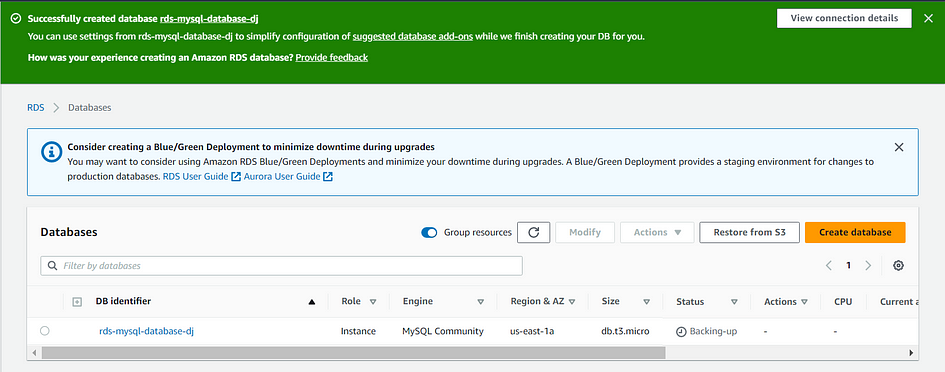
- Finally, Click on “Create database” to create the RDS instance. Wait for the creation process to complete.
- Once the RDS instance is created, locate it in the RDS console and click on its name to view its details.
- In the details page, find the “Connectivity & security” tab and note down the endpoint (hostname) of the database instance.
Step 3: Download a SQL Client
- Use a MySQL client or command-line tool (e.g., MySQL Workbench, MySQL command-line client) to connect to the RDS instance using the endpoint, master username, and password you specified.
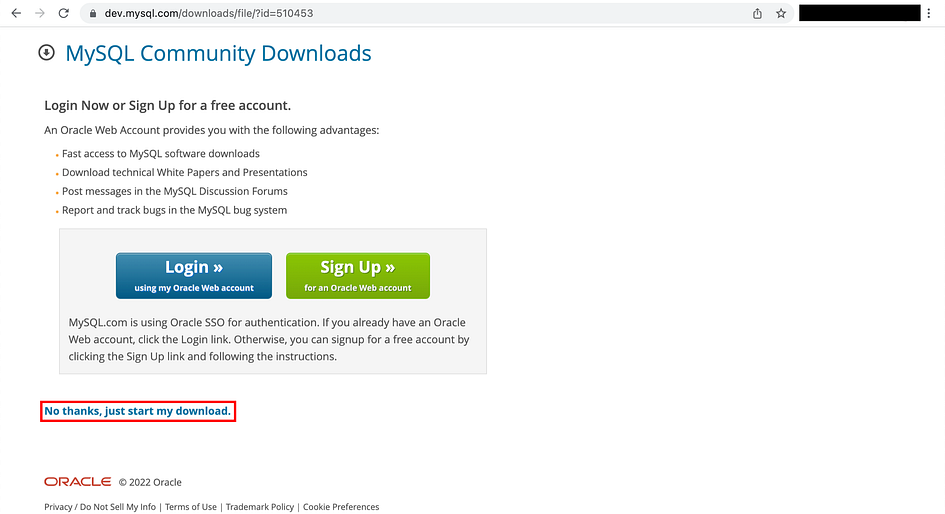
- Go to the Download MySQL Workbench page to download and install MySQL Workbench.
- You will be prompted to log in, sign up, or begin your download. You can choose No thanks, just start my download for a quick download.
Step 4: Connect to MySQL database
- Install MySQL Workbench. Launch it.
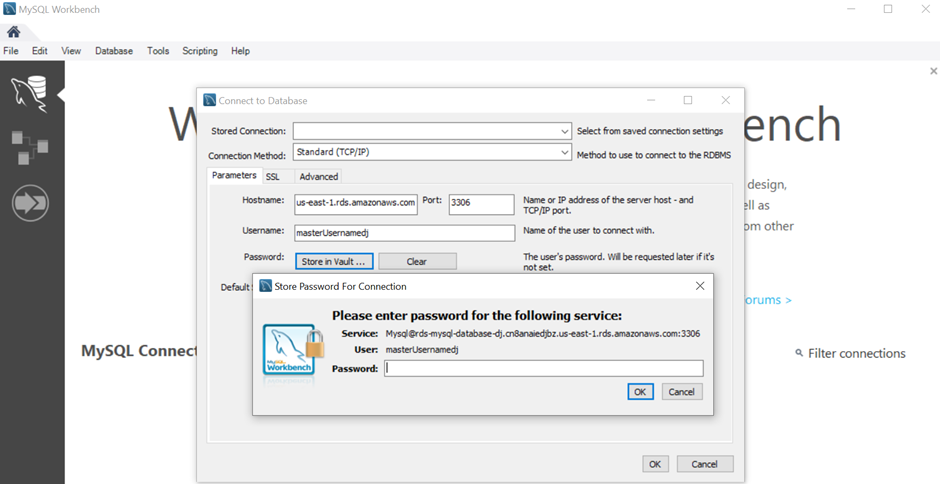
- Go to Database > Connect to Database from the menu bar.
- A dialog box appears. Enter the following:
=> Hostname: You can find your hostname on the Amazon RDS console as shown in the screenshot.
=> Port: The default value should be 3306.
=> Username: Type in the username you created for the Amazon RDS database. In this tutorial, it is ‘masterUsernamedj.’
=> Password: Choose Store in Vault (or Store in Keychain on MacOS) and enter the password that you used when creating the Amazon RDS database.
- Choose OK twice.
You are now connected to the database! On the MySQL Workbench, you will see various schema objects available in the database. Now you can create tables, insert data, and run queries.
Thank you for reading and/or following along! Please stay tuned for all my upcoming projects, hands-on labs and feel free to check out the rest of my articles.
Leave a Reply