Welcome back to another article. If you are a cloud engineer, devops engineer or site reliability engineer, chances are you know about CI CD pipeline. Thus, if you are new to cloud engineering you have noticed that there are several DevOps tools, so CI CD tools.
What do you know about CI CD? Have you used Github Actions to build a CI CD pipeline? What is GitHub Actions? Why should you use Actions? When do you use Actions?
In the following guide, I will describe the steps by steps to build a CI/CD pipeline with GitHub Actions.
Background
CI CD refers to Continuous Integration, Continuous Deployment. A CI/CD pipeline is the process of building, testing, and deploying code in a SDLC. A CI pipeline runs when code changes, it compiles your code, run tests, and check that it’s functional. A CD pipeline deploys the built code into production. Github Actions is a CI/CD tool that gives you the ability to implement powerful automations right in your repositories.
Prerequisites
- A Github account, if you don’t have an account get one here for free.
Now let’s have fun building your CI CD pipeline using Github Actions.
First step: Create a repository or select an existing repo, and a project
- Create or select a repository on GitHub to build a CI pipeline with GitHub Actions.
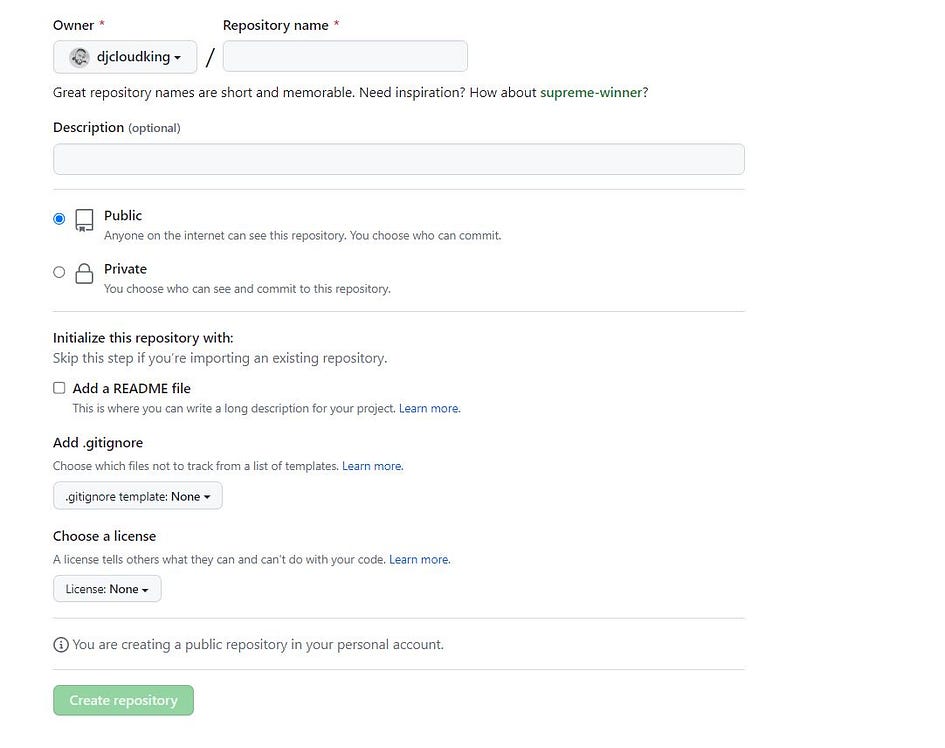
Cheat Sheet: you can either use an existing project code base, fork a project you like on GitHub (see screenshot below), or start from scratch (see screenshot above).
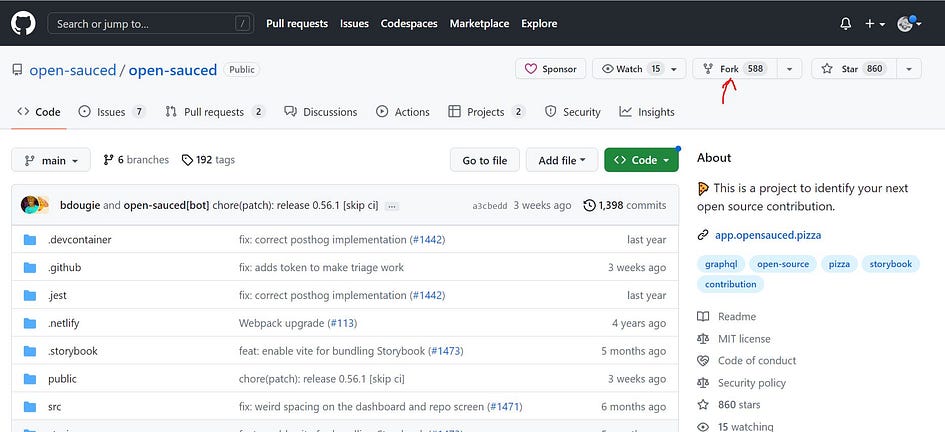
- For this guide I decided to fork this Open Sauced repository.
Cheat Sheet: A fork is a copy of a repository. Forking a repository allows you to freely experiment with changes without affecting the original project.
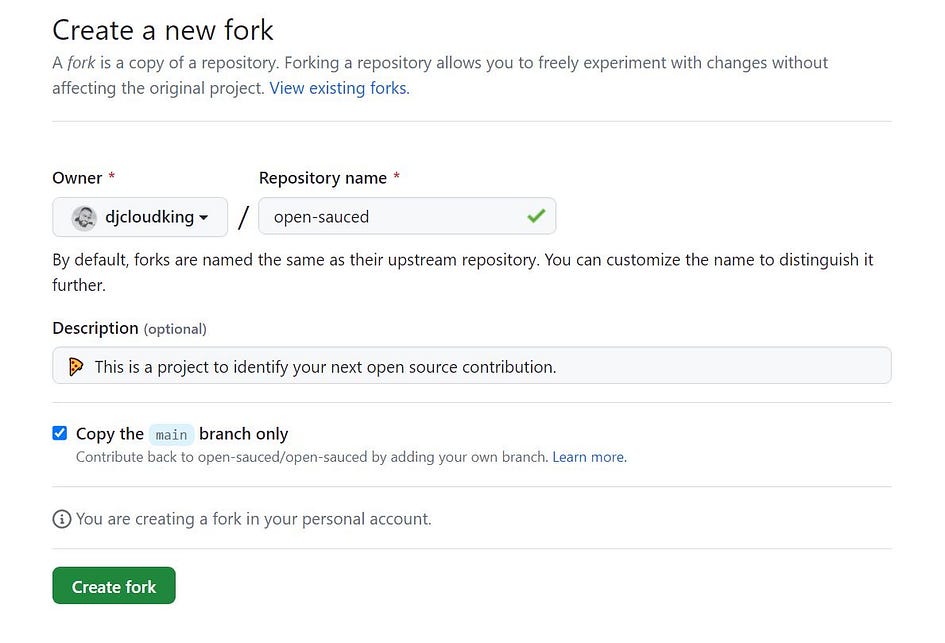
Second Step : Open GitHub Actions in your repository to start building your CI/CD workflow
- Go to your repository’s top navigation bar.
- Open the GitHub Actions tab
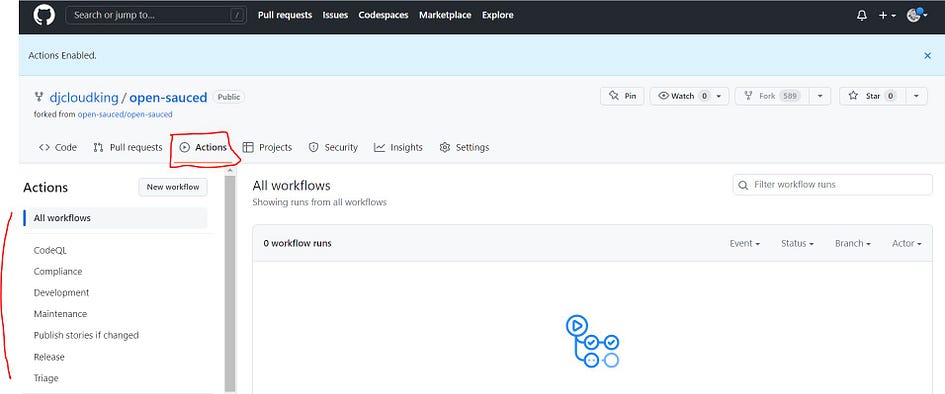
- From a list of CI/CD and workflow automation templates click on New workflow (see screenshot below) or select one in All workflows list (see screenshot above).
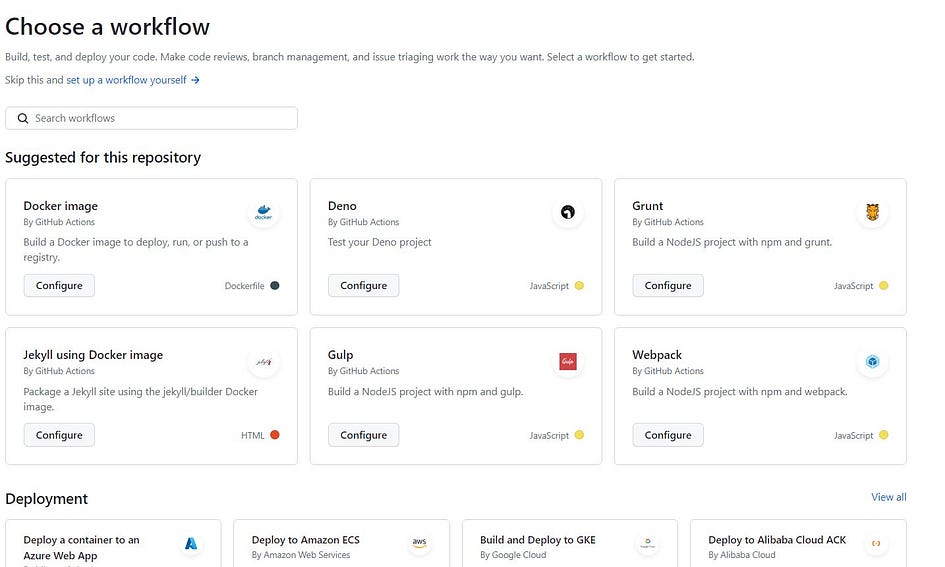
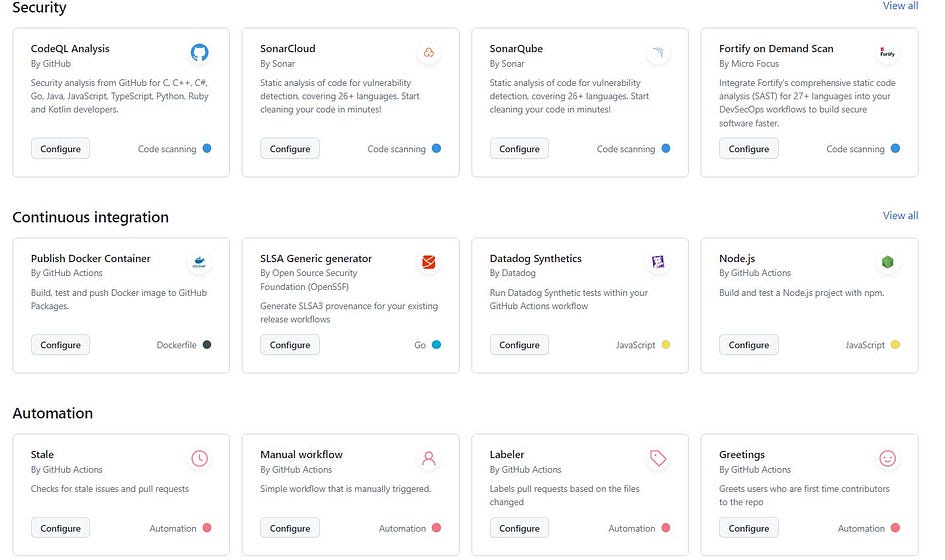
- Remember we forked an existing repository for this exercise. Go back to the repo and click on workflow. You are able to see all the existing workflows.
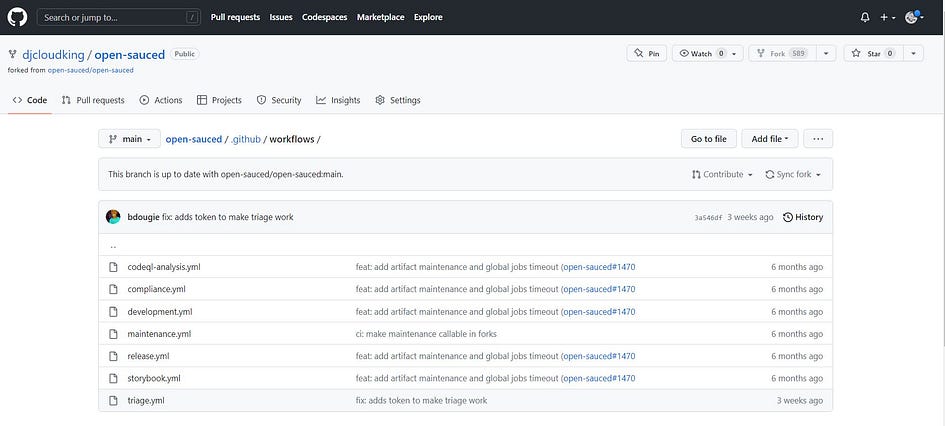
Cheat Sheet: building a CI pipeline can be a simple process. You can use your workflow and move quickly, or it can be more complex when building a big enterprise software.
Third Step: Change your code to trigger your CI/CD pipeline
- For the easy route, you will use compliance workflow or compliance.yml.
- Open it and read through, you will see this workflow is triggered whenever someone makes their first pull request and sends a message to the owner for approval.
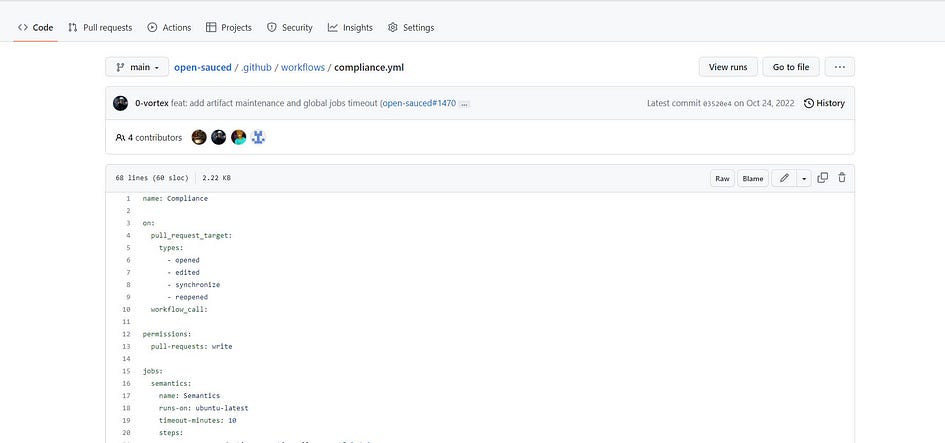
- Now it’s time to change the code in compliance workflow to trigger your CI CD pipeline.
- Check compliance.yaml, focus on the part of the code below:

- Add “IMPORTANT” on top of this part and start commit.

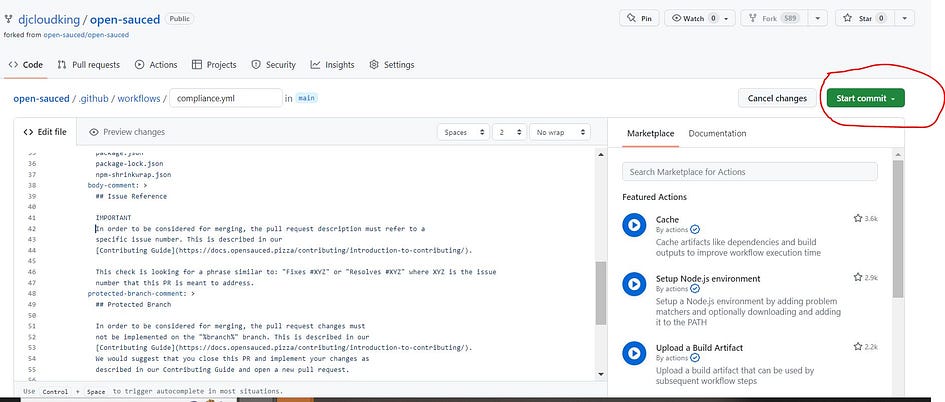
- Choose to attach the change to the main branch or create a new branch, then commit changes.
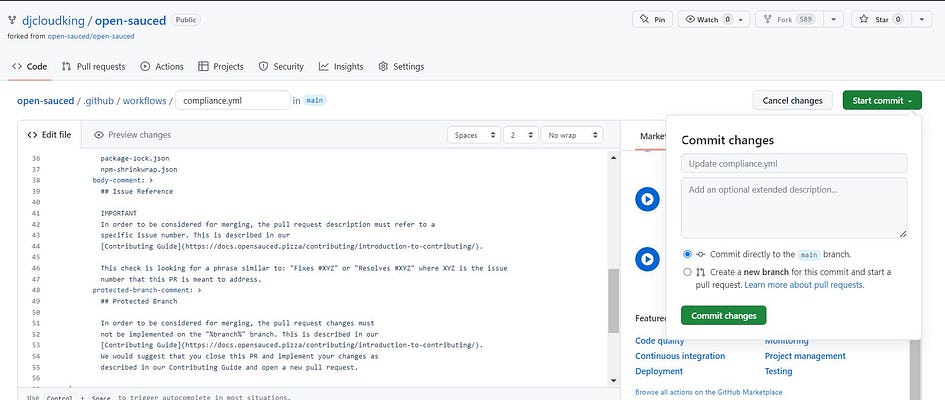
Forth Step: Check your pipeline
- Now look at the workflow visualizer and live logs.
- Go back to all workflows, and click on the one you just updated. In our case it’s update compliance.yaml

Cheat Sheet: In the visualizer, it’s important to see which job in the workflow works (green check mark), fails (red sign) and if something is in progress (a yellow sign).
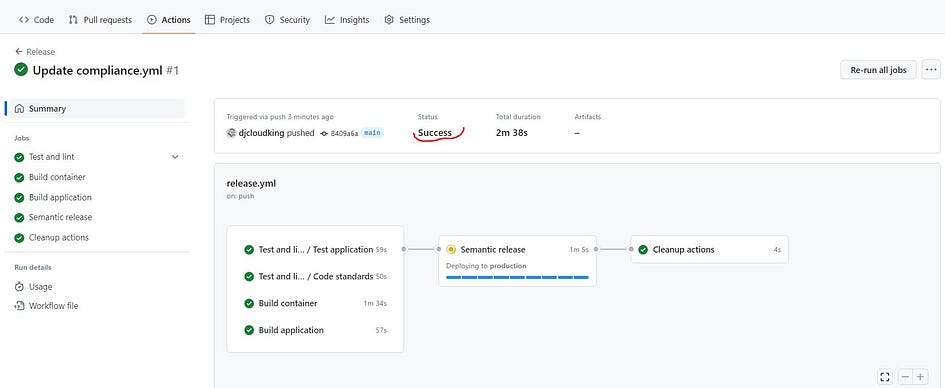
Cheat Sheet: These logs and the timestamps are very useful if you’re debugging a time-sensitive error. A live log makes it possible to immediately address the problem.
Voilà! You have your guide to build a CI/CD pipeline using GitHub Actions.
Thank you for reading and/or following along! Please stay tuned for all my upcoming projects, labs and feel free to check out the rest of my articles.


Leave a Reply