This short tutorial is the perfect example of how to use CDK with Python to automate a workflow. Read below for more details.
Scenario
You have a photo-sharing application where users can upload images, and you’d like to automatically analyze each image as soon as it’s uploaded.
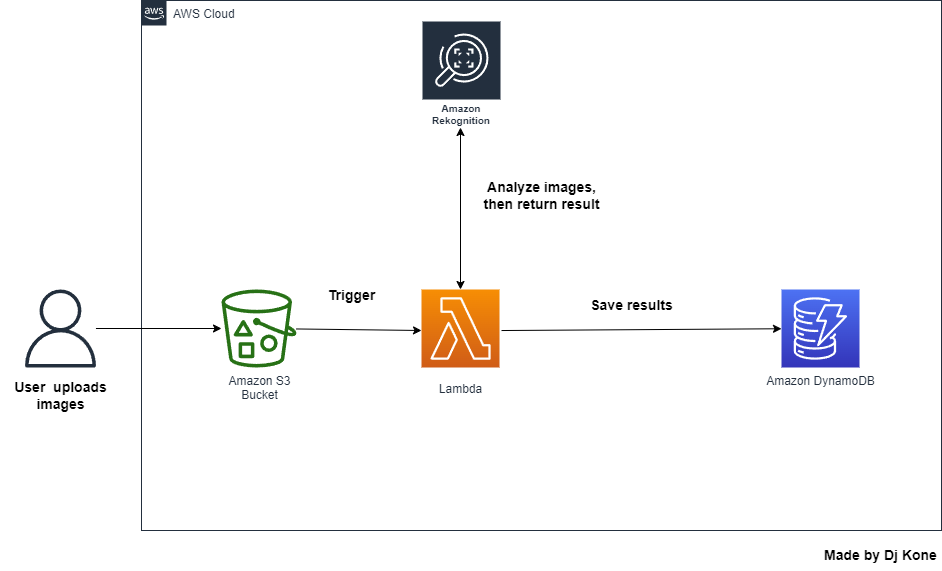
Once the image is uploaded to an S3 bucket, AWS Rekognition will be used to analyze the photo, identifying key details like objects and scenes. The results of this analysis should be stored in DynamoDB, allowing each user to view details about their uploaded photos. AWS Lambda will manage the process of analyzing the image and saving the results, and you’ll use AWS CDK in Python to set up this automated workflow.
Architecture

Project Outline
In this tutorial, we’re going to set up a simple workflow that automatically analyzes images whenever they’re uploaded to an S3 bucket. We’ll use AWS Rekognition to handle the image analysis, and the results will be saved in DynamoDB. AWS Lambda will take care of orchestrating everything behind the scenes, and we’ll use the AWS Cloud Development Kit (CDK) in Python to build it all.
Pre-requisite
- AWS account with admin rights
- Knowledge of CDK, Python, Javascript
Step 1. Install the CDK in our environment
- Go to you AWS console.
- Open Cloudshell.
- Run
sudo npm install -g aws-cdk-lib

Cheat Sheet: directory name must be cdk-app/ to go with the rest of the tutorial, changing it will cause an error
- Create a directory
mkdir cdk-app - Move in the directory
cd cdk-app/ - Now, initialize the application
cdk init app-language

- Always verify if it works correctly
cdk ls

Step 2. Copy the content of cdk-app-stack.js into lib/cdk-app-stack.js
- List the contents of lib/ and go inside the folder

- Remove the content:
rm cdk-app-stack.jsand create new contenttouch cdk-app-stack.js

- Open the new file:
nano cdk-app-stack.js - Copy the content of cdk-app-stack.js located in this code repository: https://github.com/djcloudking/python-challenges/blob/main/95_Python%20project%206/lib/cdk-app-stack.js and paste it in cloudshell
- Run
cat cdk-app-stack.jsto verify if everything is there.
Step 3. Setup the Lambda function
- Back to cdk-app, verify if lambda function does not exist yet.

- If no, create a new lambda directory
mkdir lambda && cd lambda - Then, create a python file
touch index.py.Edit it withnano index.py. - Copy the python code in this repository: https://github.com/djcloudking/python-challenges/blob/main/95_Python%20project%206/lambda/index.py and paste it.
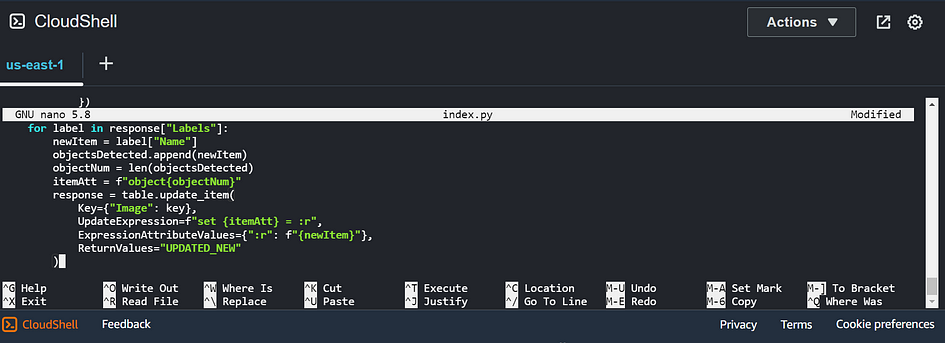
- Verify if the code has been copied using
cat index.py
Step 4. Bootstrap the CDK application
- It’s time to bootstrap our cdk application
cdk bootstrap - Run
cdk bootstrap. You should see a message asking you to specify an environment name.

- Go one level down with
cd .. - Run again
cdk bootstrap

Step 5. Synthesize as a CloudFormation template
- Go to CloudFormation console and verify if something has been created

- Now, run
cdk synthto target cloudformation template that is going to be created and deployed to the cloudformation stack.
Step 6. deploy the CDK stack
- Finally, deploy the cdk stack:
cdk deploy - If asked, enter
Yto continue the deployment

- At the end of the deployment of the CDK, you will see a new stack in cloudformation
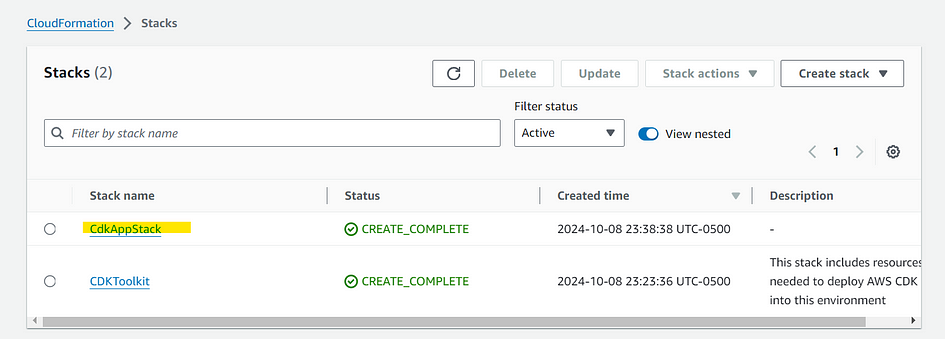
Step 7 — Verify S3 bucket and DynamoDB table
- Go to AWS S3 dashboard.
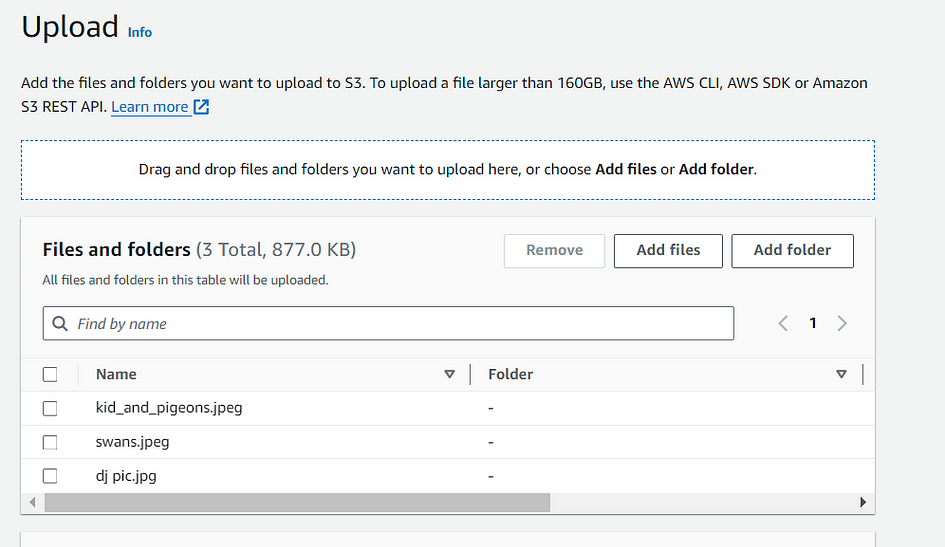
- Select a bucket and upload a picture in the bucket.

- If our CDK has been deployed correctly, we will see the description of this picture in our DynamoDB table.
- Go to the DynamoDB table. Click on explore items.

- As we intended, a Lambda function is triggered when an image is uploaded to the S3 bucket. Rekognition analyzes the picture and sends the results to DynamoDB.
- Let’s try again with different images.

By following this tutorial, you have successfully created a serverless solution that analyzes images using AWS Rekognition and stores the results in DynamoDB, all orchestrated via CDK in Python. This pipeline can be extended to handle more complex workflows or scaled for production use.
Thank you for reading and/or following along! Leave us a clap or a comment, Share & Follow.

Leave a Reply