In this short tutorial, I will create a secure and isolated AWS environment for developers, accessible through Remote SSH for streamlined workflow and enhanced security.
Scenario
My manager asked me to set up a new development environment. So, I decided to document the whole process of creating a secure and isolated AWS environment for our developers. I’ll also show you how to make it easily accessible using VS Code’s Remote SSH extension.
Architecture
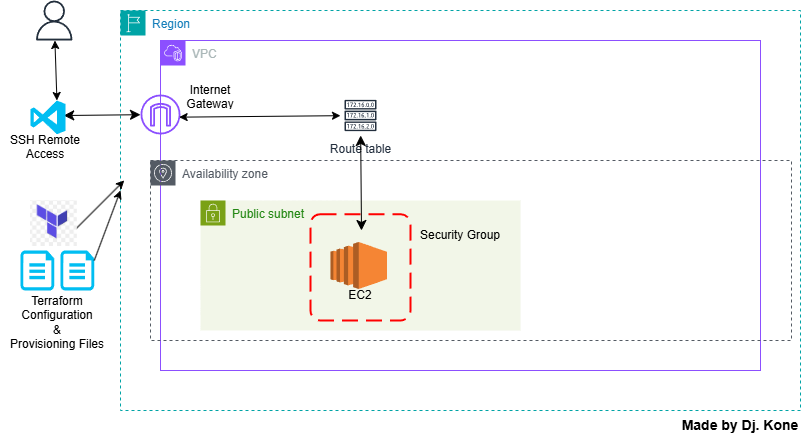
Project Outline
Don’t forget! Our main goal is to create a secure and isolated AWS environment for developers, accessible through Remote SSH for streamlined workflow and enhanced security.
Here’s what you’ll learn:
Part I
- Setting up IAM role, keys and permission
- Setting Up Visual Studio Code for AWS and Terraform
- Initializing Terraform and Configuring the AWS Provider
- Applying Terraform to create an AWS VPC
- Utilizing Terraform State
- Applying Terraform to create AWS Subnets
- Creating an AWS Internet Gateway
- Applying Terraform to create AWS Route Tables
- Managing AWS Security Groups with Terraform
- Using Terraform Data Sources
- Applying Terraform to create an EC2 Key Pair
- Launching an AWS EC2 Instance with Terraform
Pre-requisite
- AWS account with the right access
- AWS CLI installed
- Terraform installed
- Visual studio Code used as IDE.
PART I
Setting up IAM role, keys and permission
- Go to IAM dashboard
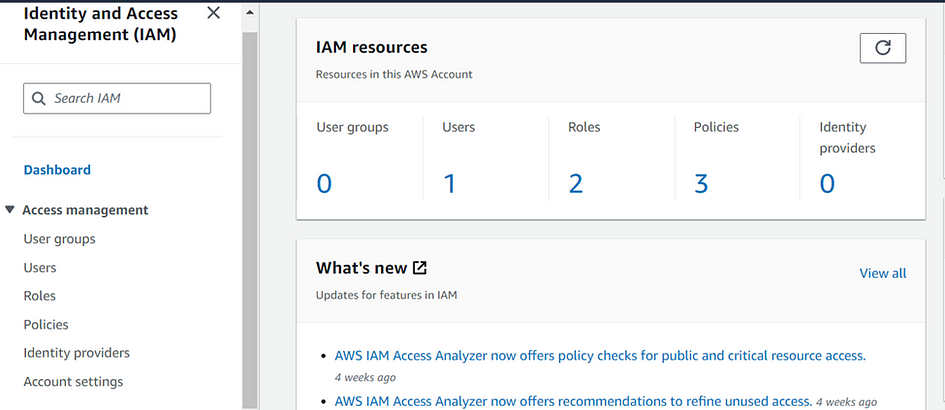
- Click on users, then click create a user.
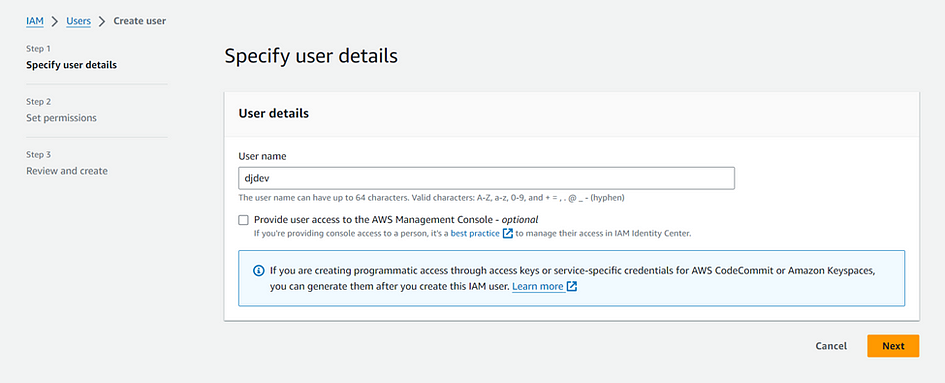
- Fill out the form with the necessary details. I chose “djdev” as my username.
- Do not check “provide user access to the AWS Management Console”. We need the “Access key — programmatic access”.
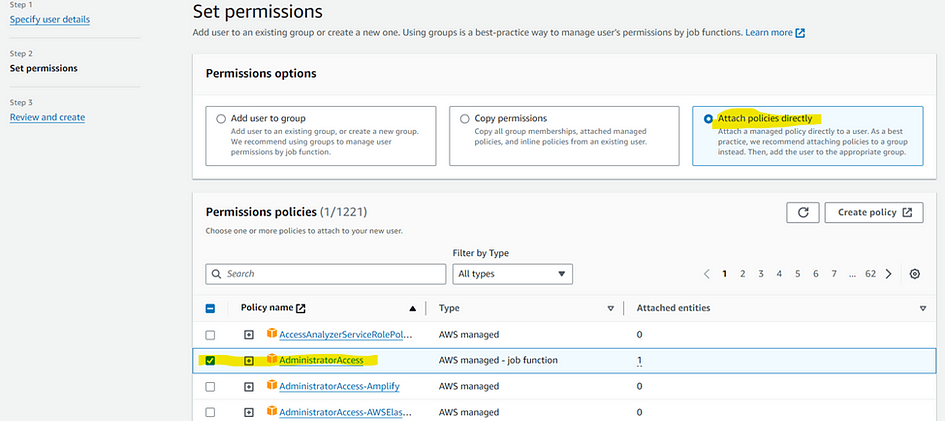
- In the Set permissions window, select attach policies directly.
- Search for and select Administrator Access in the permissions policies section. Leave tag as default.
- Now click on the user you created.
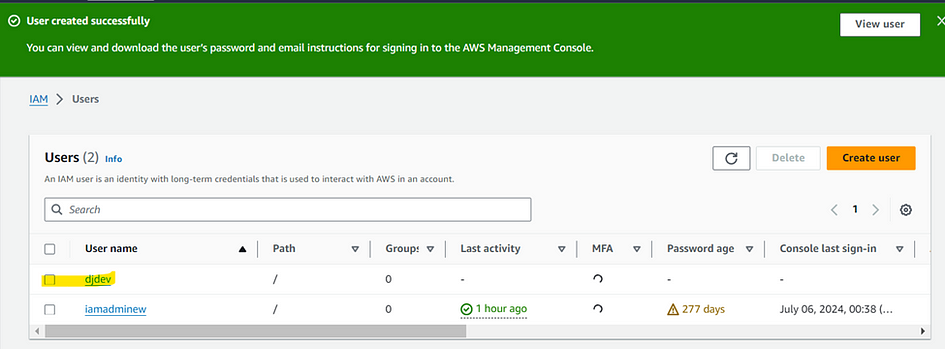
- Scroll down and click Security Credentials tab.
- Scroll down again and go to Access keys. Then click create access key.

- Select CLI for our programmatic access credentials.
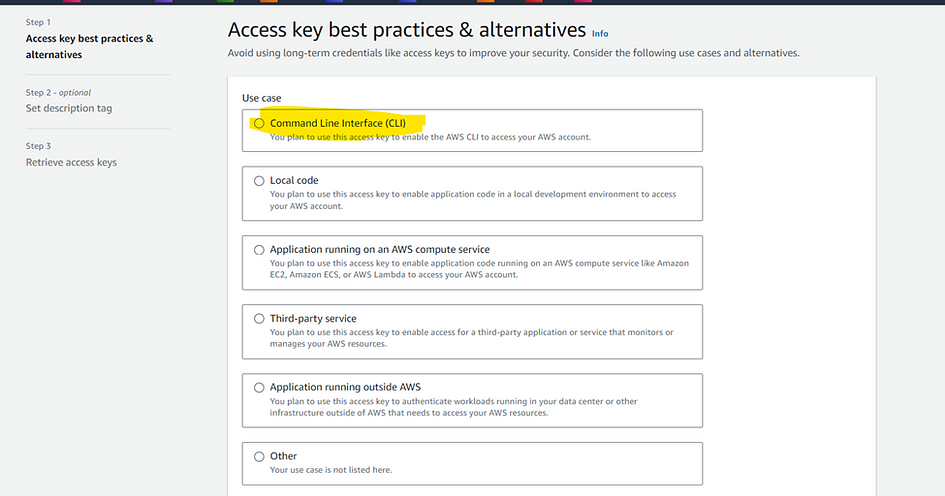
- Check the bottom for confirmation. For tags, add what you want to describe what you’re doing.
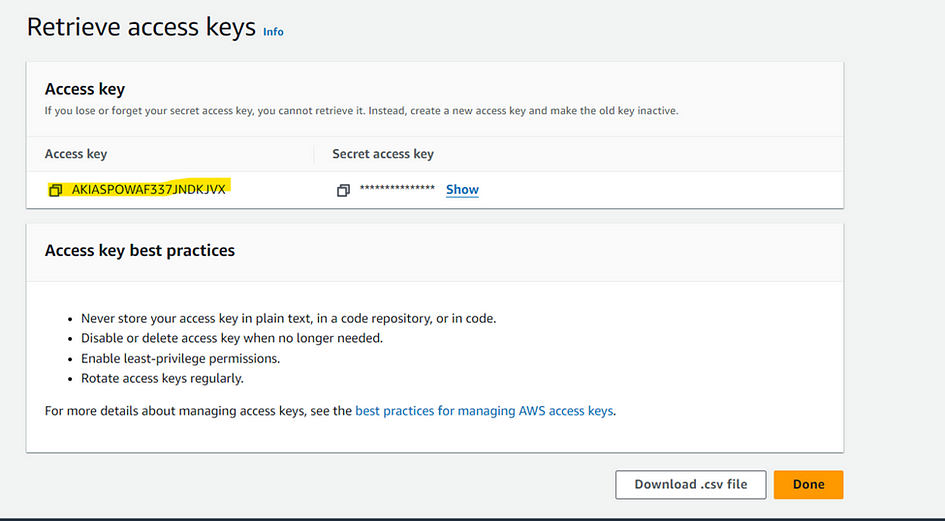
- You’ve created your access key. Download the CSV file.
Setting Up Visual Studio Code for AWS and Terraform
- Open Visual Studio Code. Go to the extension. Search for AWS and install AWS Toolkit.
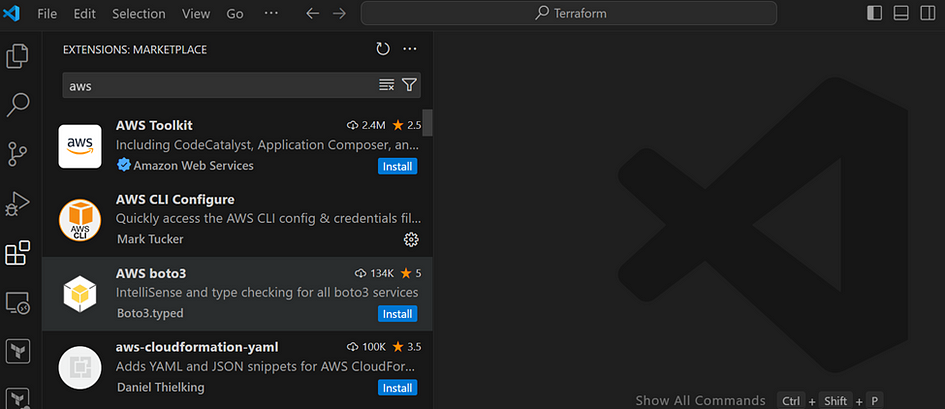
- Go to View, then Command Palette.
- Click on “AWS: create credential profile (djtest)”
- Copy the credentials from your CSV file and paste it in the credentials window.
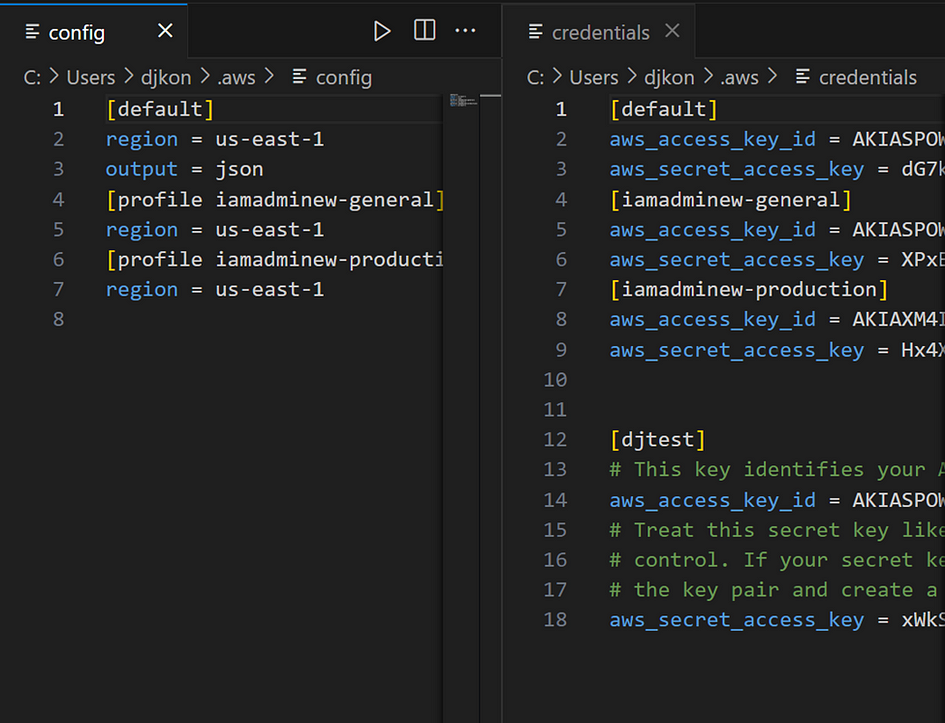
- Save and close the window.
- Click Connect to AWS. You should see your profile.
Initializing Terraform and Configuring the AWS Provider
- Go back to the extension. Add Terraform and close the extension window.
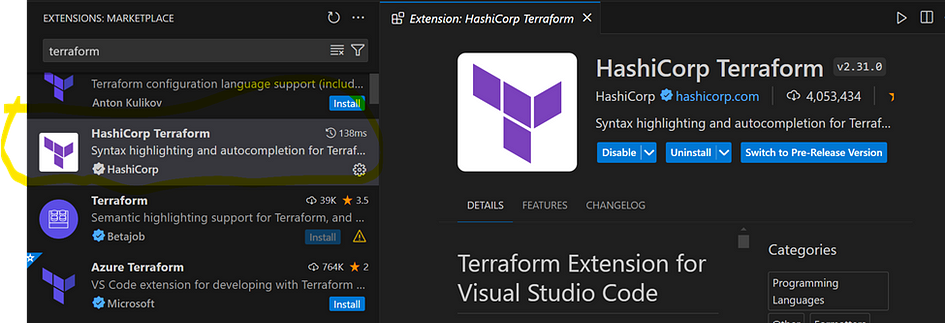
- Create a new working directory or folder named Terraform. Open and select the folder in VS Code.
It’s now time to create our terraform files, starting with providers.tf, which is used by Terraform to interact with APIs for anything you want to build.
- Go into the Terraform folder and create a file named providers.tf
- Add the necessary code to the file
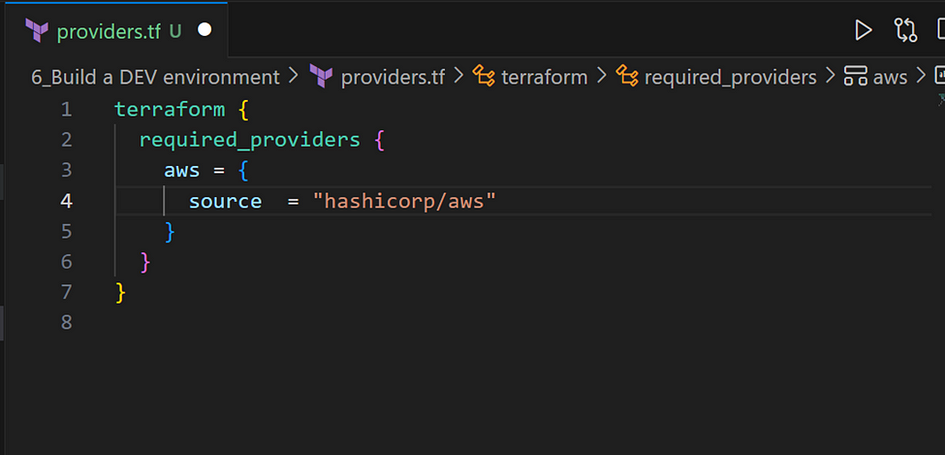
Cheat Sheet: I deleted the version so that it can download whatever version is newer.
- Look into the terraform documentation on how to add the provider block. Use the provider block with “shared credentials file”

- Copy and paste it under required provider
- Change shared credentials to “~/.aws/credentials” if you’re using Linux or “C:/Users/djkon/.aws/credentials” if you are using Windows and add your profile name.

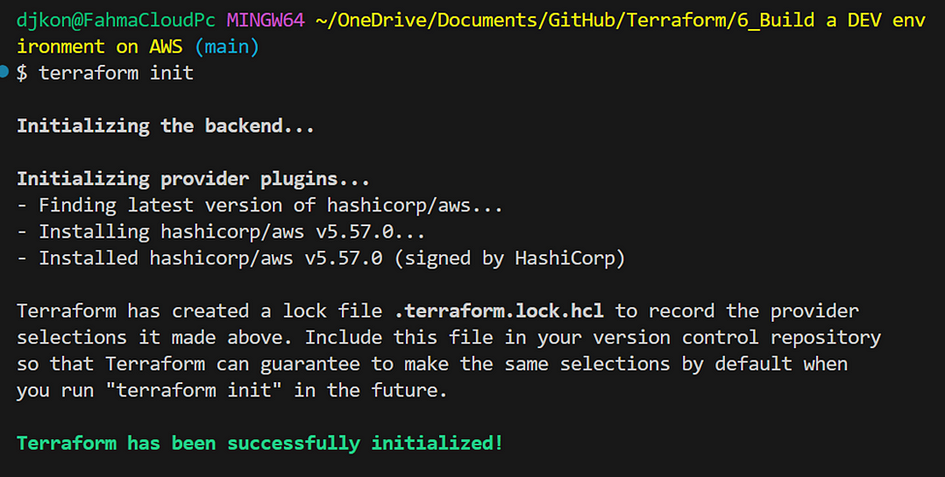
- Open the terminal. Then run terraform init.

- Terraform has been successfully initialized.
Terraform Errors Example: Be careful about what you’re writing. You may encounter some errors, but read the error messages and try to resolve them


I resolved this issue by entering the right attribute and changing the profile name.
Applying Terraform to create an AWS VPC
- Google “AWS VPC resource in terraform”. You should land on the section in the terraform documentation that mention AWS VPC.
- Go back to VS Code and create a new file called main.tf in the Terraform directory.
- Enter the necessary information needed to create a VPC.
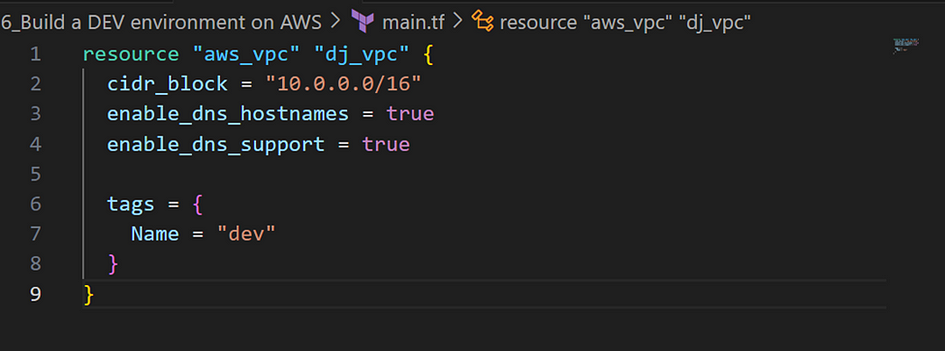
- Save the file and run terraform plan.
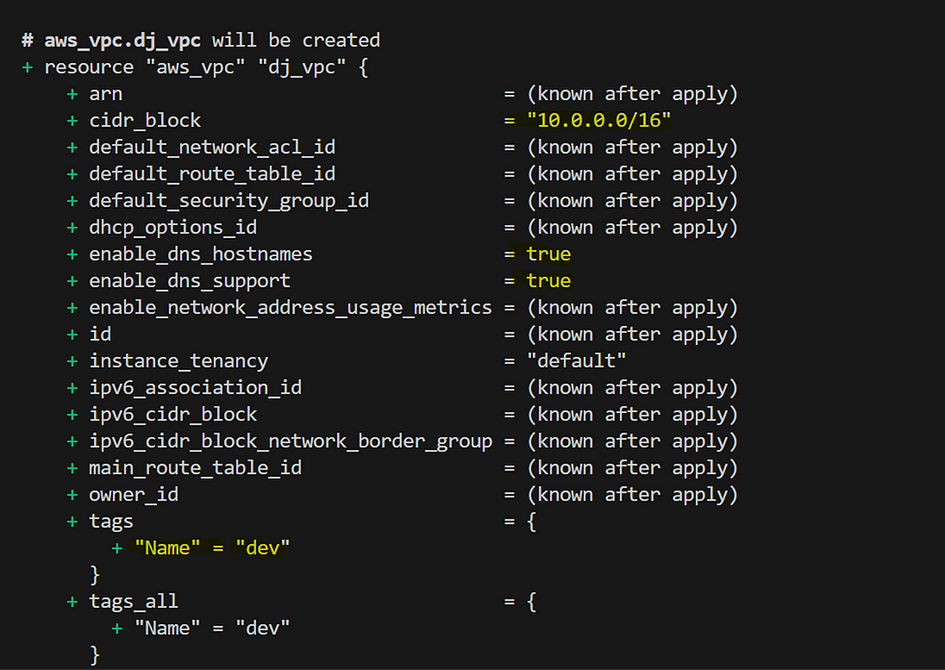
- Enter terraform apply, then yes.


- Next, click on AWS icon. Click No, and Resource. You should see your VPC.
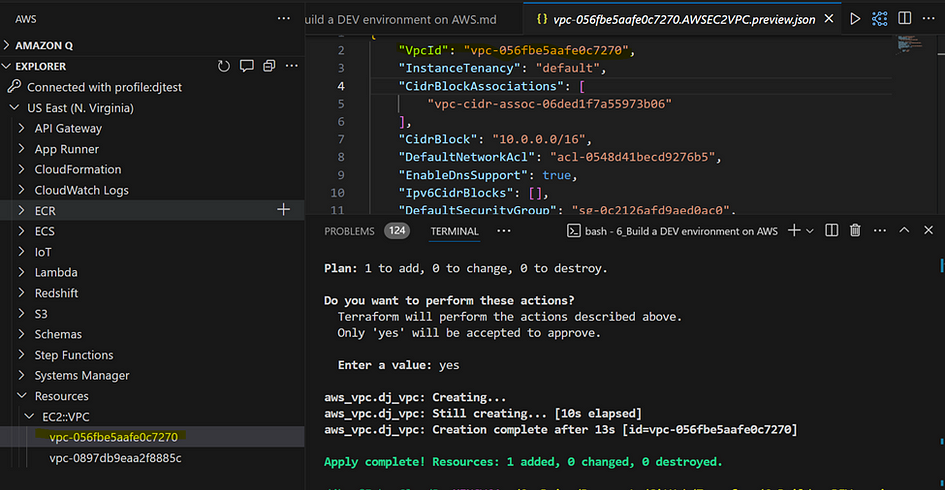
- Go to the VPC Dashboard and verify if you see the VPC you created.

Utilizing Terraform State
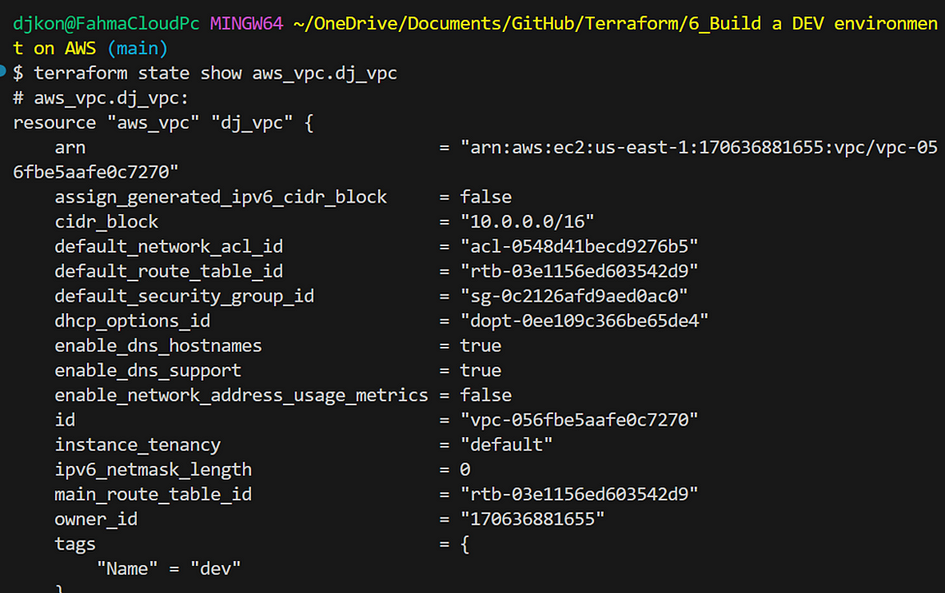
Terraform use State to determine which changes to make to your infrastructure.
- The command terraform state list shows all the resources you created.

- The command terraform show displays everything in details.
- The command terraform destroy kills all existing resource.
Applying Terraform to create AWS Subnets
- Google again “AWS subnets resource in terraform”. You should land on the section in the terraform documentation that mention AWS subnets.
- Go back to VS Code and add the new code block to the main.tf in the Terraform directory.
- Enter the necessary information needed to create subnets.
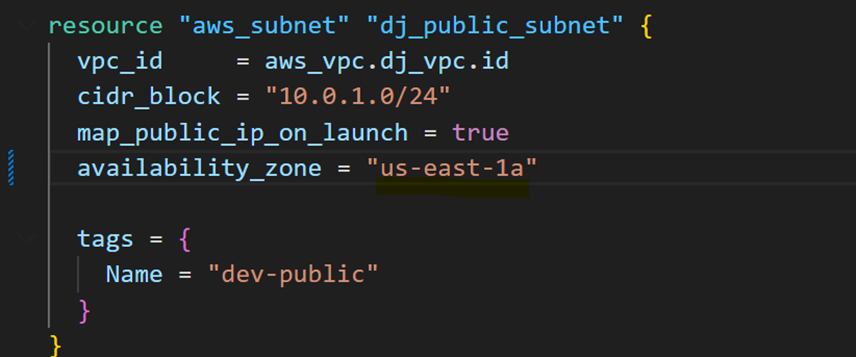
- Ensure that our resource receive a public ip address. Add Map_public_ip_on_launch to label it correctly.
- Run terraform plan. You should see all the details that you applied.
- Run terraform apply -auto-approve. This new command will allow you to skip the yes or no question.


Terraform Errors Example: Be careful about what you’re writing. You may encounter some errors, but read the error messages and try to resolve them.
When I first executed this code:
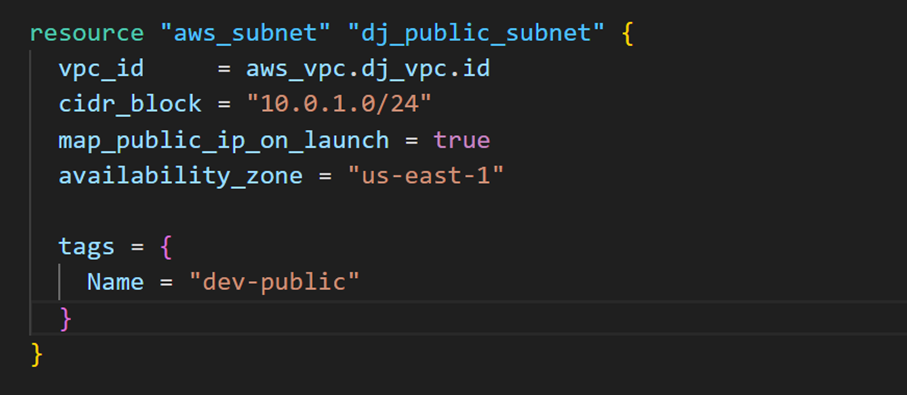
I received this error message:

I fixed it by changing the AZ from us-east-1 to us-east-1a.

Creating an AWS Internet Gateway
- Repeat the same process between terraform documentation and main.tf
- Add the necessary information related to the infrastructure you want to create.
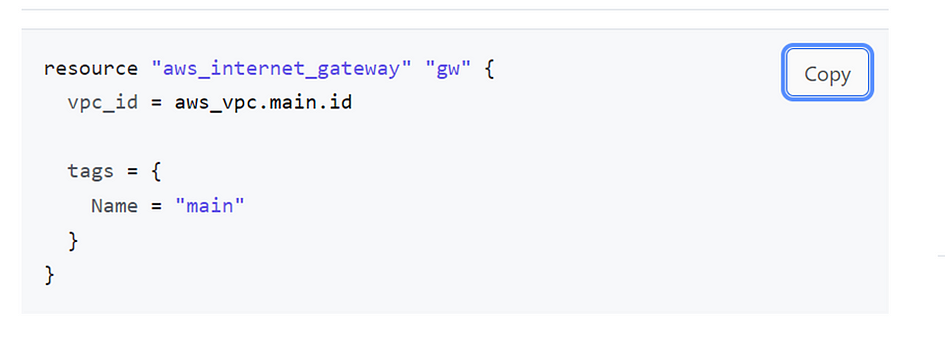

- Run
terraform plan, thenterraform apply -auto-approve. You should see a new resource, such as an internet gateway, in your resources and in your AWS account.

Applying Terraform to create AWS Route Tables
- Repeat the same process between terraform documentation and main.tf
- Add the necessary information related to the infrastructure you want to create.
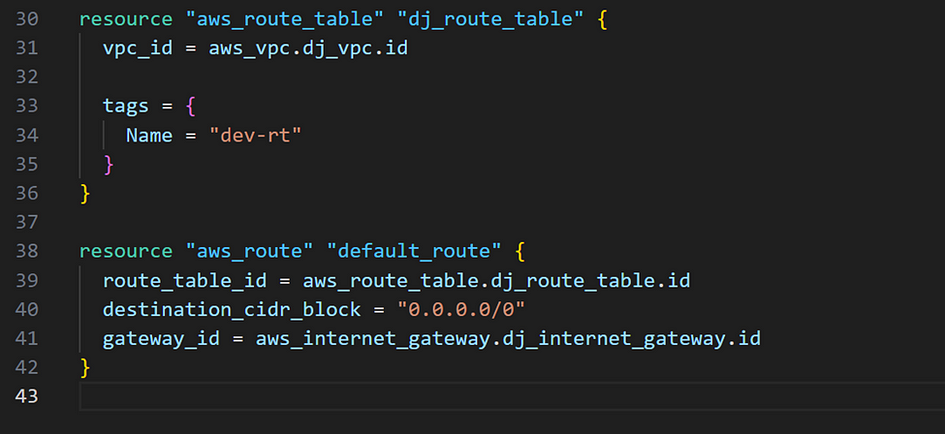
- Run
terraform plan, thenterraform apply -auto-approve. You should see a new resource, such as an internet gateway, in your resources and in your AWS account.

- Now, let’s bridge the gap between route table and public subnet by providing a route table association.
- Apply the same process: search the resource in the terraform documentation, then copy the code block in the main.tf file
- Add the necessary information related to the infrastructure you want to create.
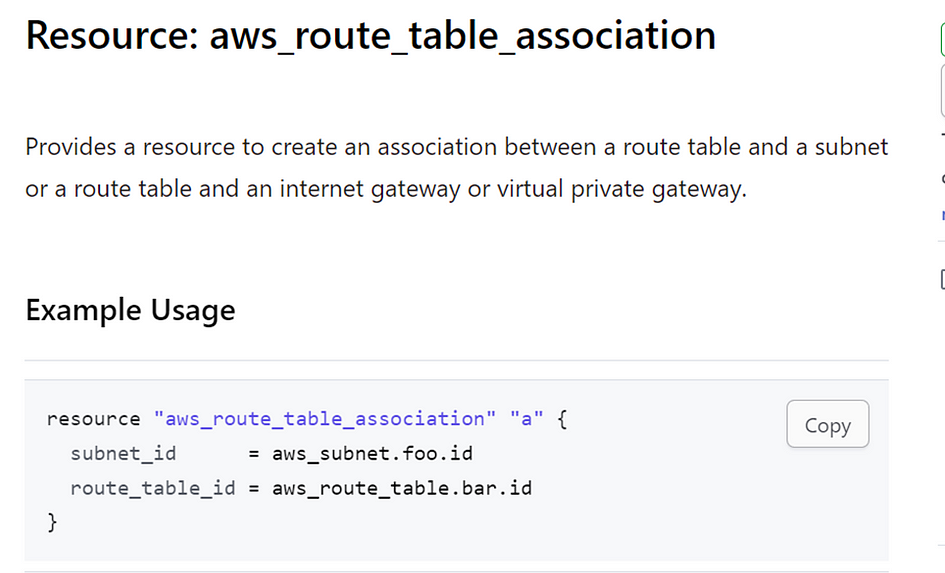
- Run
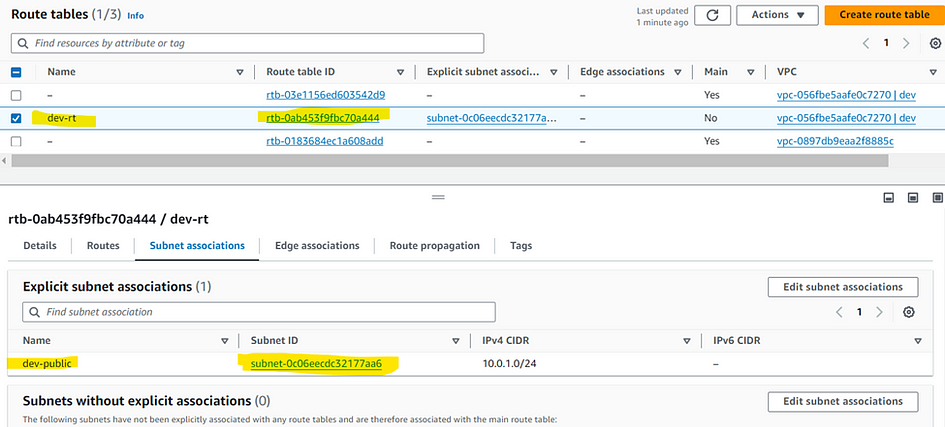
terraform plan, thenterraform apply -auto-approve. - Verify if those resources were created.
Managing AWS Security Groups with Terraform
- Repeat the same process between terraform documentation and main.tf
- Add the necessary information related to the infrastructure you want to create.

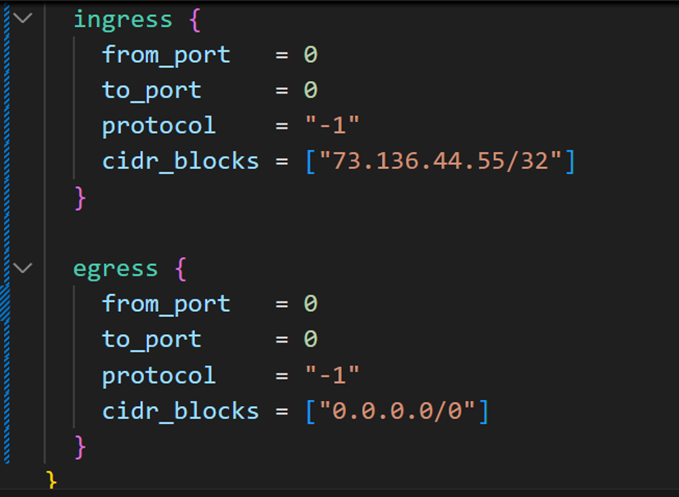
- Run
terraform plan, thenterraform apply -auto-approve. You should see a new resource.
Using Terraform Data Sources
- Data source is a query from AMI to deploy a resource.
- Go to EC2 dashboard. Click on “Launch instance”.
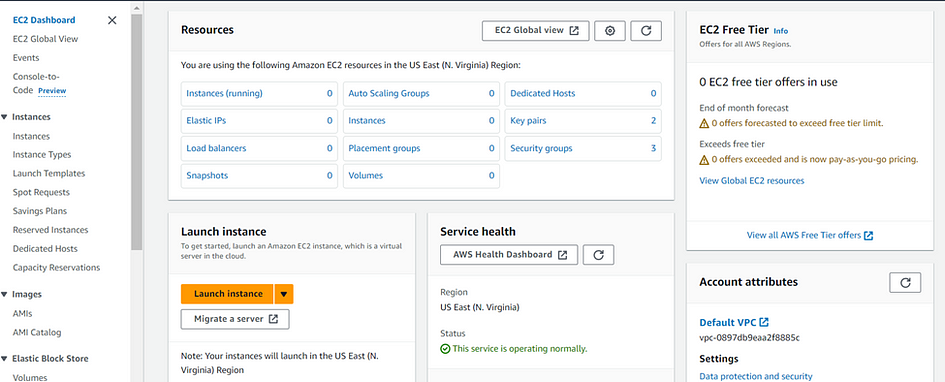
- Click on Ubuntu AMI and copy AMI ID number.
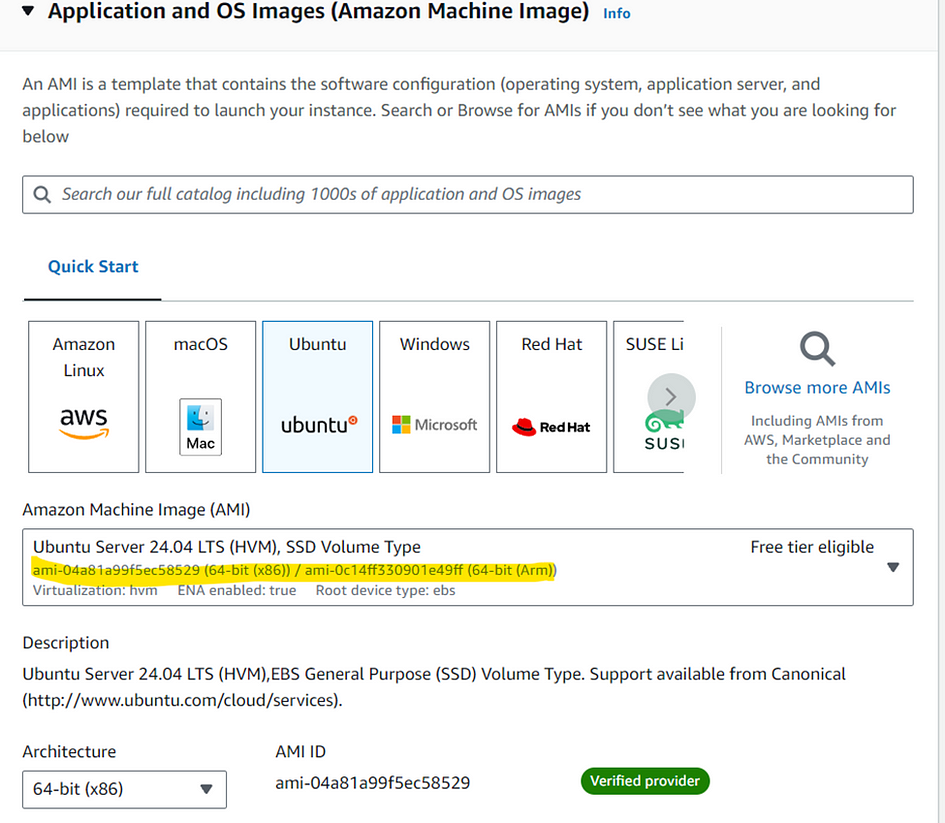
- Go back to EC2 dashboard. Click on AMIs under Images. Select Public images. Then enter the same AMI ID in the search bar.

- Copy the AMI name and Owner.

- Repeat the same process between terraform documentation and vscode.
- Create a new file “datasources.tf”, enter this block code.
- Add the necessary information related to the infrastructure you want to create.
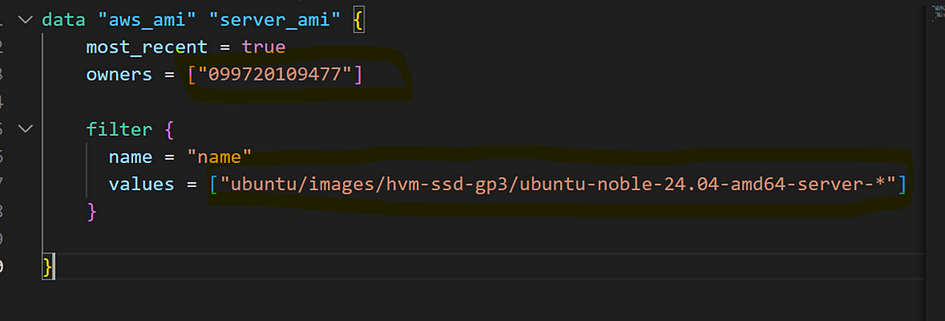
- Save the file.
- Run
terraform plan,thenterraform apply -auto-approve. You should see a new resource.

Applying Terraform to create an EC2 Key Pair
- Open the terminal and type
ssh-keygen -t ed25519

- Name your keypair. I chose “dj_auth”. Do not add a passphrase.

- Enter
sls ~/.sshto see the directory. - Repeat the same process between terraform documentation and main.tf, and use a terraform file function.
- Add the necessary information related to the infrastructure you want to create.

- Run
terraform plan, thenterraform apply -auto-approve. You should see a new resource.
Launching an AWS EC2 Instance with Terraform
You’ve completed the first part. Click the follow link to access Part II on how we deploy EC2 in our DEV environment.
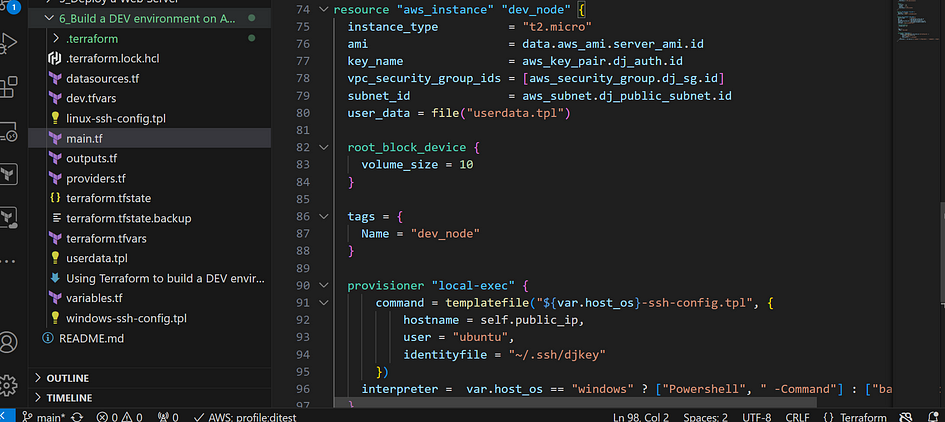
Thank you for reading and/or following along! Don’t forget to read Part II: https://cloudwithdj.com/building-a-dev-environment-on-aws-using-terraform-part-ii/

Leave a Reply