In this short tutorial, I will show you how to deploy Jenkins on AWS EC2, launch an EC2 instance, install Jenkins on it, and configure Jenkins.
Background
Interested in CI/CD tool across any cloud platform? Consider Jenkins.
Jenkins is a tool that helps automate parts of the software development process, like building, testing, and deploying code. It ensures your code is always in good shape and ready to go live. By catching bugs early and making the whole process more efficient, Jenkins helps developers work faster and more reliably.
Jenkins is customizable with lots of plugins, so it can fit just about any project or workflow. It works well with several AWS services, including AWS CodeCommit, AWS CodeDeploy, and Amazon EC2.
DevOps Project Outline
Your manager asked you to deploy Jenkins on EC2 instance so that it can be expose to the world.
In this short tutorial, you will learn:
- how to deploy Jenkins step by step
- how to launch an EC2 instance
- how to install Jenkins on EC2
- how to configure Jenkins automatically
- how to add more Jenkins agents when you need extra build power.
Prerequisite
You need access to an AWS account.
Let’s have fun.
Step 1: Create a key pair using Amazon EC2.
- If you already have one, you can skip to step 3.
- If you don’t have any, login to your AWS account.
- Next, open the Amazon EC2 console.
- In the left pane, under NETWORK & SECURITY, select Key Pairs.
- Click on Create key pair.
- For Name, enter a name you can remember. I chose jen-kp.
- For File format, select the format in which to save the private key.
- Finally, select Create key pair. The private key file downloads automatically.
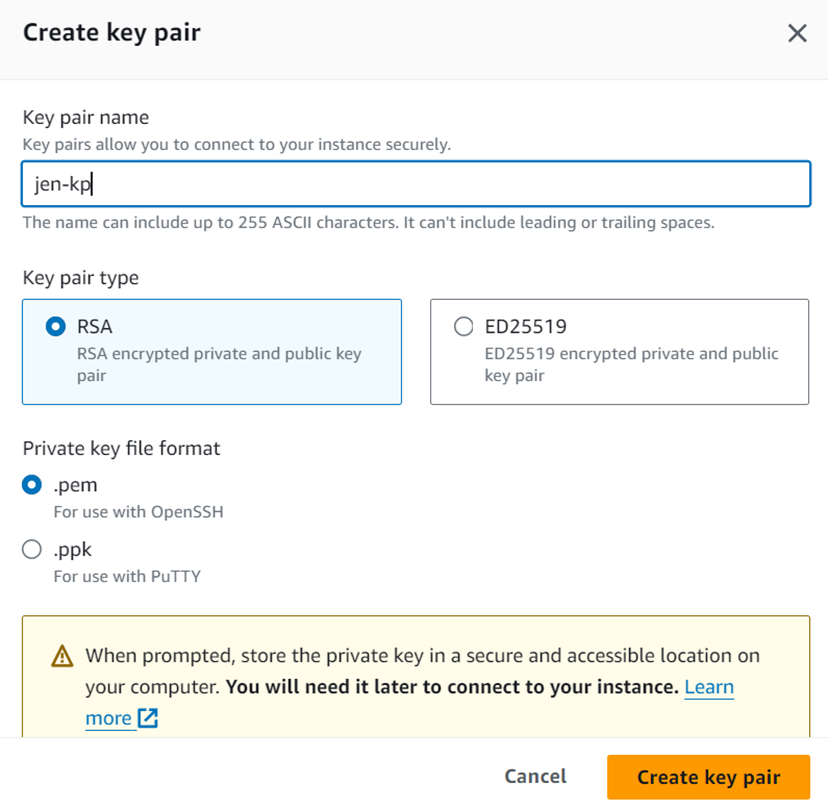
Cheat Sheet: For File format, select the format in which to save the private key: if it’s for OpenSSH compatibility, select pem. If it’s for PuTTY compatibility, select ppk.
Step 2: Create a security group
- If you already have one, you can skip to step 4.
- If not, create a security group and add the following rules: allow inbound HTTP access from anywhere; allow inbound SSH traffic from your computer’s public IP address so you can connect to your instance.
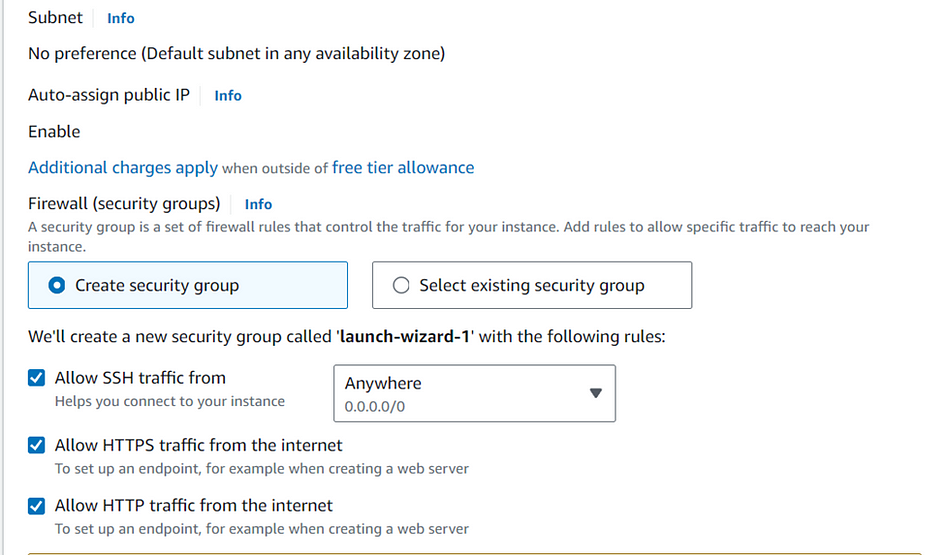
- When editing the Inbound tab, add the rules as follows:
- Select Add Rule, and then select SSH from the Type list.
- Under Source, select Custom, and in the text box, enter the IP address, followed by /32 indicating a single IP Address.
- Select Add Rule, and then select HTTP from the Type list.
- Select Add Rule, and then select Custom TCP Rule from the Type list.
- Under Port Range, enter 8080.
Step 3: Launch an Amazon EC2 instance
- You have your key pair and your security group, launch your EC2 instance.
- Do you need help creating an EC2 instance? Read this article I wrote: AWS Skills Challenge — Creating EC2.
Step 4: Connecting to EC2 instances
After creating EC2, it s time to connect to it. Here is a reminder article on how to connect to an EC2 instance.
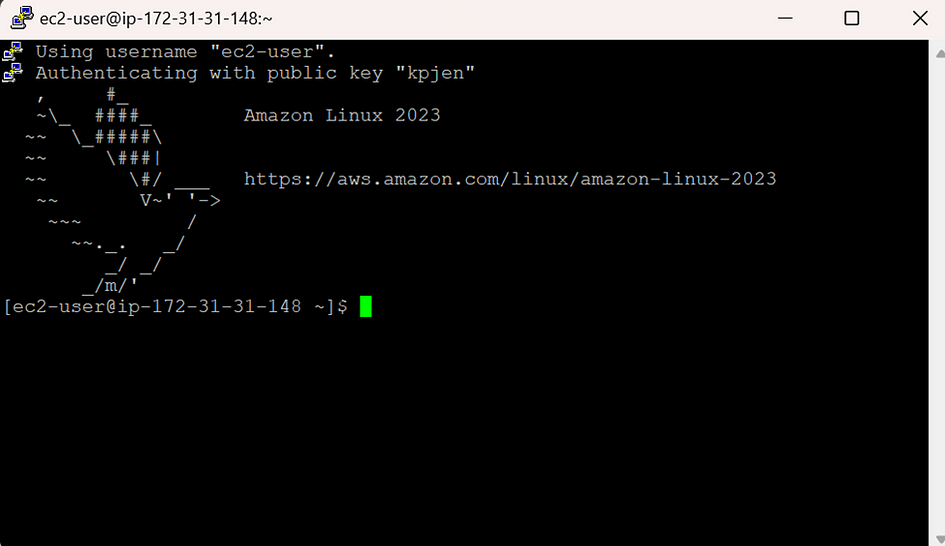
Step 5: Download and install Jenkins
- Before doing anything, perform a quick software update to ensure that your software packages are up to date on ec2:
[ec2-user~]$ sudo yum update -y - Add the Jenkins repo:
sudo wget -O /etc/yum.repos.d/jenkins.repo https://pkg.jenkins.io/redhat-stable/jenkins.repo
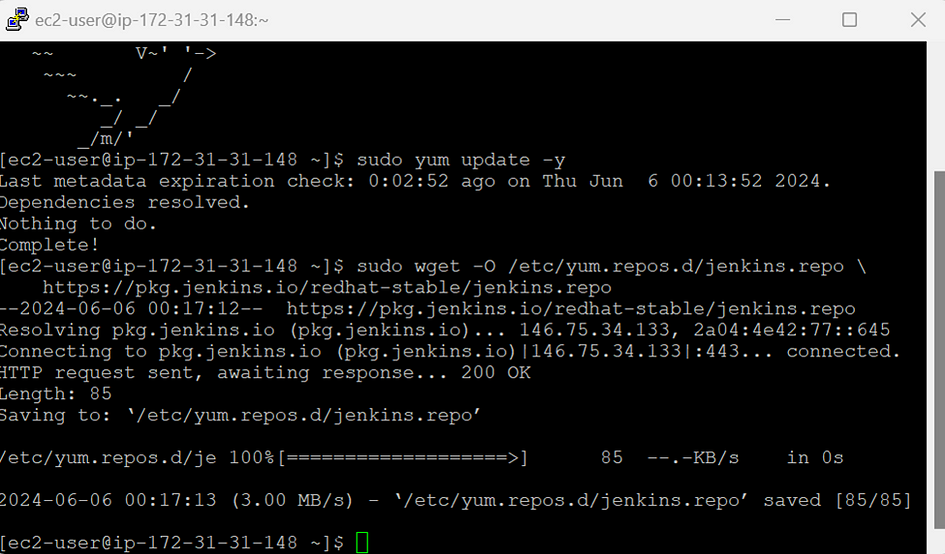
- Import a key file from Jenkins-CI to enable installation from the package:
sudo rpm-import https://pkg.jenkins.io/redhat-stable/jenkins.io-2023.key
sudo yum upgrade

- Install Java (Amazon Linux 2023):
sudo dnf install java-17-amazon-corretto -y - Install Jenkins:
sudo yum install jenkins -y

- Now, enable the Jenkins service to start at boot:
sudo systemctl enable jenkins - Then, start Jenkins as a service:
sudo systemctl start jenkins - Check the Jenkins status:
sudo systemctl status jenkins
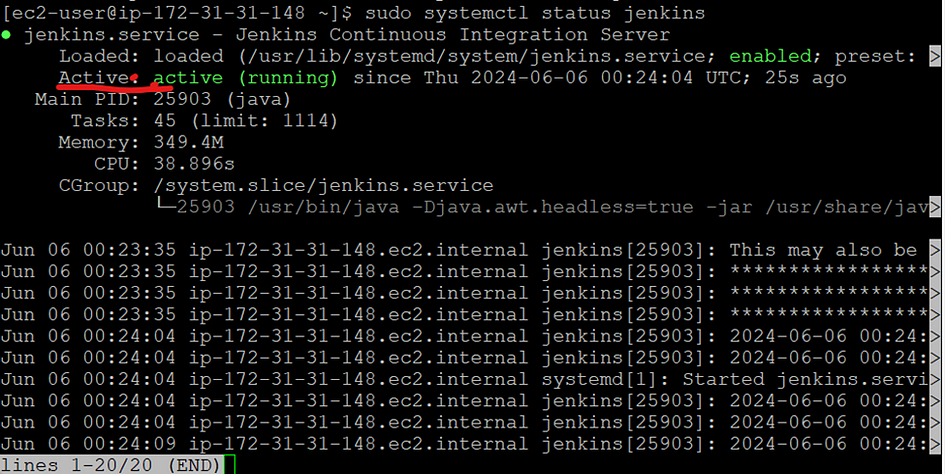
- Jenkins is now installed and running on my EC2 instance.
Step 6: Configure Jenkins
- Connect to http://<your_server_public_DNS>:8080 from your browser. You will be able to access Jenkins through its management interface:
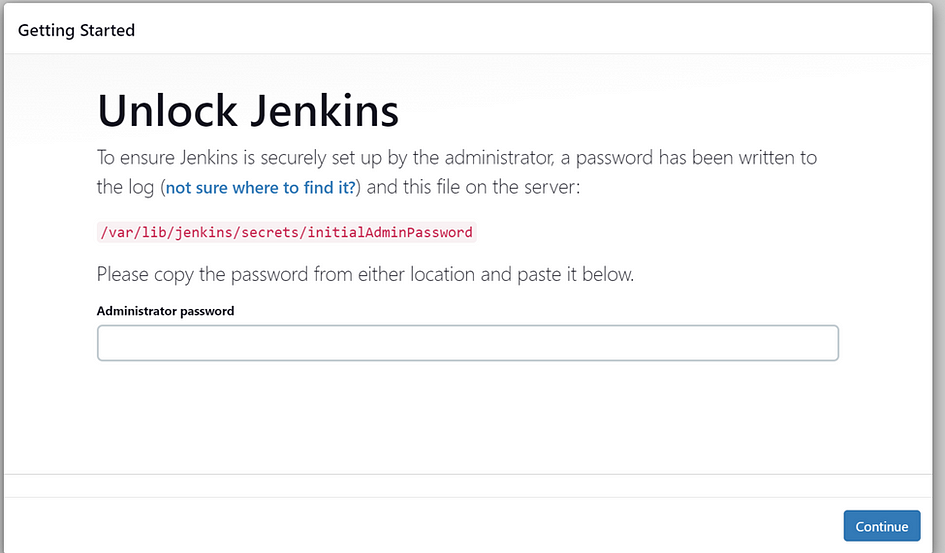
- As prompted, enter the password found in /var/lib/jenkins/secrets/initialAdminPassword. Use the following command to display this password:
[ec2-user ~]$ sudo cat /var/lib/jenkins/secrets/initialAdminPassword

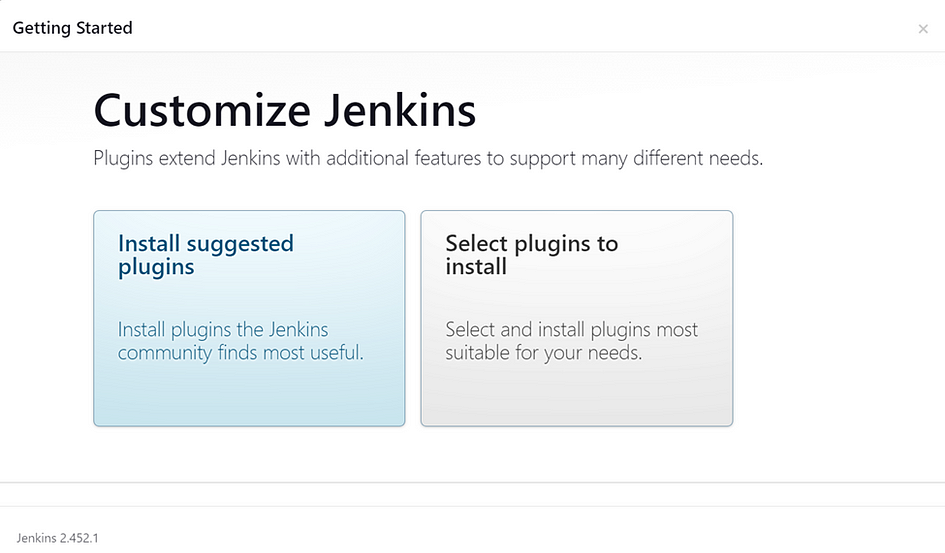
- Click Install suggested plugins to Customize Jenkins page.
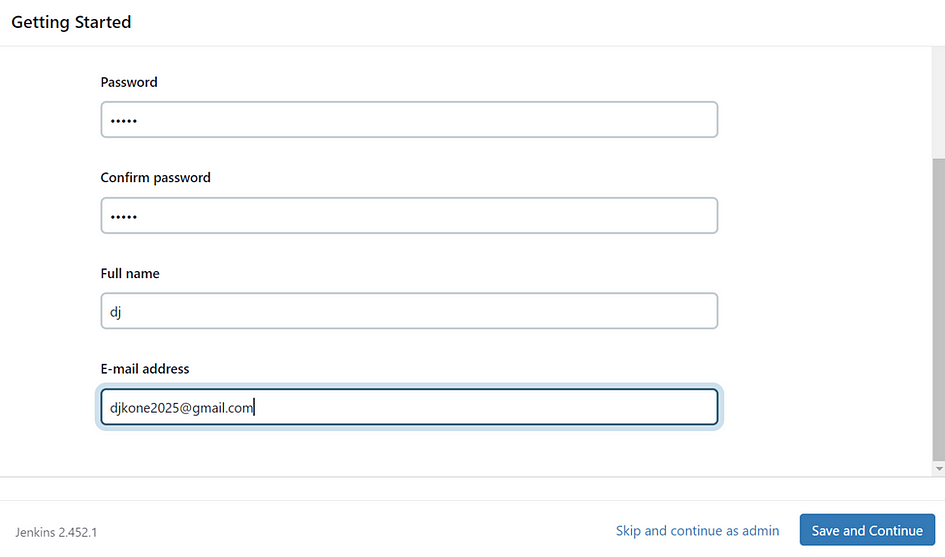
- Fill out the form in the new window by adding a password, your full name and your email address.
- Continue the configuration by adding the jenkins URL http://<your_server_public_DNS>:8080
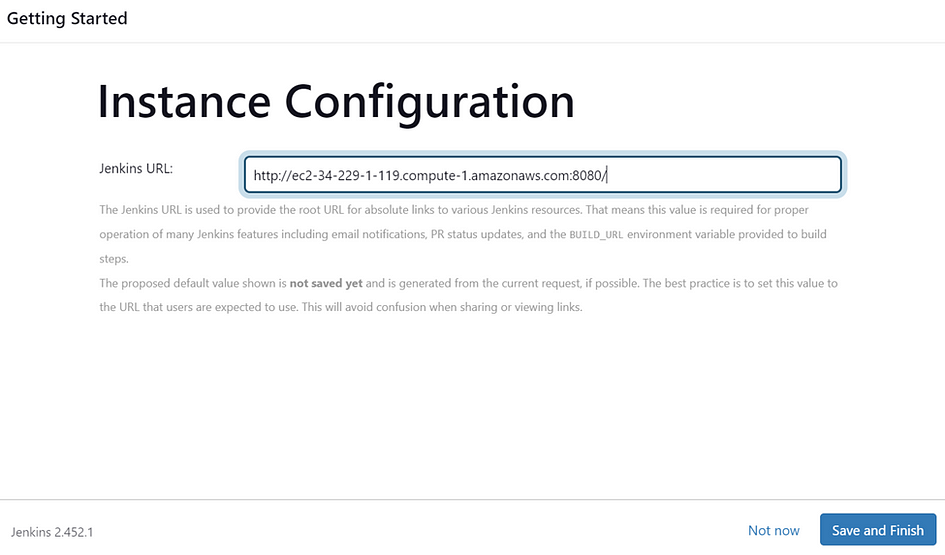
- The installation is now complete. You have your first admin user.

- On the left-hand side, select Manage Jenkins, and then select Plugins.
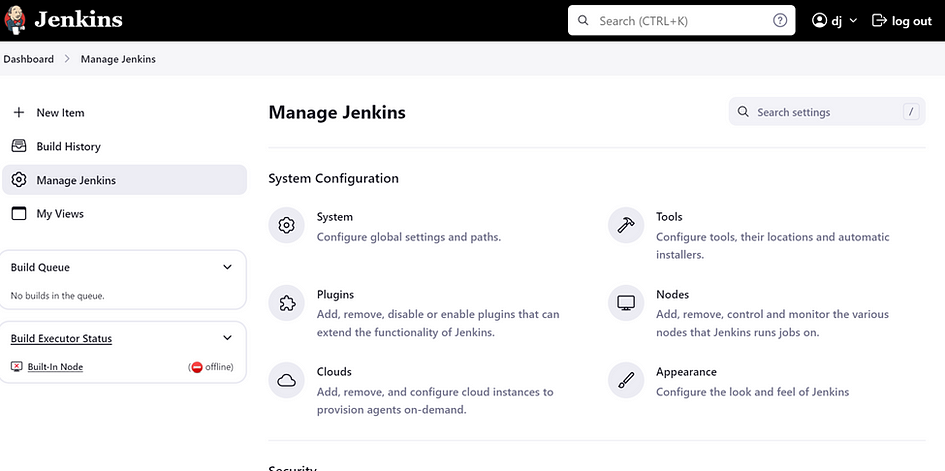
- Select Available plugins, and then enter Amazon EC2 ain the small search bar.
- Select the checkbox next to Amazon EC2 plugin, and then click Install.
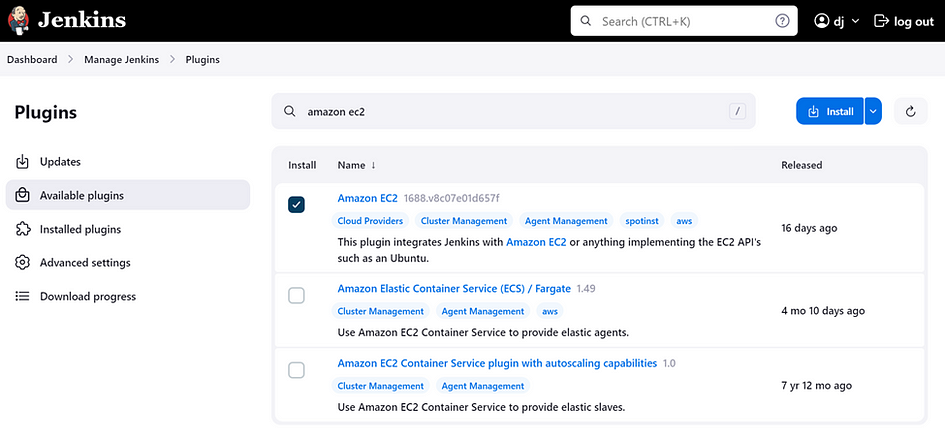
- After the installation, select Dashboard.
- Go to cloud and click New cloud.
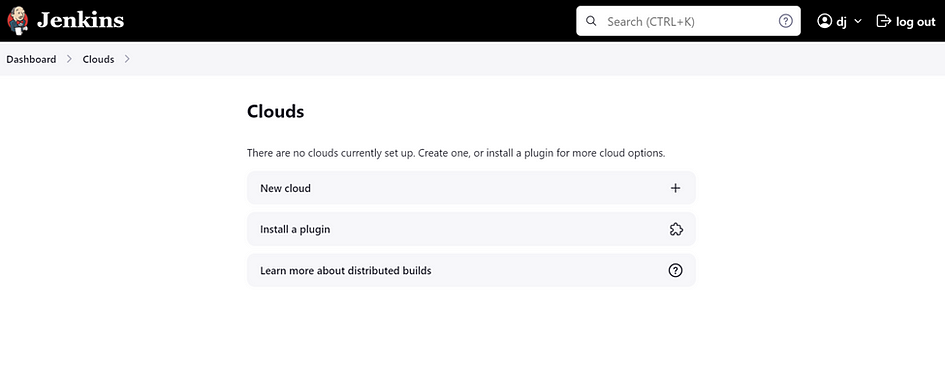
- Select AWS EC2. A collection of new fields appears.
- Click Add under Amazon EC2 Credentials
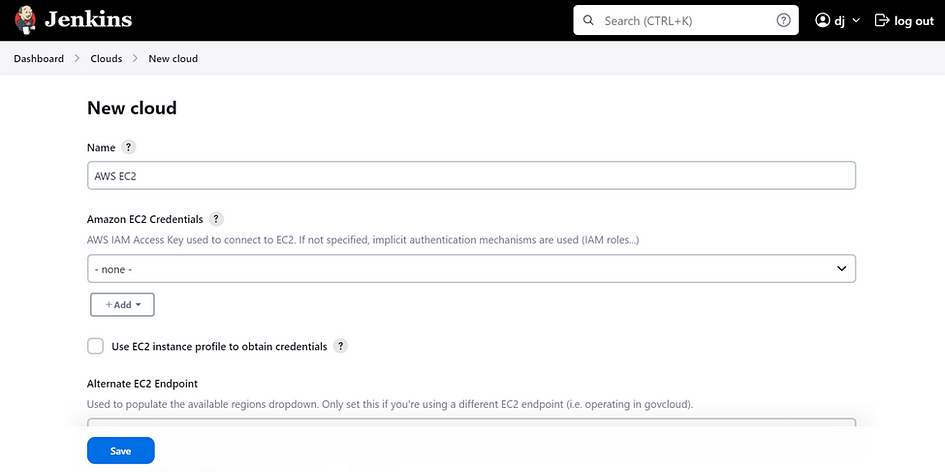
- From the Jenkins Credentials Provider, select AWS Credentials as the Kind.
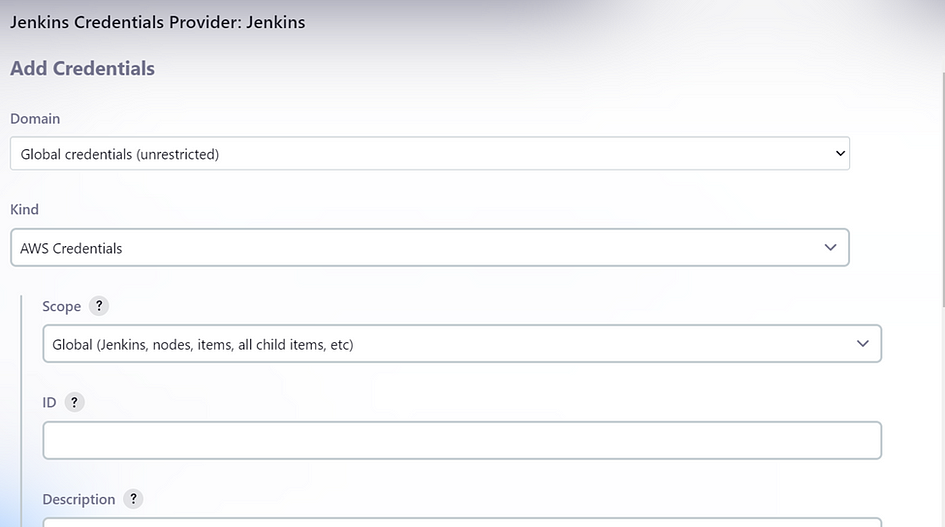
- Scroll down and enter in the IAM User programmatic access keys with permissions to launch EC2 instances and select Add.
- Scroll down to select your region using the drop-down, and select Add for the EC2 Key Pair’s Private Key.
- From the Jenkins Credentials Provider, select SSH Username with private key as the Kind and set the Username to
ec2-user. - Scroll down and select Enter Directly under Private Key, then select Add.
- Open the private key pair you created in the creating a key pair step and paste in the contents from “ — — -BEGIN RSA PRIVATE KEY — — -” to “ — — -END RSA PRIVATE KEY — — -”. Select Add when completed.
- Scroll down to “Test Connection” and ensure it states “Success”. Select Save when done.
- You are now ready to use EC2 instances as Jenkins agents.
Voila! You’ve deploy Jenkins on EC2, configure Jenkins, and prepare Jenkins agents for use.


Leave a Reply