In this tutorial, we’ll create a simple repository, make changes, create branches, and merge changes using GitHub.
Background
A GitHub workflow allows you to understand fundamental concepts like repository management, version control, branching, and collaboration.
GitHub is a platform that hosts Git repositories and provides tools for collaboration and version control. It allows users to store their Git repositories in the cloud, making it easier to manage projects, collaborate with others, and contribute to open-source projects.
Git is a distributed version control system used for tracking changes in source code. It allows multiple developers to collaborate on projects by managing different versions of files, merging changes, and maintaining a history of revisions.
DevOps Project Outline
In this short tutorial, you will create a simple repository, make changes, create branches, and merge changes using GitHub.
Prerequisite
- Basic bash scripting knowledge.
- Basic Git Knowledge.
- Access to Git Bash, Command Prompt, or Terminal.
- Access to a GitHub account.
Let’s have fun.
1- Create a GitHub Repository.
- Log in to your GitHub account.
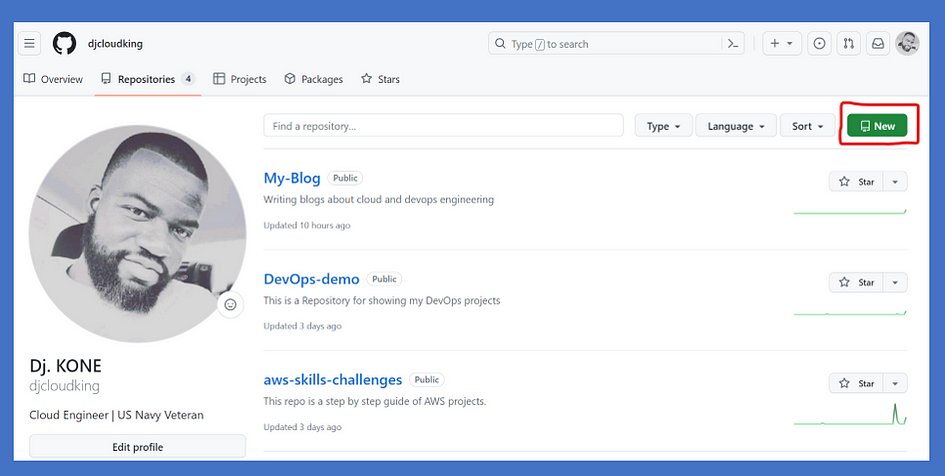
- Go to the Repositories tab, and click on the “New” button to create a new repository.
- Name your repository and add a brief description. I will name mine Git-GitHub-Demo.
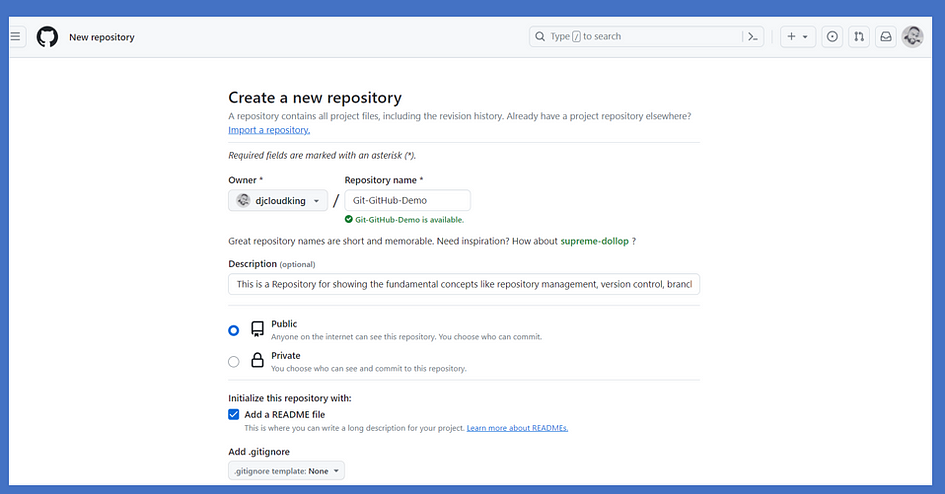
- Choose the visibility (public or private) and initialize with a README file by selecting Add a README file.
- Click on the green button Create Repository.
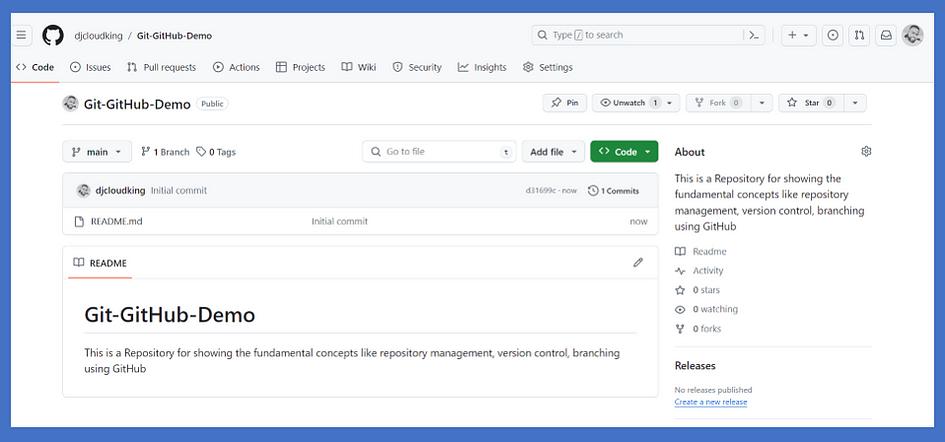
Great job! You created a repository workflow on GitHub.
2- Clone the Repository
Cloning a repository is to create a local copy of an existing repository and sync both of them on your local computer. To do that:
- First, open your Git Bash, Command Prompt, or Terminal.
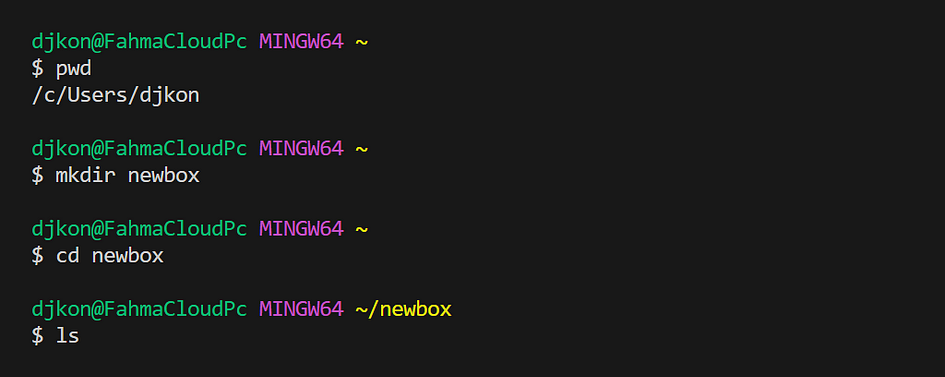
- Then, create a local directory for your repository using the command line
mkdir <name of directory>.In our case, we will make a directory called newbox. Finally, change into the directory we created usingcd newbox. Note: Usinglscommand shows that you created an empty directory named newbox.
- Now, go to the right side of your repository dashboard. Click the down arrow of the green Code button, and you will see an HTTPS clone address. Copy that address.
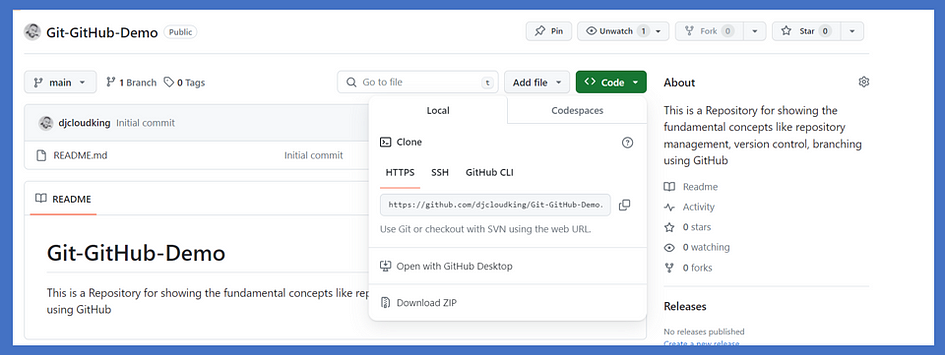
- Use the
git clonecommand to clone your repository to your local machine: git clone <repository_url copied>

Clap for yourself! You have created a directory newbox with a clone of the Git-GitHub-Demo repository in it.
3- Make Changes and Commit
Any time you need to update, add, delete, or modify files within your project, you’re making changes.
For our tutorial, let’s:
- First, modify the README file using a text editor or terminal commands.

- Open README.md in Nano and edit it.

- Check the status of changes using
git statuscommand.

Changes are staged before committing. Staging means preparing specific changes to be included in the next commit. It allows you to commit only certain changes rather than everything that’s been modified.
- Add the changes to the staging area using
git addcommand.

Commits allow you to maintain different versions of your project. If something goes wrong or you need to revert to an earlier state, you can easily reference previous commits.
- Commit the changes using
git commit -m “modified file name”.

Kudos to you. You have made changes to your copy (or clone) of the repository, committed those changes.
4- Create and Switch Branches
- Create a new branch using
git branch new-feature.

- Switch to the new branch using
git checkout new-feature.

5- Merge Changes
- Switch back to the main branch using
git checkout main.

- Merge changes from the “test” branch to the main branch using
git merge new-feature.
6- Push Changes to GitHub
- Now you are ready to push your commits back to GitHub. Push your changes to the remote repository using
git push origin main.

Well done! It’s time to go back to your GitHub account and in the Git-GitHub-Demo repository that you have been working with.
- Refresh the website and see the changes.
- Explore the commits, branches, and compare changes made in different branches.
- Observe the updated files and commit history.
Voilà! You now know how to use git branching. This was a short tutorial on how to create a simple repository, make changes, create branches, and merge changes using GitHub.


Leave a Reply