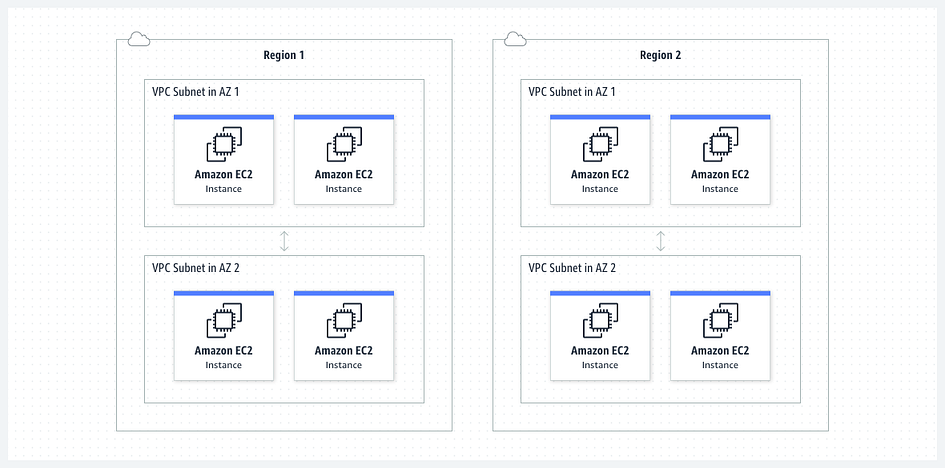
Amazon Virtual Private Cloud (Amazon VPC) enables you to launch AWS resources into a virtual network that you’ve defined.
Hello everyone. Another day Another challenge. Today, I will show you how to create a VPC. After completing this challenge, you will be familiar with AWS networking service such as VPC.
Background
Amazon VPC lets you provision a logically isolated section of the Amazon Web Services (AWS) cloud where you can launch AWS resources in a virtual network that you define.
With VPC you control your virtual networking environment, including selection of your own IP address ranges, creation of subnets, and configuration of route tables and network gateways.
Prerequisite
For this project, you need an AWS account. Set up a Free-Tier account www.aws.amazon.com/free
Project Outline
Build a VPC with 3 subnets named “Web”, “App”, and “Data”. The “Web” subnet should contain half the available IPV4 addresses while the other two contain one quarter each. Each subnet should be in a separate Availability Zone within the same AWS region. VPC CIDR: 10.1.1.0/24.
Now let’s have fun
- Log in to your AWS console, select Us-east-1 (N. Virginia) as your region and go to the VPC dashboard.
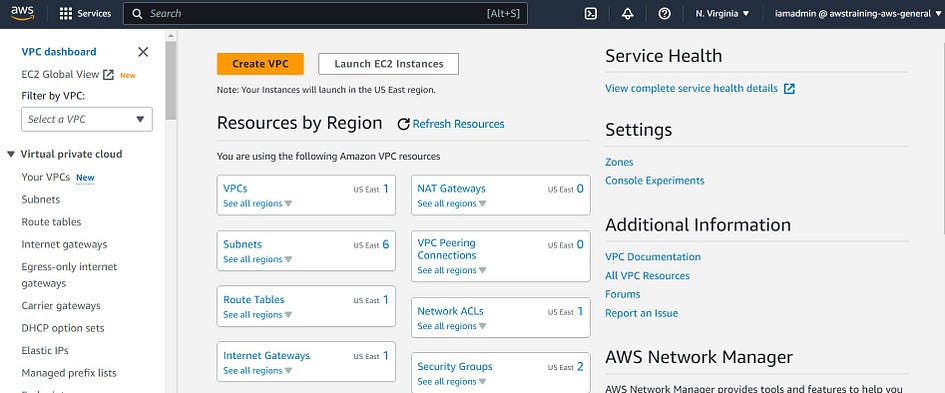
- Then click on “Create VPC’.
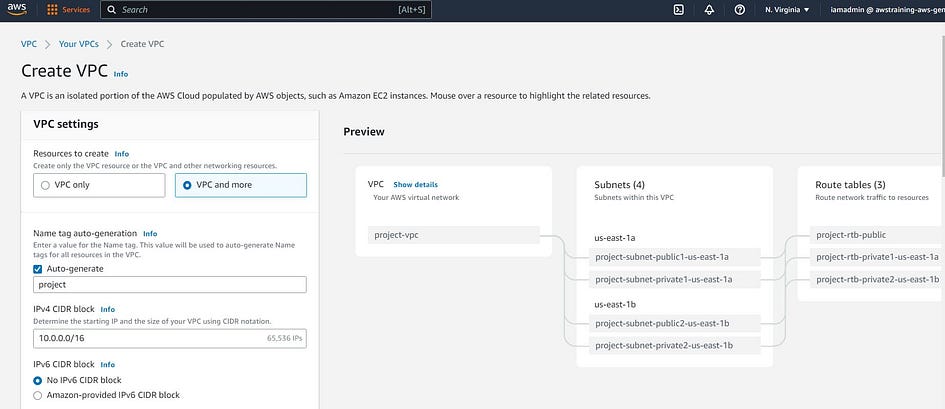
- Select VPC and more for resources to create.
- Leave “auto-generate” checked. You can change the name or leave it as default.
Cheat Sheet: the names that you specify for the VPC and the other VPC resources are used to create Name tags. If you use the name tag auto-generation feature in the console, the tag values have the format name–resource.
- For IPv4 CIDR block, Enter “10.1.1.0/24” as the CIDR block for your VPC
- For IPv6 CIDR block, check “no IPv6 CIDR block”
- For Tenancy, Choose the default option “default”
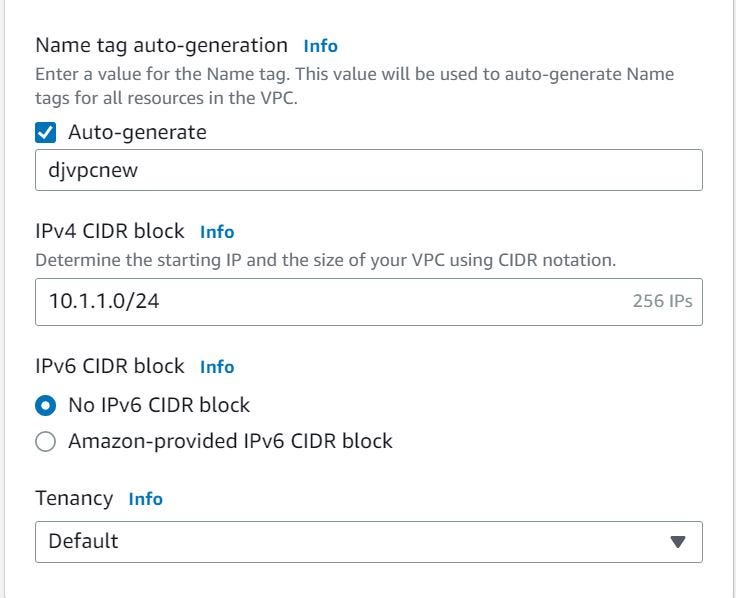
Cheat Sheet: A VPC must have an IPv4 address range. To support IPv6 traffic, you can select IPv6 CIDR block, Amazon-provided IPv6 CIDR block.
- For availability zone, choose 3.
- For public/private subnet, click on zero (0). You will create subnets associate them to this vpc later in the process.
- For everything else (or the following options), leave the “default” version.
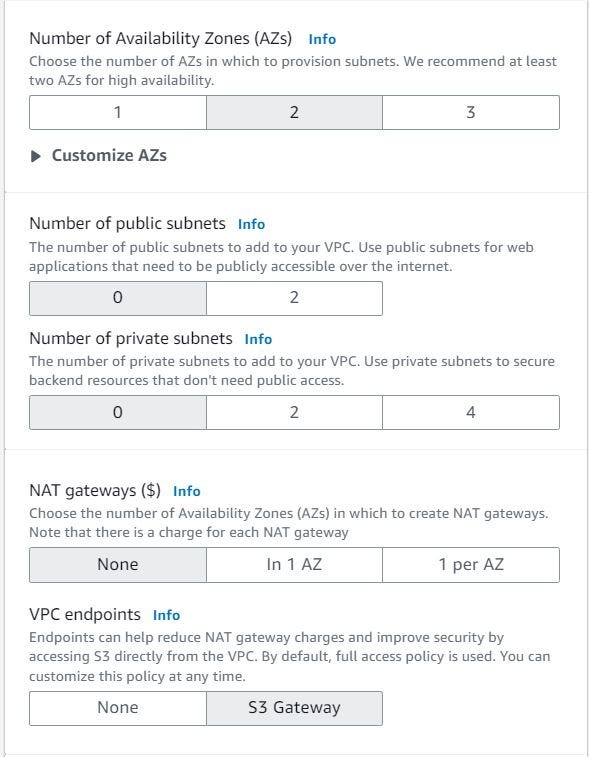
- Then click on “Create VPC”.
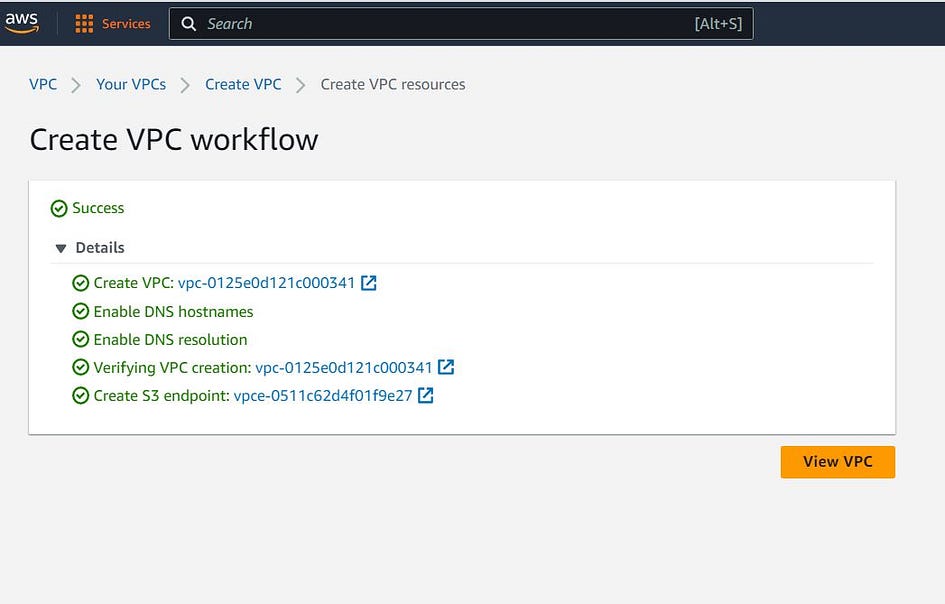
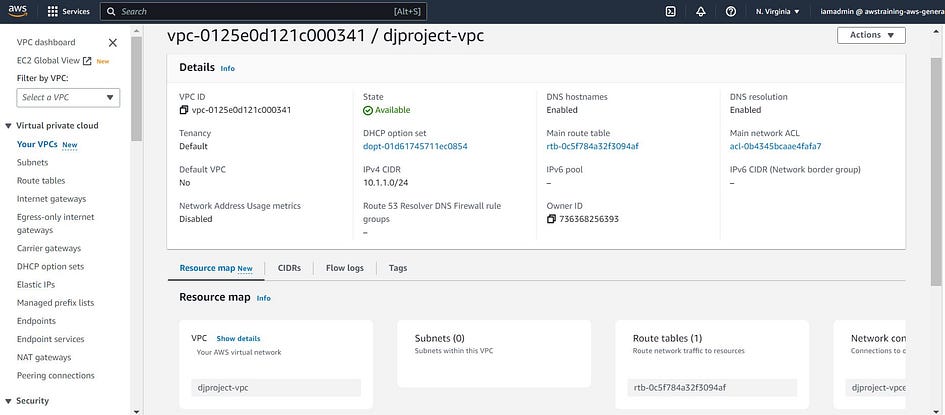
- After your VPC is created, click on “Create Subnet” on the left side of your dashboard to create your first subnet named “Web”.
- Click on “create subnet” again and follow the wizard.
- Select the VPC ID you just created a moment ago.
- In subnet settings, enter the “Web” as the name of your subnet. Then, choose the VPC you just created from the dropdown menu. Choose an available Availability Zone from the dropdown menu. Now, enter “10.1.1.0/25” as the CIDR block for your Web subnet. Finally, click on “Create” to create your Web subnet.
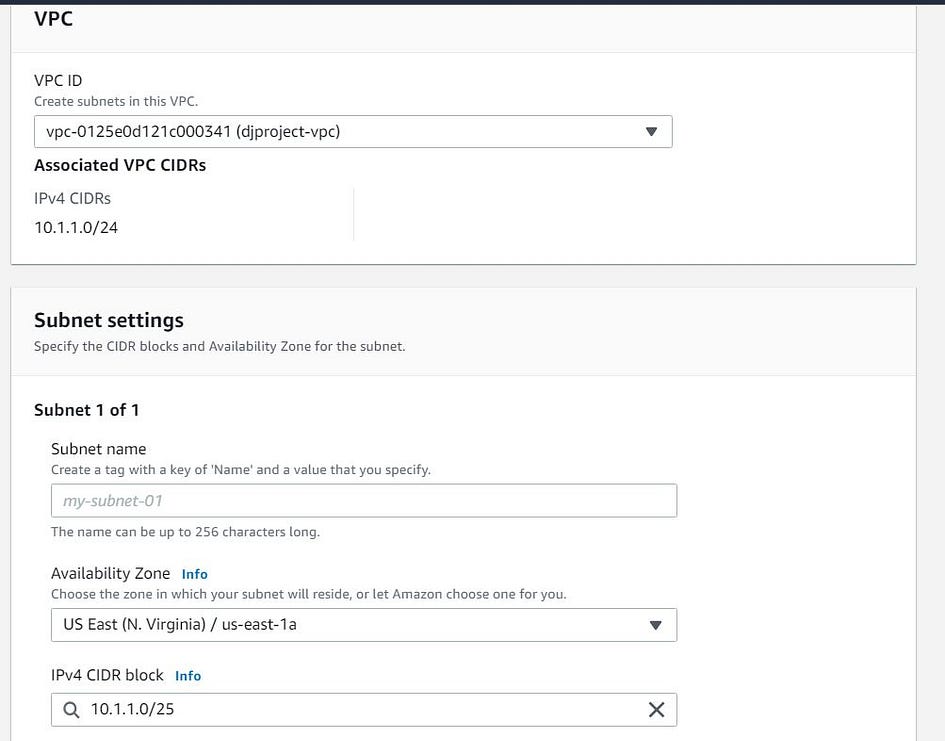
- Repeat the same steps to create your second subnet named “App”. In subnet settings, enter the “Web” as the name of your subnet. Then, choose the VPC you just created from the dropdown menu. Choose a different Availability Zone from the one you selected for your App subnet. Enter “10.1.1.128/26” as the CIDR block for your App subnet. Finally, click on “Create” to create your App subnet.
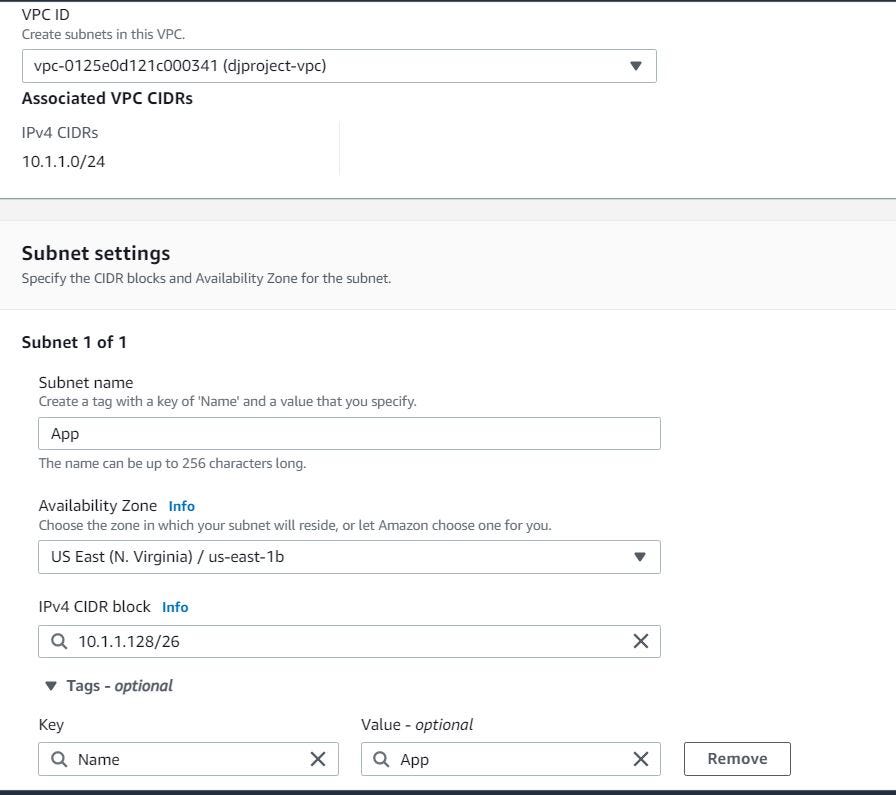
- Repeat the same steps to create your third subnet named “Data”. In subnet settings, enter the “Data” as the name of your subnet. Then, choose the VPC you just created from the dropdown menu. Choose a different Availability Zone from the ones you selected for your Web and App subnets. Now, enter “10.1.1.192/26” as the CIDR block for your Data subnet. Finally, click on “Create” to create your Data subnet..
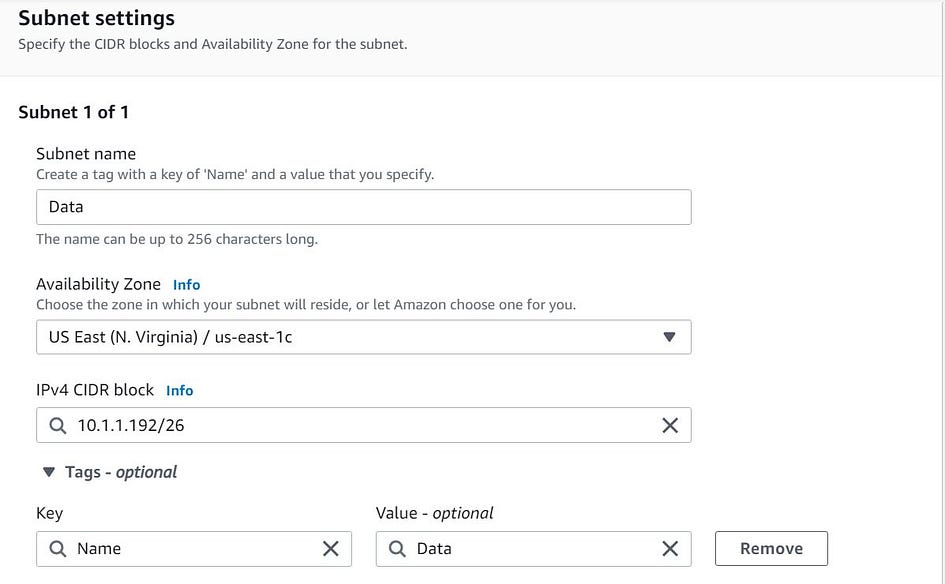
- Your VPC with 3 subnets named “Web”, “App”, and “Data” is ready to use.


Cheat Sheet: Each subnet must reside entirely within one Availability Zone and cannot span zones.
Voilà! you have built a VPC with 3 subnets (and IPV4 addresses, separate Availability Zones within the same AWS region, and VPC CIDR: 10.1.1.0/24).
Thank you for reading and/or following along! Please stay tuned for all my upcoming projects, and feel free to check out the rest of my articles.


Leave a Reply