“Give to Caesar what belongs to Caesar” — French proverb.
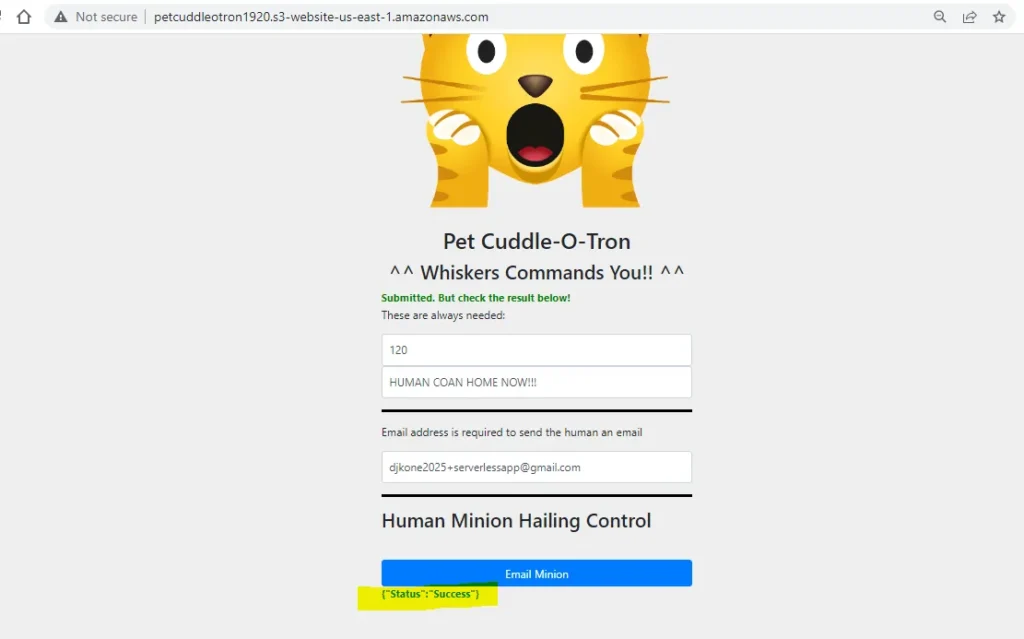
Before jumping in the meat and potato, I want to shout out a huge thanks to Adrien Cantrill. He has the best course for AWS. The project below is one of the many demos he provided in his AWS SAA C03 course.
Prerequisite
For this advanced project, you need an AWS account. Set up a Free Tier account www.aws.amazon.com/free
Project outline
Let’s have fun building a Serverless App-pet-cuddle-o-tron. In this project I will show you how to implement a Serverless reminder application. The application will load from an S3 bucket and run in a browser communicating with Lambda and Step functions via an API Gateway Endpoint. Using the application I will configure reminders for ‘pet cuddles’ to be send using email and SMS.
Step 1 : Configure Simple Email Service (SES)
1.A. Verify SES application sending email address
- Ensure you are logged into an AWS account, have admin privileges and are in the us-east-1 / N. Virginia Region.
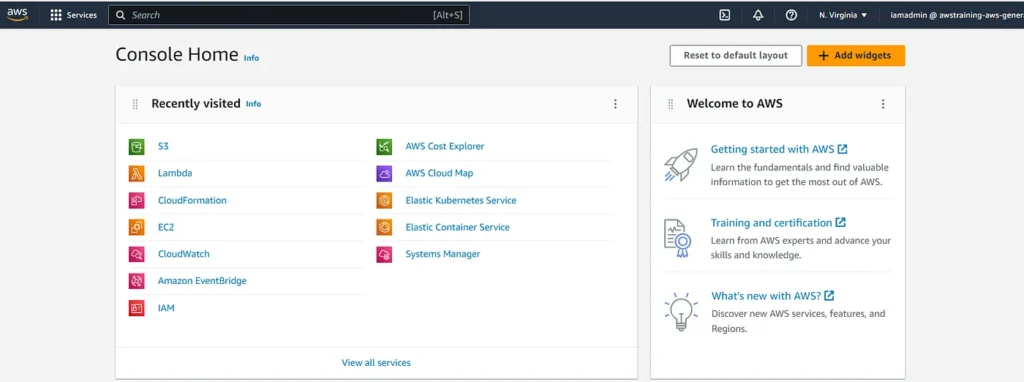
- In the AWS console, move to the SES.
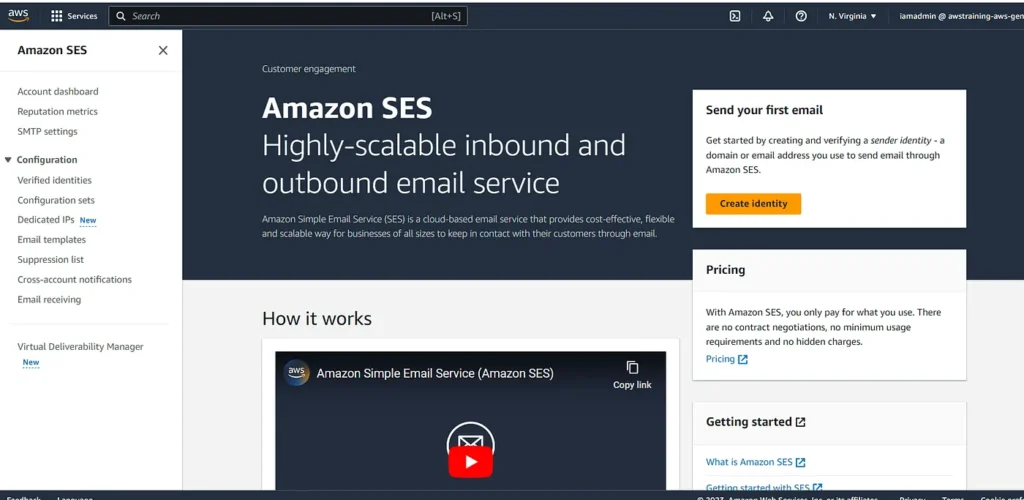
- Click on Verified Identities under Configuration. Click Create Identity and check the ‘Email Address’ checkbox.
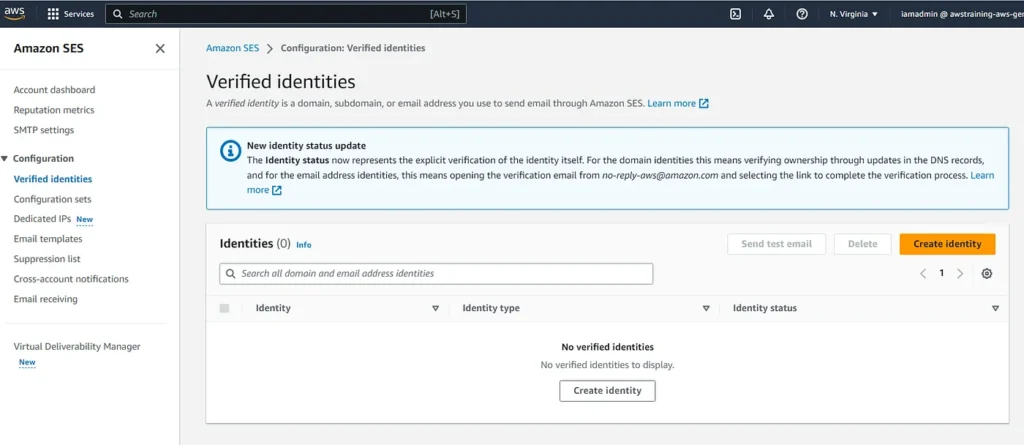
Cheat sheet: A verified identity is a domain, subdomain, or email address you use to send email through Amazon SES. Identity verification at the domain level extends to all email addresses under one verified domain identity.
For my app email, I will us [email protected] to send from. Thus, you can enter whatever email you want (it needs to be a valid address as it will be checked).
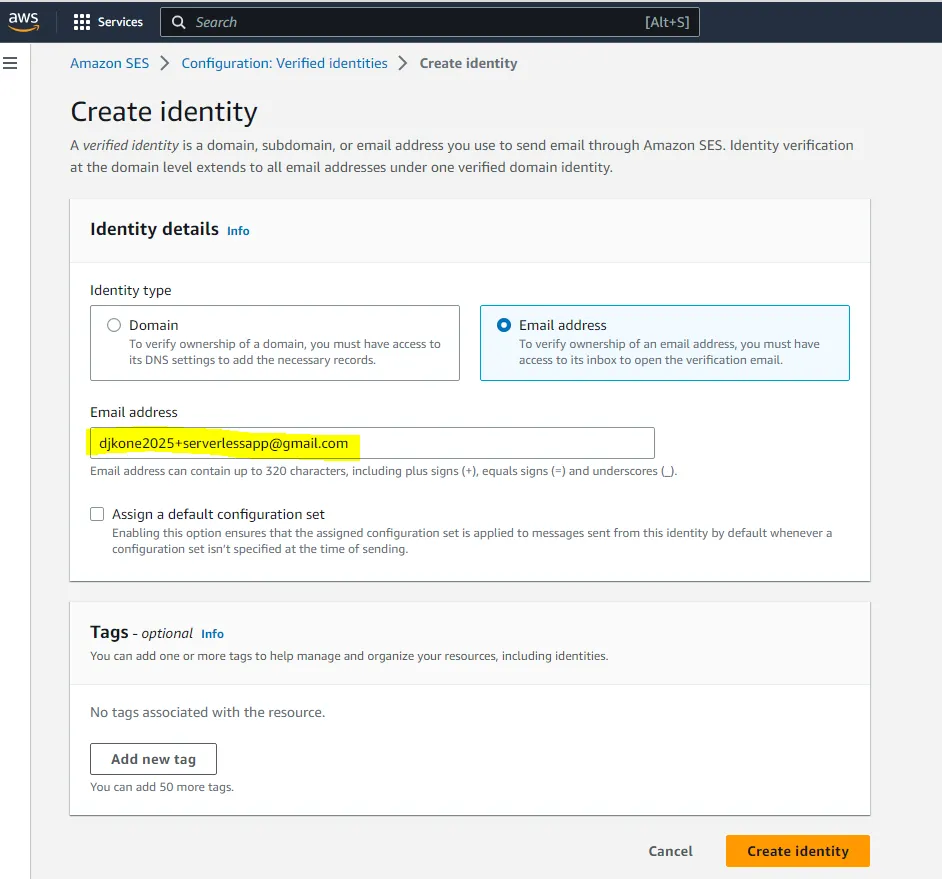
- Click Create Identity. You will receive an email to this address containing a link to click. Click that link. You should see a Congratulations! message.
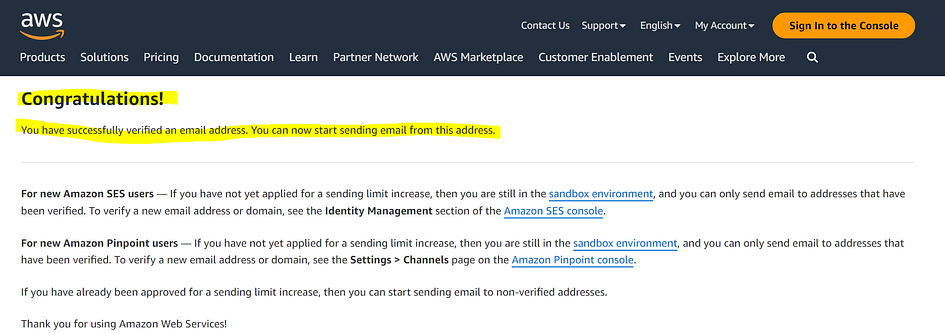
- Return to the SES console and Refresh your browser, the verification status should now be verified. Record this address somewhere save as the PetCuddleOTron Sending Address.
1.B — Verify SES application customer email.
Please follow the same steps as listed above to verify this email. You can use a different email address for the test customer (recommended) like I did ([email protected]). Finally, record this address somewhere save as the PetCuddleOTron Customer Address.
Step 1 Conclusion: At this stage you have whitelisted 2 email addresses for use with SES (the PetCuddleOTron Sending Address and the PetCuddleOTron Customer Address).
Step 2 : Add an email lambda function to use SES to send emails for the Serverless application.
2.A — Create the Lambda Execution Role for Lambda
- create an IAM role which the email_reminder_lambda will use to interact with other AWS services.
Cheat Sheet: You could create this manually, but its easier to do this step using cloudformation to speed things up. - Use this 1-click deployment to start.
- Check the I acknowledge that AWS CloudFormation might create IAM resources box and then click Create Stack.
Cheat Sheet: Wait for the Stack to move into the CREATE_COMPLETE state before moving into the next.
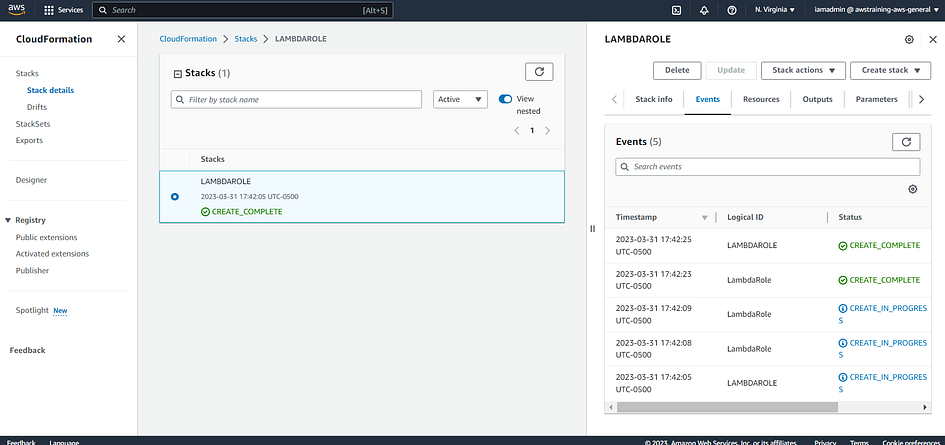
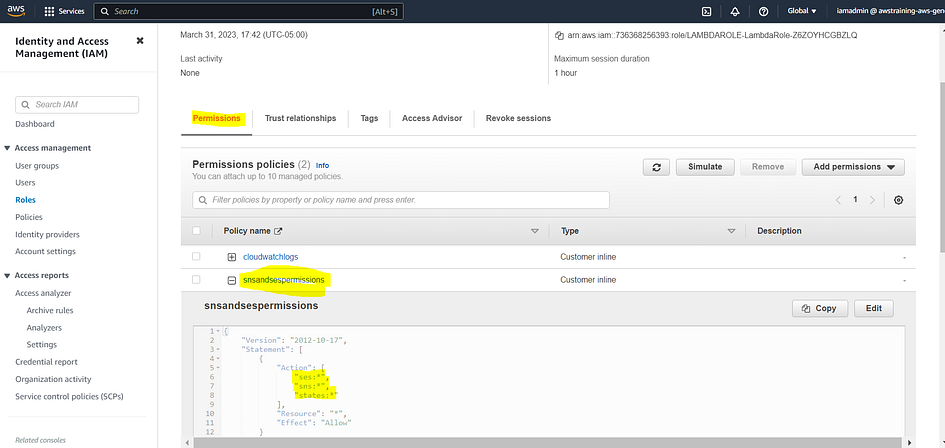
- Move to the IAM Console and review the execution role.
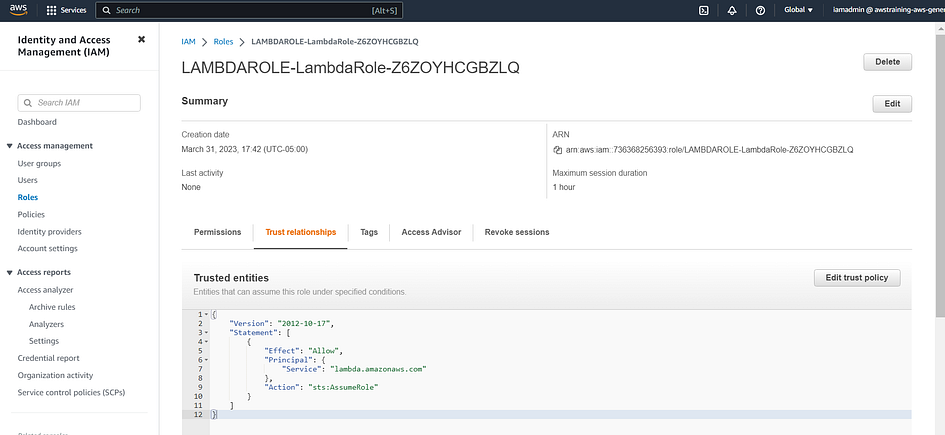
Cheat Sheet: Notice that it provides SES, SNS and Logging permissions to whatever assumes this role. This is what gives lambda the permissions to interact with those services. If you click on Permissions, you will see that this lambda function has actions on sns, ses and states. Same for Cloudwatchlogs, this lambda function has all the permissions needed.
2.B — Create the email_reminder_lambda function
- Move back to the lambda console.
- Click on Create Function.
- Select Author from scratch. For Function name enter email_reminder_lambda and for runtime click the dropdown and pick Python 3.9 or the latest version you have available.
- Expand Change default execution role. Select Use an existing Role. Click the Existing Role dropdown and select LambdaRole.
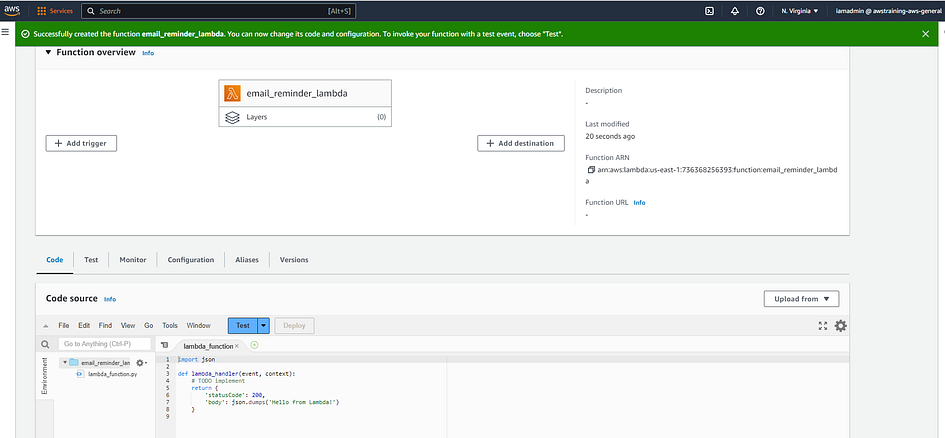
- Click Create Function. You’ve successfully created the function email_reiminder_lamda.
2.C — Configure the email_reminder_lambda function
- Scroll down, to Function code in the lambda_function code box, select all the code and delete it.
- Paste in the code below.
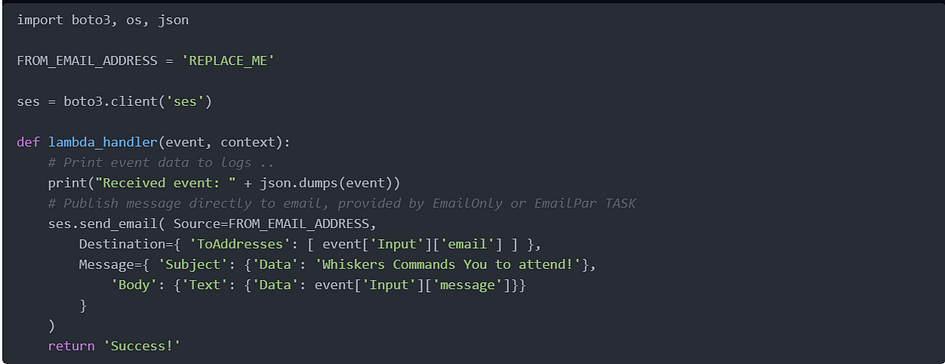
Cheat Sheet: This function will send an email to an address it’s supplied with (by step functions) and it will be FROM the email address we specify.
- Select REPLACE_ME in the code and replace with the PetCuddleOTron Sending Address which you created in Step 1.
- Click Deploy to configure the lambda function.
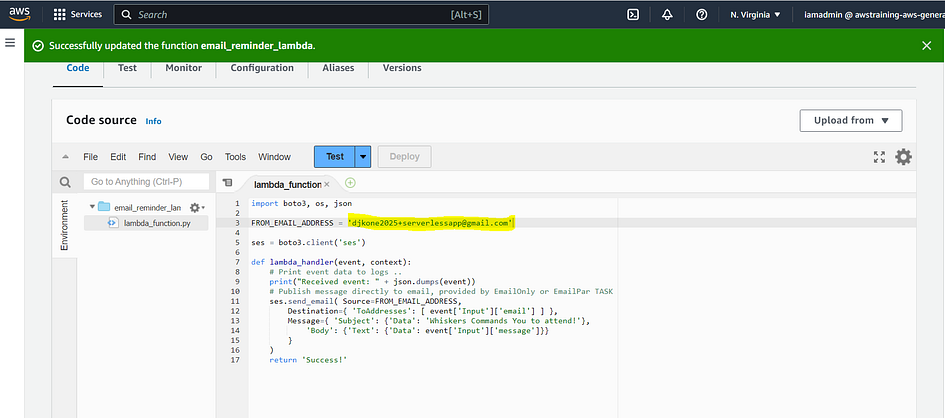
- Scroll all the way to the top, and click the copy icon next to the lambda function ARN. Note this ARN down somewhere same as the email_reminder_lambda ARN. Mine was arn:aws:lambda:us-east-1:736368256393:function:email_reminder_lambda
Step 2 Conclusion: At this stage you have configured the lambda function which will be used eventually to send emails on behalf of the serverless application.
Step 3 : Implement and configure the state machine, the core of the application.
3.A. Create State Machine Role.
- Click on1-click deployment and start.
- Check I acknowledge that AWS CloudFormation might create IAM resources box and then click Create Stack. Wait for the Stack to move into the CREATE_COMPLETE state before moving into the next
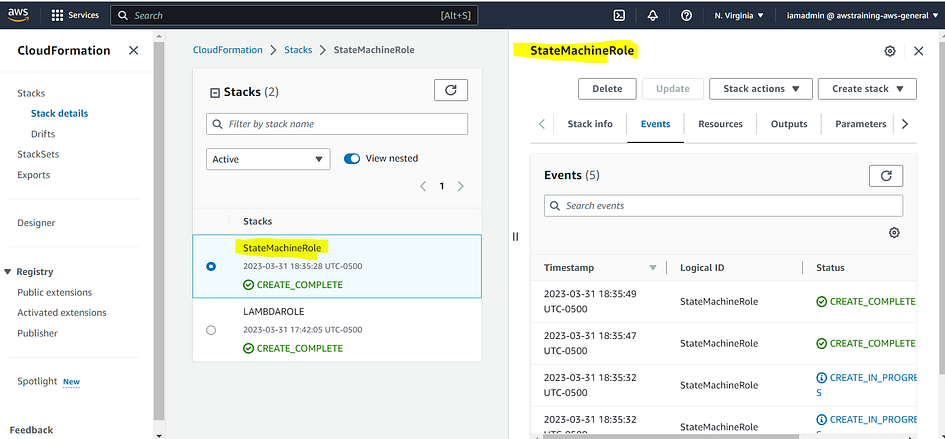
- Move to the IAM and review the STATE MACHINE role note how it gives logging permissions, the ability to invoke the email lambda function when it needs to send emails, and the ability to use SNS to send text messages.
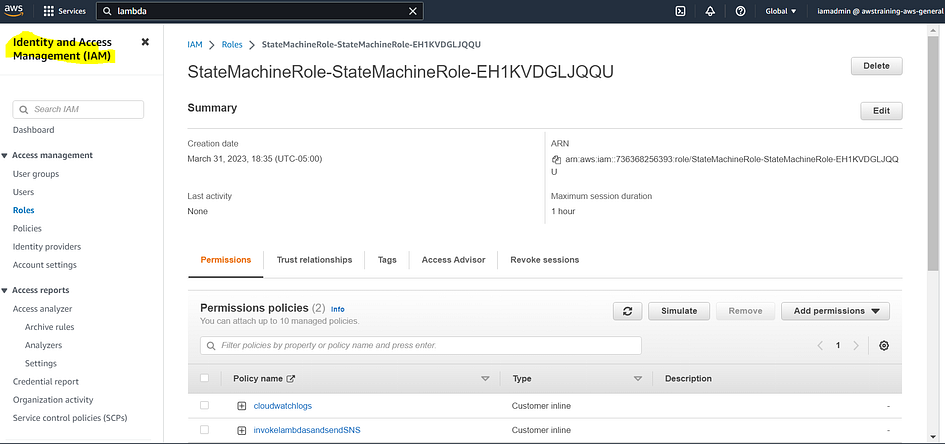
3.B. Create a State Machine
- Move to the AWS Step Functions Console.
- Click the Hamburger Menu at the top left and click on State Machine. Click on Create State Machine.
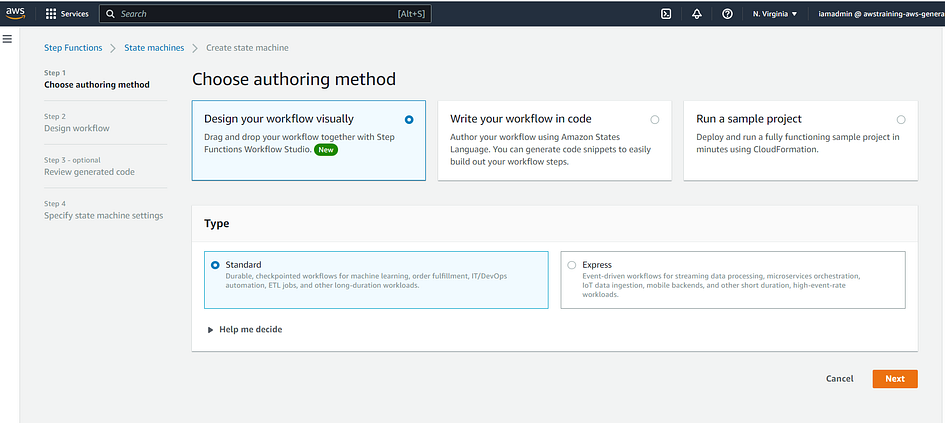
- Select Write your workflow in code which will allow you to use Amazon States Language.
- Scroll down for type, select standard.
- Open this Amazon States Language (ASL) file for the
pet-cuddle-o-tron - Copy the contents into your clipboard.
- Move back to the step functions console. Select all of the code snippet and delete it. Paste in your clipboard
- Click the Refresh icon on the right side area (next to the visual map of the state machine).
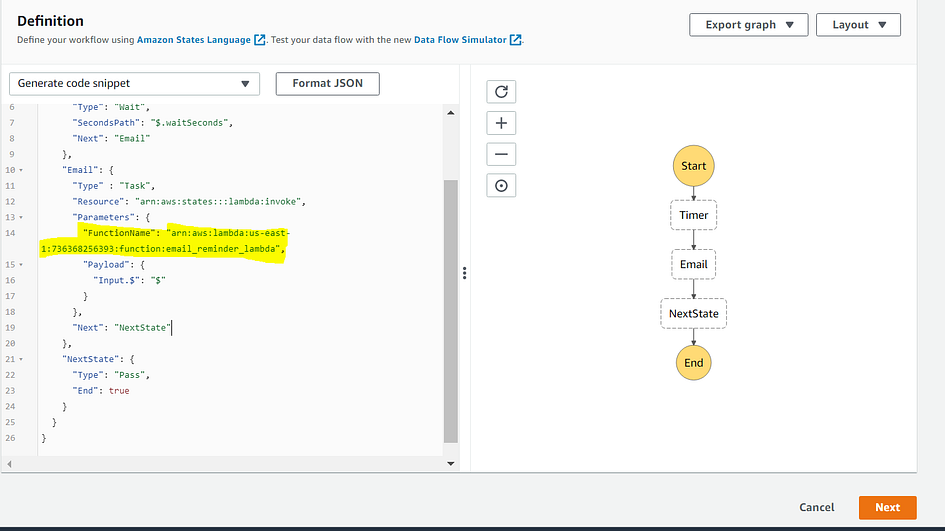
3.C. Configure State Machine
- In the state machine ASL (the code on the left) locate the
EmailOnlydefinition. - Look for
EMAIL_LAMBDA_ARNwhich is a placeholder, replace this with the email_reminder_lambda ARN you noted down in the previous step. This is the ARN of the lambda function you created. - Scroll down to the bottom and click
nextForState machine nameusePetCuddleOTron - Scroll down and under
PermissionsselectChoose an existing roleand selectStateMachineRolefrom the dropdown - Scroll down, under
Logging, change theLog LeveltoAll
Scroll down to the bottom and clickCreate state machine - Locate the
ARNfor the state machine on the top left (note this down somewhere safe asState Machine ARN.Mine is arn:aws:states:us-east-1:736368256393:stateMachine:PetCuddleOTron
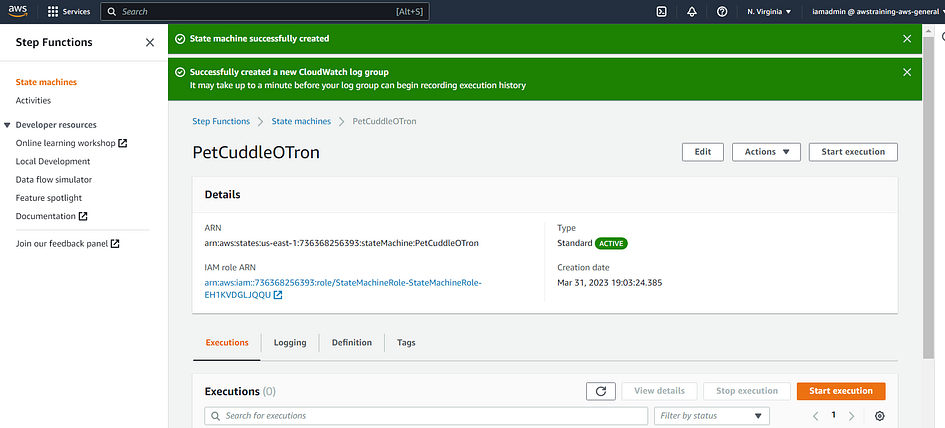
Step 3 Conclusion: At this stage you have configured the state machine which is the core part of the serverless application. The state machine controls the flow through the application and is responsible for interacting with other AWS products and services.
Step 4 : Implement the API Gateway, API and supporting lambda function.
4.A. Create API Lambda Function which supports API Gateway
- Go back to the Lambda console.
- Click on Create Function.
- For Function Name use api_lambda. For Runtime use Python 3.9 or the latest version available.
- Expand Change default execution role. Select Use an existing role.
- Select the LambdaRole from the dropdown.
- Click on Create Function. You’ve successfully created a lambda function which will support the API Gateway.
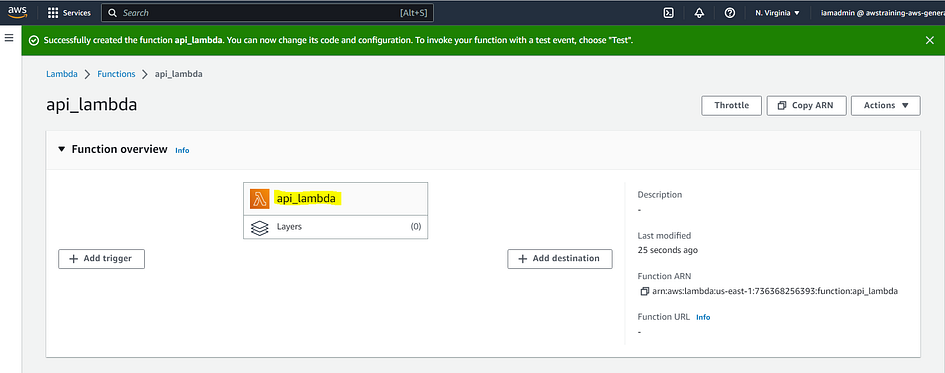
4. B. Configure the Lambda Function (using the current UI)
- Scroll down, and remove all the code from the lambda_function text box. Open this link in a new tab (it’s a .py file). Open it in your favorite code editor. Then, Copy it all into your clipboard.
- Go back to the Lambda console. Select the existing lambda code and delete it. Then, paste the code into the lambda function.
Cheat Sheet: This is the function which will provide compute to API Gateway. It’s job is to be called by API Gateway when its used by the serverless front end part of the application (loaded by S3). It accepts some information from you, via API Gateway and then it starts a state machine execution — which is the logic of the application.
- Locate the YOUR_STATEMACHINE_ARN placeholder and replace this with the State Machine ARN you noted down in the previous step.
- Click Deploy to save the lambda function and configuration.
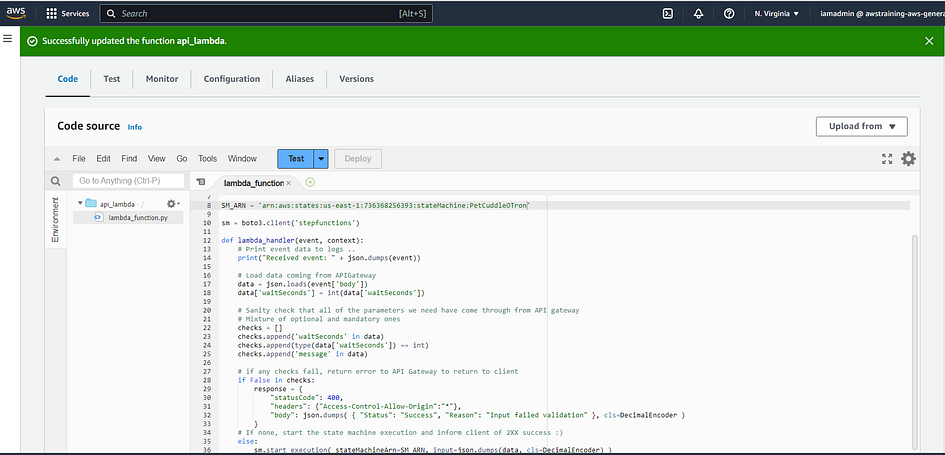
Now you’ve successfully created the api_lambda function. The next step is to create the API Gateway, API and Method which the front end part of the Serverless application will communicate with.
4. C. Create API
- Go to the API Gateway console.
- Click on APIs on the menu on the left.
- Locate the REST API box, and click on Build. If you see a popup dialog Create your first API, click OK.
- Under Create new API ensure New API is selected.
- For API name* enter petcuddleotron
- For Endpoint Type, select Regional. Click on create API.
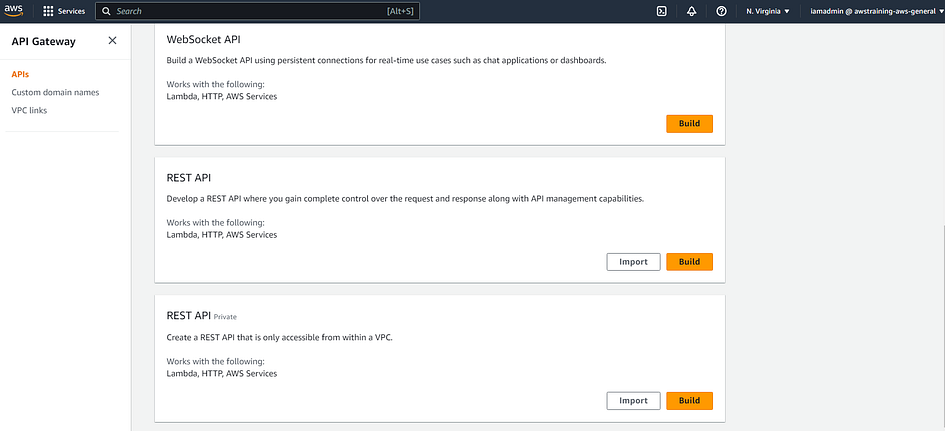
4. D. Create Resource
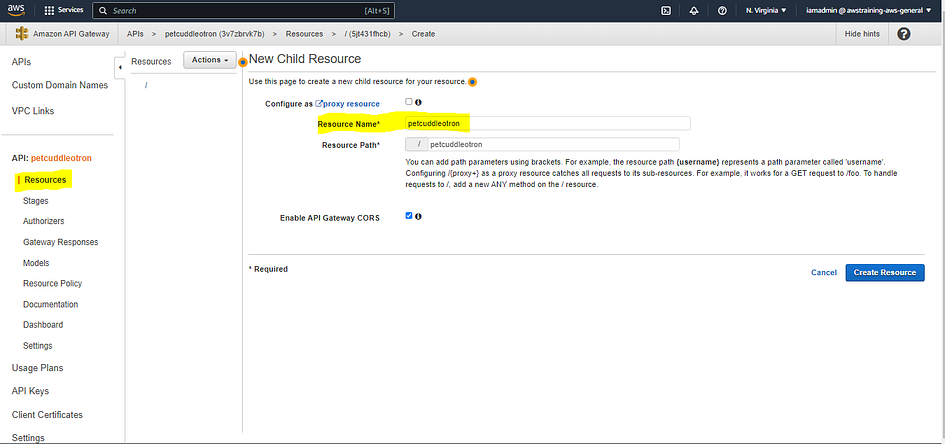
- Click the Actions dropdown and Click Create Resource.
- Under resource name enter petcuddleotron. Make sure that Configure as proxy resource is NOT ticked — this forwards everything as is, through to a lambda function, because we want some control, we DONT want this ticked.
- At the bottom MAKE SURE TO TICK Enable API Gateway CORS.
Cheat Sheet: this relaxes the restrictions on things calling on our API with a different DNS name, it allows the code loaded from the S3 bucket to call the API gateway endpoint. If you DONT check this box, the API will fail.
- Click on Create Resource.
4. E. Create Method
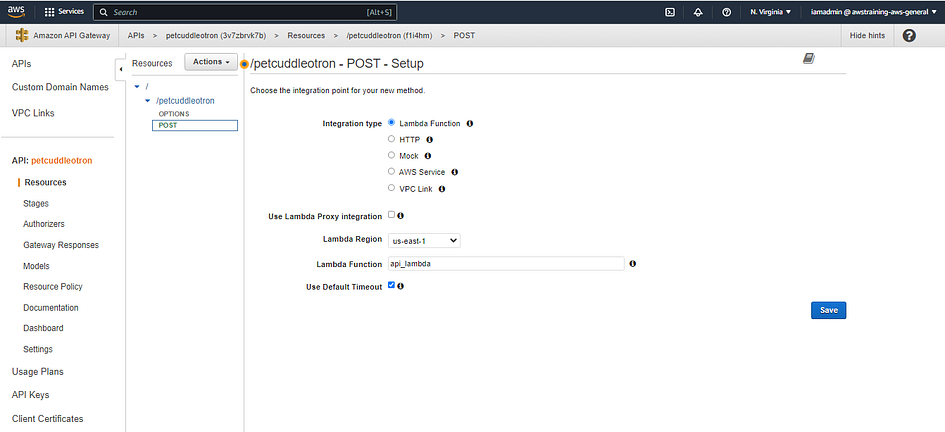
- Select the /petcuddleotron resource.
- Click on Actions dropdown and click on create method.
- In the small dropdown box which appears below /petcuddleotron, select POST and click the tick symbol next to it.
- Select Lambda Function in Integration Type. Select us-east-1 for Lambda Region.
- Type api_lambda in the Lambda Function box. Select api_lambda and not email reminder lambda.
- Tick Use Default Timeout box and Use Lambda Proxy integration box. Then Click Save.
4. F. Deploy API
- Click on Actions Dropdown and Deploy API.
- For Deployment Stage select New Stage. For stage name and stage description enter prod.
- Click Deploy.
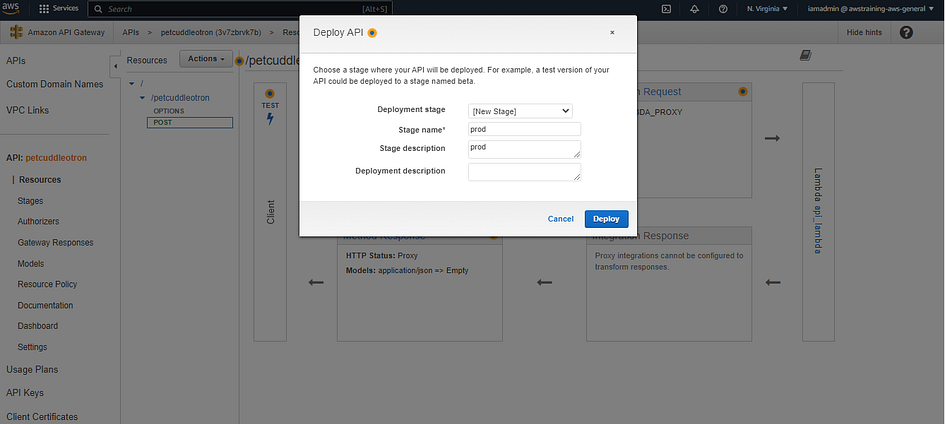
Cheat Sheet: At the top of the screen will be an Invoke URL. Note this down somewhere safe, you will need it in the next step. Mine is https://3v7zbrvk7b.execute-api.us-east-1.amazonaws.com/prod. This URL will be used by the client side component of the Serverless application and this will be unique to you.
Step 4 Conclusion: At this stage you have configured the last part of the AWS side of the serveless application. Now, you have SES Configured, an email Lambda function to send email using SES, a State Machine configured which can send EMAIL after a certain time period when invoked, and an API, Resource & Method, which use a lambda function for backing deployed out to the PROD stage of API Gateway.
In step 5, we will configure the client side of the application (loaded from S3, running in a browser) so that it communicates to API Gateway.
Step 5 : Implement the static frontend application and test functionality.
5.A. Create the S3 bucket
Please read this article Create a S3 bucket if you don’t know how to do it.
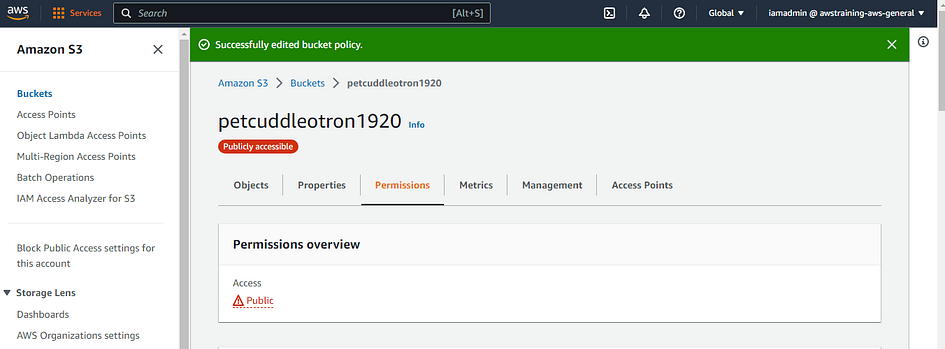
5.B. Set the bucket as public
- Go into the bucket you just created. Click on the Permissions tab.
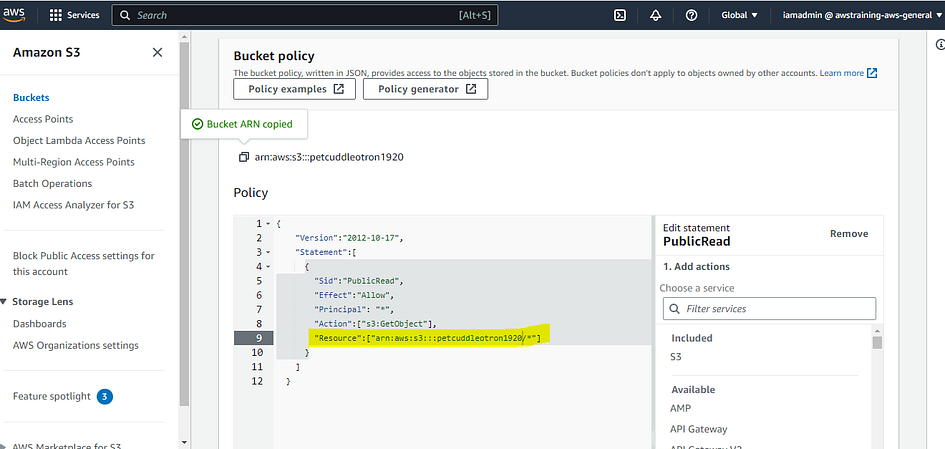
- Scroll down and in the Bucket Policy area, click Edit.
- In the box, paste the code below
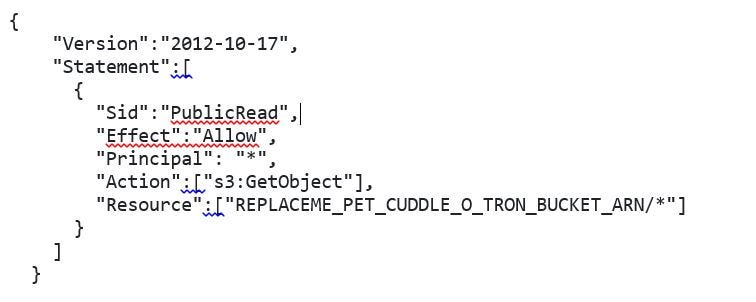
- Replace the REPLACEME_PET_CUDDLE_O_TRON_BUCKET_ARN (DO NOT to include the /*) with the bucket ARN, which you can see near to Bucket ARN
- Click Save Changes.
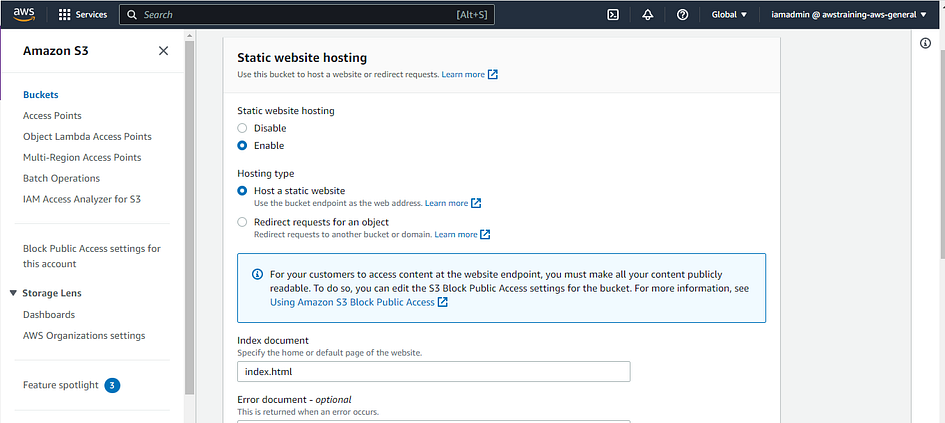
5.C. Enable Static Hosting
Read this article to learn how to enable static hosting.
Note: For both Index Document and Error Document enter index.html Click Save Changes and note down the bucket endpoint URL.
5.D. Download and edit front end files
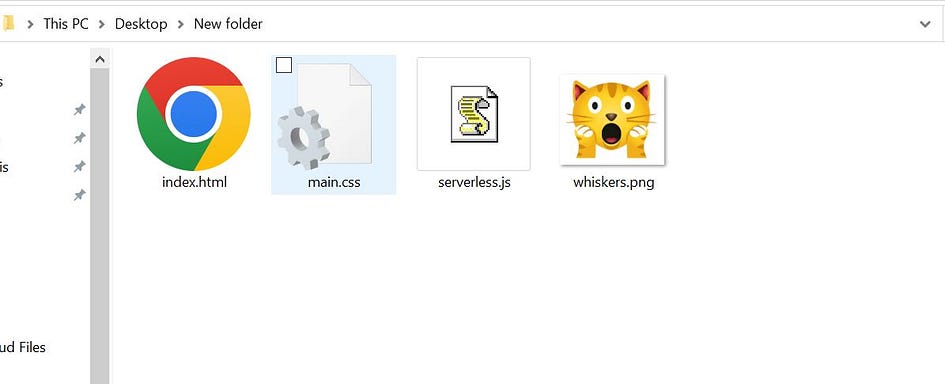
- Download and extra this ZIP file.
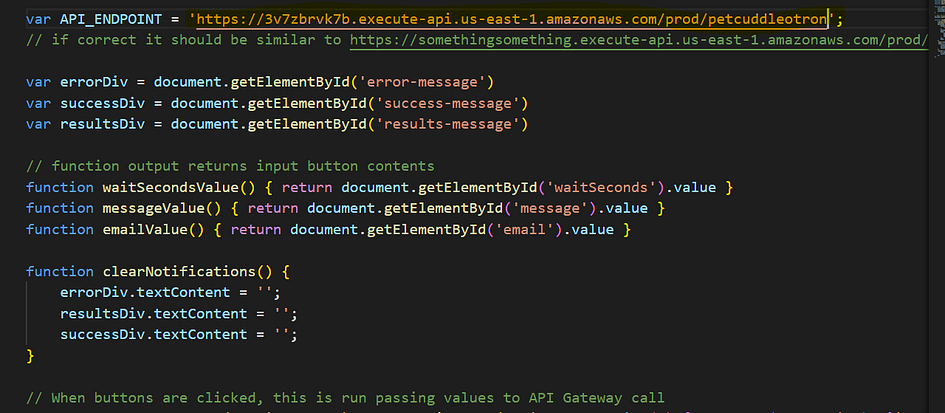
- Inside the serverless_frontend folder are the front end files for the serverless website :index.html (the main index page), main.css (the stylesheet for the page), whiskers.png (an image of whiskers), and serverless.js (the JS code which runs in your browser). It responds when buttons are clicked, and passes and text from the boxes when it calls the API Gateway endpoint.
- Open the serverless.js in a code/text editor.
- Locate the placeholder REPLACEME_API_GATEWAY_INVOKE_URL.
- Replace it with your API Gateway.
- Invoke URL at the end of this URL and add /petcuddleotron. You should get sonething like this https://somethingsomething.execute-api.us-east-1.amazonaws.com/prod/petcuddleotron
- Save the file.
5.E. Upload and Test
- Go back to the S3 console.
- Click on the Objects Tab. Then click Upload.
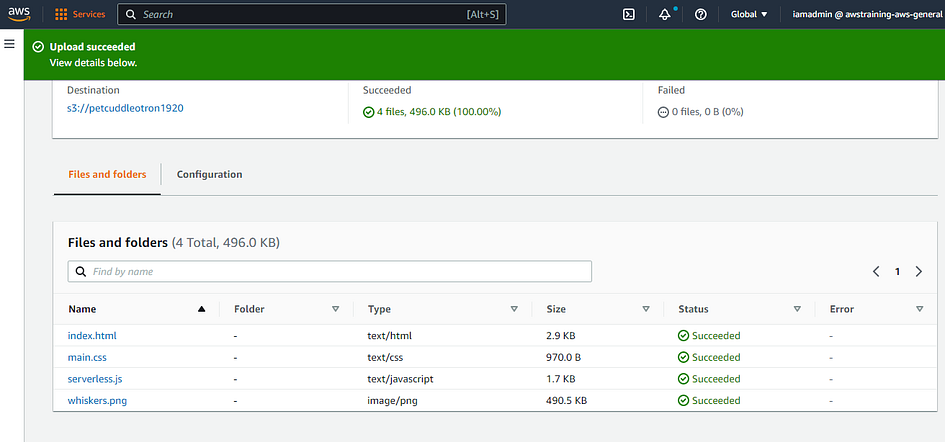
- Upload the 4 files from the serverless_frontend folder onto this tab, including the serverless.js file you just edited.
- Please wait for it to complete.
- Click Exit. Verify All 4 files are in the Objects area of the bucket.
- Open the PetCuddleOTron URL you just noted down in a new tab.
Now let’s test the application.
- Enter an amount of time until the next cuddle. I used 120 seconds.
- Enter a message, i used HUMAN COAN HOME NOW. Then enter the PetCuddleOTron Customer Address in the email box, this is the email which you verified right at the start as the customer for this application.
Cheat Sheet: if you want to see how the application works do the following:
- open a new tab to the Step functions console.
- Click on PetCuddleOTron.
- Click on the Logging tab, you will see no logs CLick on the Executions tab, you will see no executions.
- Move back to the web application tab (s3 bucket), then click on Email Minion Button to send an email.
- Back to the Step functions console, select the Executions Tab.
- Click on the Refresh Icon. Click on the execution. Watch the graphic.
Cheat Sheet: You should see how the Timer state is highlighted. The step function is now executing and it has its own state. It’s a serverless flow. Keep waiting, and after 120 seconds the visual will update showing the flow through the state machine. Timer waits 120 seconds. Email invokes the lambda function to send an email. NextState in then moved through, then finally END.
- Scroll to the top, click ExeuctionInput. You can see the information entered on the webpage. This was send it, via the JS running in browser, to the API gateway, to the api_lambda then through to the statemachine
- Click PetCuddleOTron at the top of the page.
- Click on the Logging Tab. Because the roles you created had CWLogs permissions the state machine is able to log to CWLogs Review the logs and ensure you are happy with the flow.
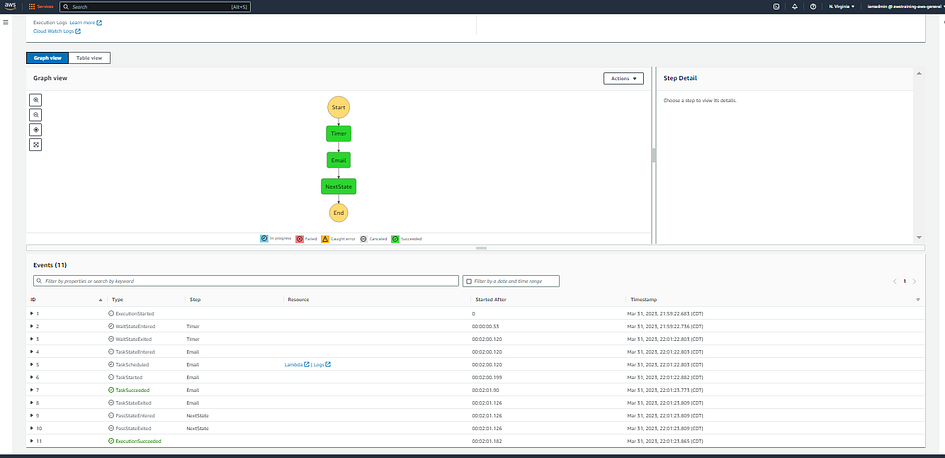
Voilà! You now have a fully functional serverless application.
- Loads HTML & JS From S3 & Static hosting
- Communicates via JS to API Gateway
- uses api_lambda as backing resource
- runs a statemachine passing in parameters
- state machine sends email
- state machine terminates
No servers were harmed, or used even, in this production 🙂
Thank you for reading and/or following along! Please stay tuned for all my upcoming projects, and feel free to check out the rest of my articles.

Leave a Reply